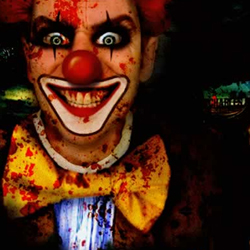
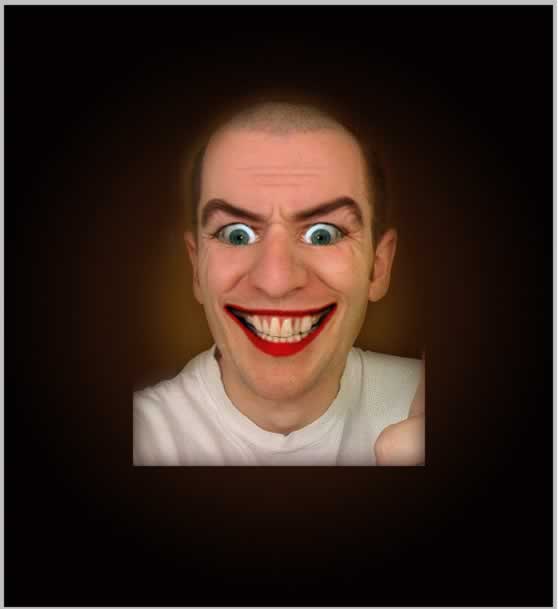
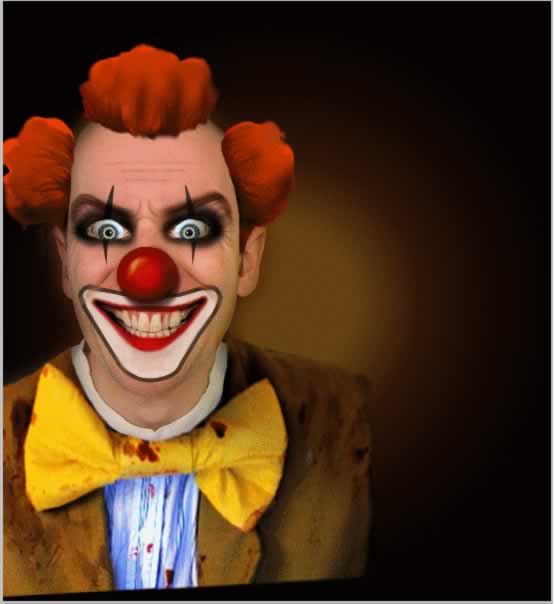
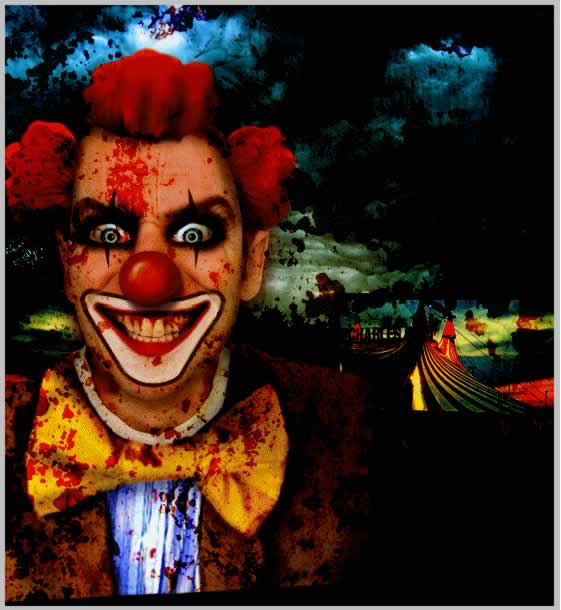
Scary Clown Photoshop Manipulation: Final Image
Let's take a quick look at the final image of the scary clown Photoshop manipulation that we are about to create. Please remember that sometimes the images used in
certain photo manipulation may not be available anymore, so that doesn't mean you can not practise the tutorial using other stock images.

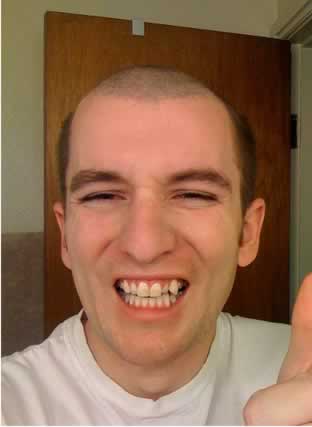
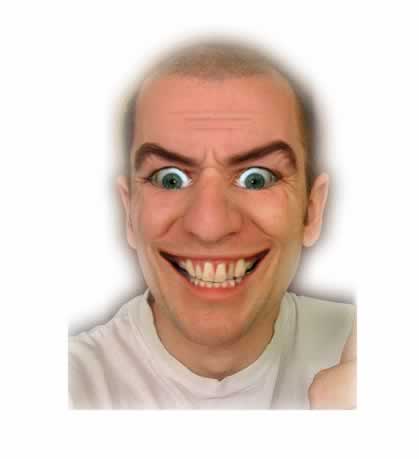
In this tutorial I will show you how to draw a clown face step by step using Phtoshop. So, we'll start with a portrait photo and draw on top of it. You can use this technique as a truely awesome clown filter in Photoshop.
Step 1 – Find the Perfect Images
So, how to make a clown?
Open a new psd
file 550/600 pixels. Now lets start looking on the internet for images. I found
on flickr that has the label Creative Commons-licensed content for adaptation,
modification or building upon a nice image.
This image is just perfect except
the eyes, background and clothes. For the eyes I will use this
scary eyes photo. I will add the other
images further on.
Lets proceed!
Call this initial
layer Face layer.
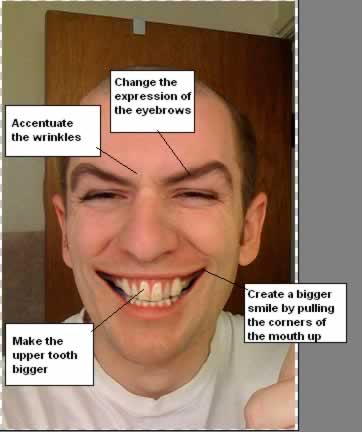
Step 2 – Use Liquify to change the Face Expression
This smile is
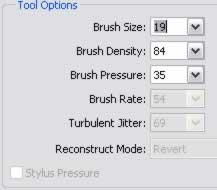
not scary so go to Filter – Liquify and pick Forward Warp Tool for this job.
The settings for this tool are presented below but the brush size will vary from
19 to 30.
Step 3 – Add Scary Eyes
Copy this
scary eyes photo and place it above
Face layer. Resize the image until the eyes have the same size as the original eyes.
Select only the left side screen eye with Eliptical Marquee Tool and than press
CTRL+C and CTRL+V. Now we have a new layer. Call this layer Eye layer. Delete scary
eyes photo.
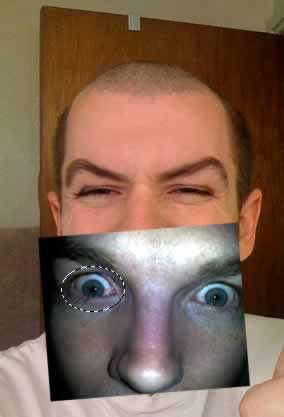
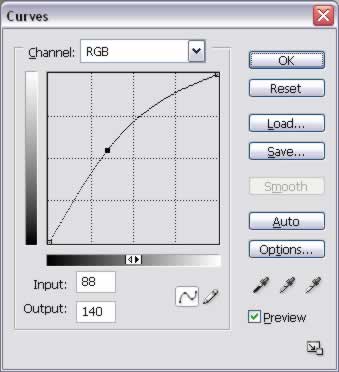
As you can see
the eye is too dark so go to Image – Adjustments – Curves and lighten
the image
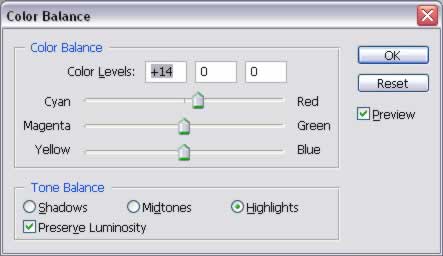
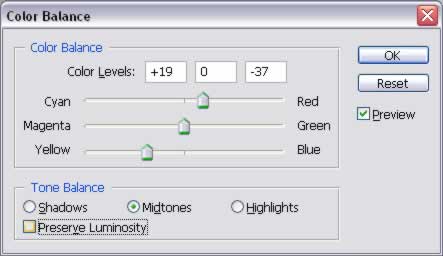
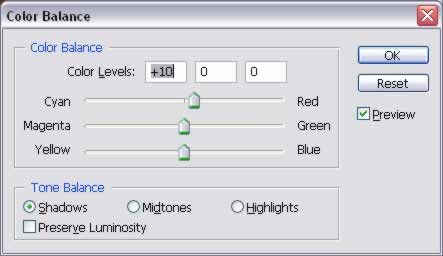
Now go to Image
– Adjustments – Color Balance and make the following settings
Now duplicate
the eye and go to Edit – Transform – Flip Horizontal. Now we have the
second eye. Move the eyes to their appropriate place.
Zoom in the
image and easily delete the unnecessary skin around the eyes.
You should obtain
an image like this one:

It starts to
look pretty scary, isn’t it?
Step 4 – Add wrinkles to the Face
Select the Face
layer and the two Eye layers and right click , merge layers.
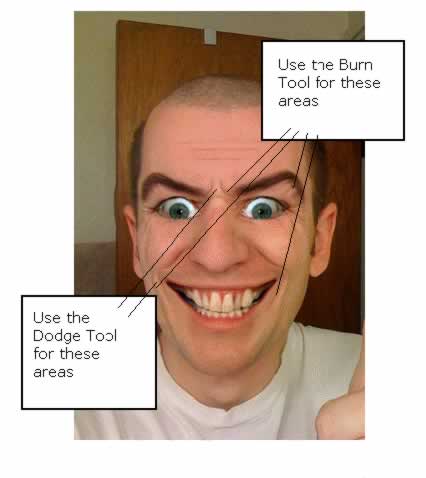
With the Burn
Tool size 3, exposure 17 %, range Shadows burn the wrinkles. As you can see from
the image below I have accentuate some of his wrinkles with burn tool I’ve
created some new ones with the same tool on the forehead.
Because the
wrinkles from the forehead are too colored I will use Sponge Tool, brush size 3
, desaturate .
Use the Dodge
Tool near the wrinkles, to give the impression that area is bumped.
As you can see
the result is a more scary wrinkled face.
Step 5 – Crop the Man
Until we go
any further crop the man image or remove the background is the same thing.
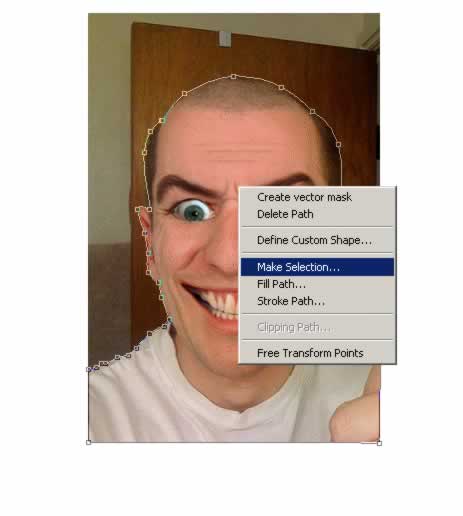
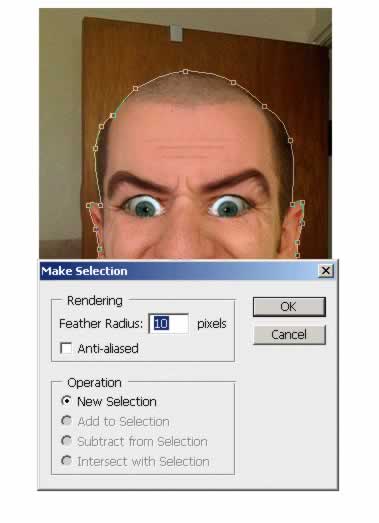
Use the Pen
Tool , right click , choose Make Selection. Set the Feather Radius to 10 pixels
; if you don't do that the selection edges would be very visible and annoying .
With the lasso Tool selected , right click and choose Select Inverse and press delete.
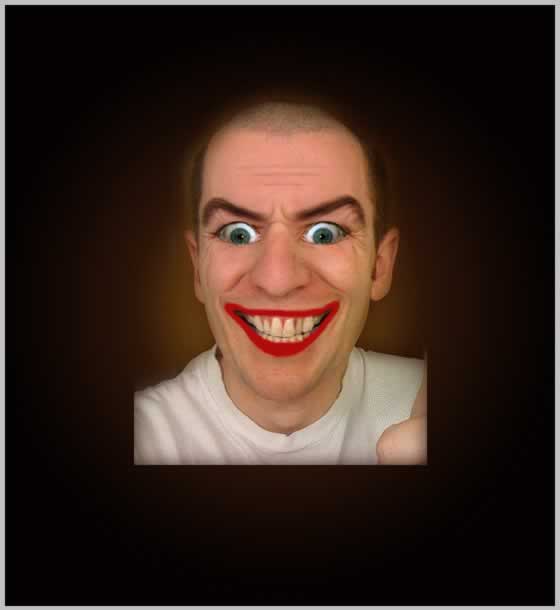
The result should
be something like this:
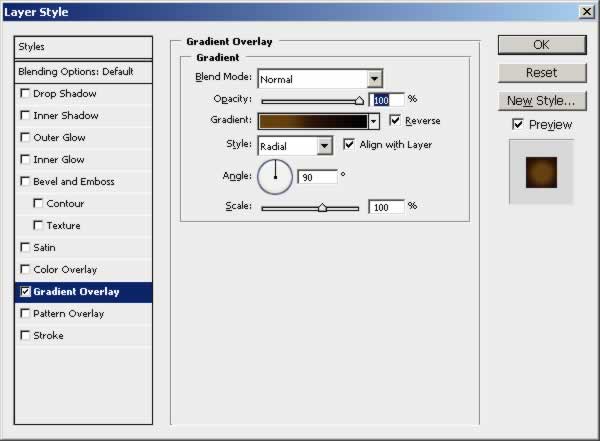
Step 6 – Add Background
I will now add
a background. Draw a rectangle and place it below all layers. Go to the Blending
Options of this layer and add Gradient Overlay:
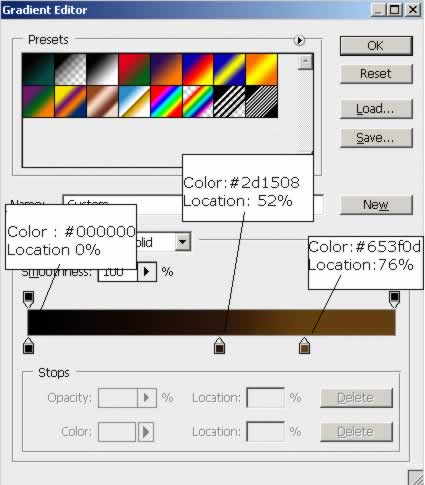
For the gradient
I choose the following colors :
Step 7 – Face Clown Makeup Photoshop
Let's start
to add the clown makeup to the photo using Photoshop.
The first thing
that I will do to paint with the Brush Tool the lips. Create a new layer and call
it Lips. The color I've used is #b00808.
Change the blending
mode of Lips Layer from Normal to Color Burn , Opacity 90%.
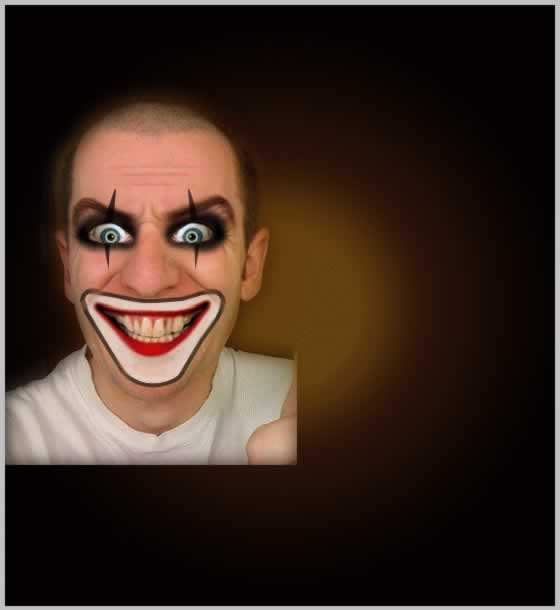
Place the clown
on the left side of the image...this will be his final place because as you saw
in the initial image I will add a background image!
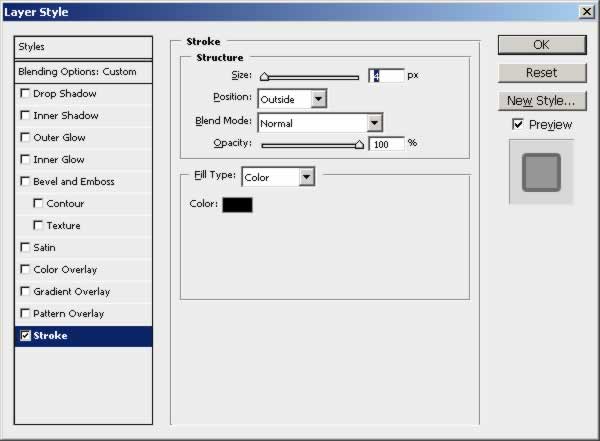
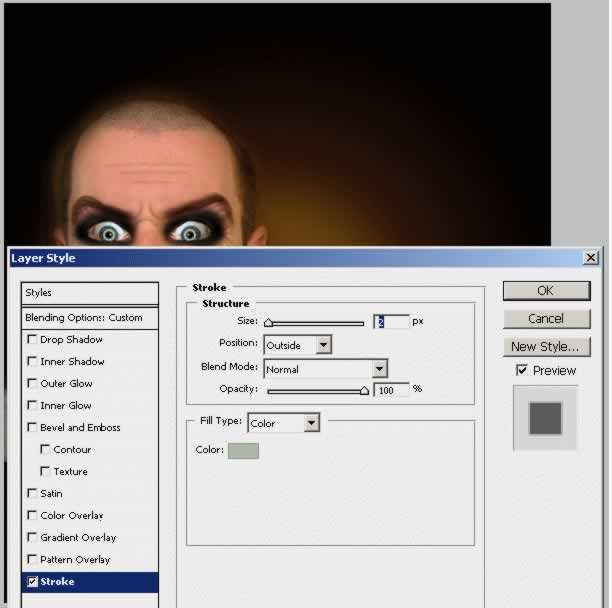
With the Pen
Tool draw a shape like in the image , the color is white. Call this layer Mouth.
Go to blending options and add a stroke , color black:

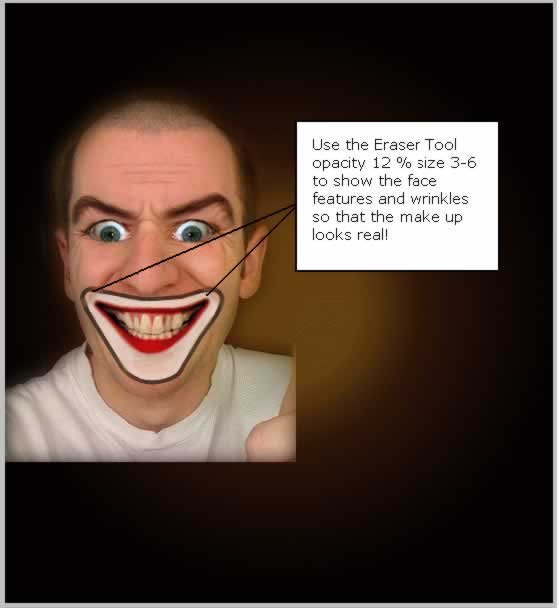
Duplicate this
layer Mouth. Merge Mouth layer and Mouth copy layer. Now with the Eraser Tool delete
the part that covers the lips and teeth. Change the opacity of this layer to 78%.
Use the Eraser
Tool opacity 12 % size 3-6 to show the face features and wrinkles so that the make
up looks real!
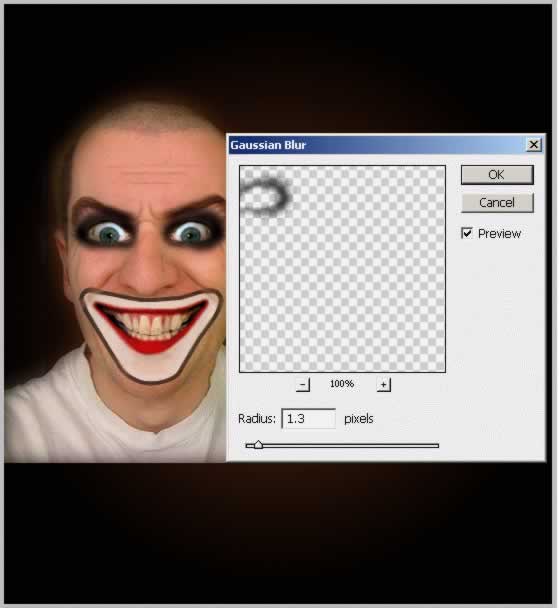
Create a new
layer and with the Brush Tool , color #201005 draw an area around the eyes. To look
real use Filter – Blur – Gaussian Blur :
Let's change
the eyes a little bit to look like scary glass eyes. Draw a circle with the Ellipse
Tool .
The circle color
is white and add a stroke 2 px , color #afb9a8.
Change the Blending
Mode of this layer from Normal to Darken 100%!
Add another
make up element to the eyes. With the Pen Tool draw a shape like in the image ,
color #1a100b.
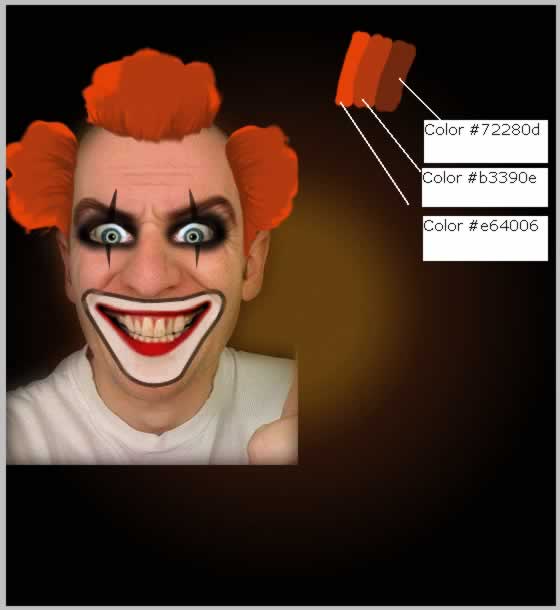
Step 8 – Hair
The hardest
part of this photo manipulation was adding the hair. I am not using the graphic
tablet even if I had one :) .... I will learn to use it soon!
So with the
Brush Tool and this color #d43a05 draw a simple hair shape like in the image. Use
the other two colors to give contrast. You will have to use small size brush for
creating hair wires!
When you draw
hair you may want to use Dodge Tool to lighten parts of the hair , Burn Tool to
darken the bottom areas of the hair. I also use Smudge Tool (small size 3 px, strength
85%) to create hair wires.
The result is
up to you!
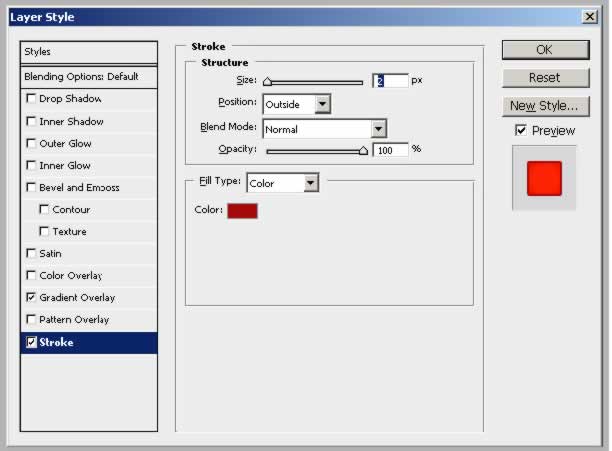
Step 9 – Add A Red Clown Nose To The Picture
This is a cool technique if you want to add a clown nose to a picture.
Draw a red circle
in the nose area. Apply Gradient Overlay and Stroke to this circle like in the image:
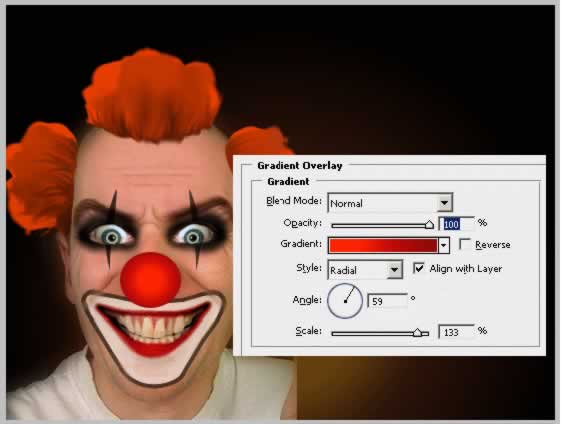
The colors and
the settings for the gradient , lighter color #ff2400 (24%) , darker #be0707 (58%)
and the darkest #8d0303 (100%):

The color for
the stroke is #a70808:
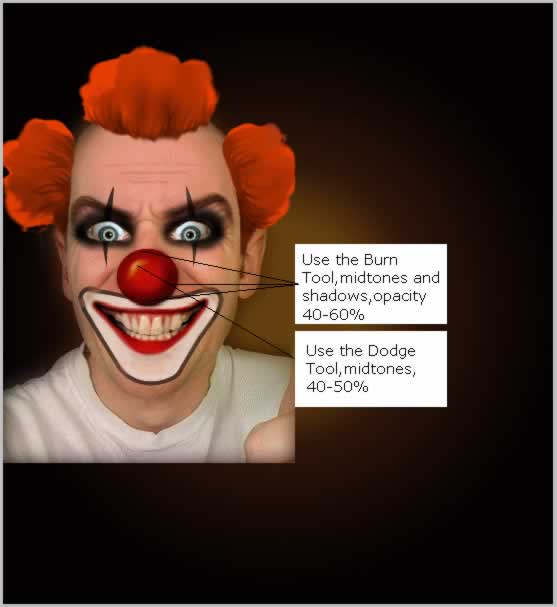
Duplicate this
layer and merge the two nose layers. With the Burn Tool and the Dodge Tool darken
and lighten the nose to look like in the image:
It is impossible
to look exactly like this because I can't do it twice with an identical result.
You can also adjust the intensity of the color if you think it is too saturated
from Image – Adjustments – Hue/Saturation.
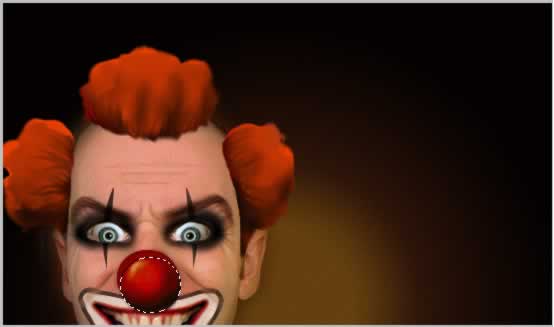
Lets add a nose
shadow to look more realistic. Because the initial photo did not contain the nose
there is any shadow on the face. Press CTRL and click the nose layer thumbnail.
You will see that a selection was made. Create a new layer below nose layer and
call it shadow.
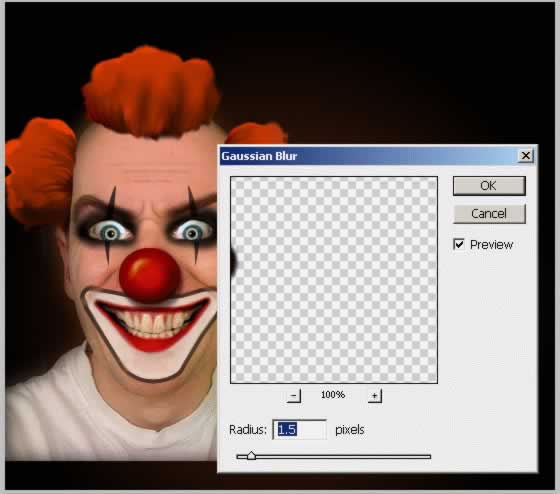
Fill the selection
in the shadow layer with #190202.
Move the shadow
downwards and to the right.
Now lower the
opacity of the layer to 70% and to soften the edges go to Filter – Blur –
Gaussian Blur and set the radius to 1.5 px:
Step 10 – Dress the Clown
A clown in the
T-shirt not so right so I have found this really nice
clown outfit
Crop only the
outfit and add it to our clown.
Rotate the image
a little and place it to fit to the original image
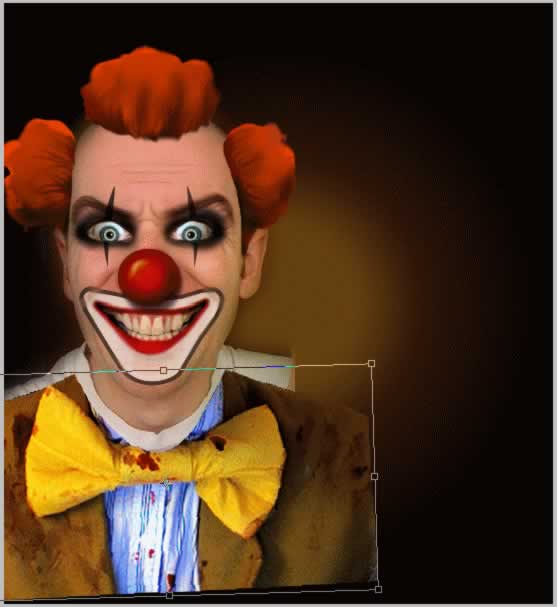
Use the Resize
and Warp options to look like it is from the initial photo. Use the Eraser Tool
to give a round shape in the neck area.
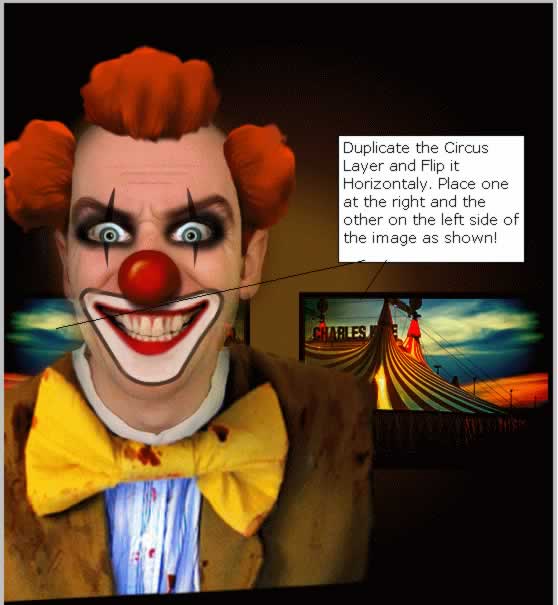
Step 11 – Background Circus
Now we have
to make this image look good! For that I will have to add first a background. I
have found this
sky and this
circus . Very beautiful
photos that work perfect with my clown.
First add the
circus image . Resize it to 50%. Duplicate this image and flip one of them horizontally.
Change the blending
mode of these layers to Hard Light 100%.
Merge the two
layers and erase the part from the left that is in the face area.
Now lets add
the clouds. Scale it to 115% to cover the image.

Change the blending
mode of Sky Layer to Hard Light 100%.
Step 12 – Simple Blending Solution
As you can see
we have three different images that don't match very good one with another. So in
just two simple steps the image will be completely transformed!
Ups big problem!I
can't remember the link to the original image of one of the textures that I used
in this image . If someone finds this image please leave me a comment with the link
:).
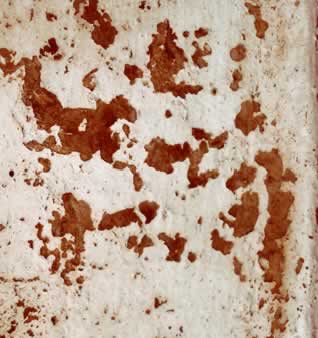
So I have placed
this image above all the layers except the nose layer including the nose shadow.
Change the blending
mode of this Rusty Texture layer to Color Burn 95%.
Now simply create
another layer above all the other layers and with the Brush Tool draw with dark
color the areas that you want to hide. Be careful to use a Soft Round Brush to give
the impression that the clown is covered of dark shadow . You can of course after
completing this step to return to every layer and play with contrast, use Burn/Dodge
Tool to add contrast , play with colors , saturation levels etc.
Horror Scary Clown Photoshop Image
22 comment(s) for "The Mad Horror Clown"
thanks for reading my tuts, glad u find them interesting!
Your result is really nice, I like the clown and also the floating island....as an advice try to pay more attention to the details! reply
thank you so much Cory ! reply
Thank you! reply
reply