How to Install Font in Photoshop
In this quick tutorial I will show you how to install fonts in Microsoft Windows. For other Operating Systems like Linux for example, the process is different and you will have to find that information in some oher place. I have read how to do it, but because I can't test it I can't write about it.
So for those of you who have Microsoft Windows running on your computer, here is how you can install a new font that will be available in most of the Software Programs that you have installed, like Photoshop for instance.
Download the Font
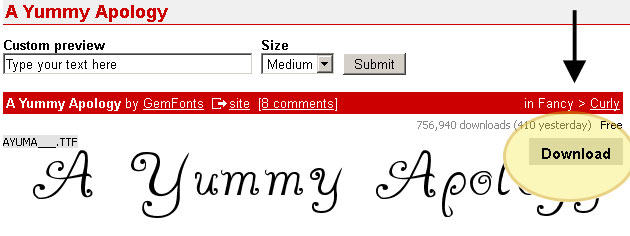
Let's say you have found a new Font on the internet that you want to use. There are many Font Websites, many of them free for peronal projects, so plenty to choose from. I have found this free font that I want to install in Photoshop. First you have to download it, so press the download button.
Extract Files from Archive
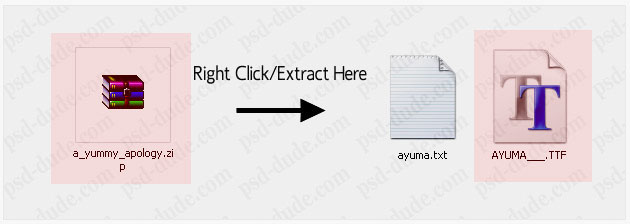
Most of the Font files come in an archive like .zip or .rar. After you downloaded the archive, press right click and choose Extract Files. You will see that the archive contains a TXT file and a .ttf file that is actually the font file.
There are other extensions for Fonts for example .otf or .fon. They all have the same installing process.
Add a New Font
Now the file is on your computer but in order to install the new font you have to make the following steps. If you have Under Windows 7/Vista all you have to do is Right Click on the .ttf file and choose Install.
If you have other Windows version, you have to go to the Fonts Folder. On my computer is in C:\Windows\Fonts but it can also be on C:\WINNT\Fonts it depends on the Windows version.
While being in the Fonts Folder open the File menu and click Install New Font. Or simply Right Click on the window and choose Install New Font. You will have to browse the folders to find the path where you saved the .ttf file.
If as a result your new font is added in the Fonts Folder that means the install process was successful.

How to Add Font to Photoshop
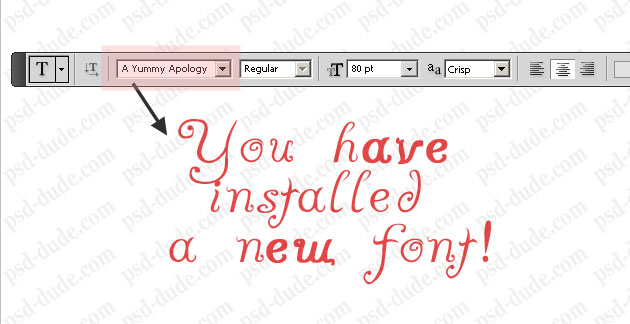
If the process went well, when you will open the Photoshop the new font will be in the Type Tool fonts list, ready to be used!
Quick Tip
Fonts are a really great way to set the style for your designs. I really enjoy searching and keeping lists of fonts to use for certain types of design. This helps me whenever I need to make a design, because I simply pull out the list and start experimenting with different fonts to see what looks best
For example:
I recently made an awesome list of Halloween fonts right here on PSDDude.
And, because I just love Christmas, I wanted to find a similar list of fonts for this wonderful holiday. Here's an amazing list on MockoFun with over 50 Christmas fonts that you can use online or install in Photoshop, Word or any other software that works with text.
And they're all free!
3 comment(s) for "Install Font in Photoshop"
I can't use this font in PS3! :( reply