To create a text shadow in Photoshop is quite easy if you know some simple rules that you must obey. For example the most important thing is the light source. It can be one or even more light sources and each light source creates a shadow for all the surrounding objects.
Other things that you must take into account when you want to create a realistic shadow are the light direction, the light distance from the object, the intensity of the light and so on.
Text Shadow Photoshop Effect
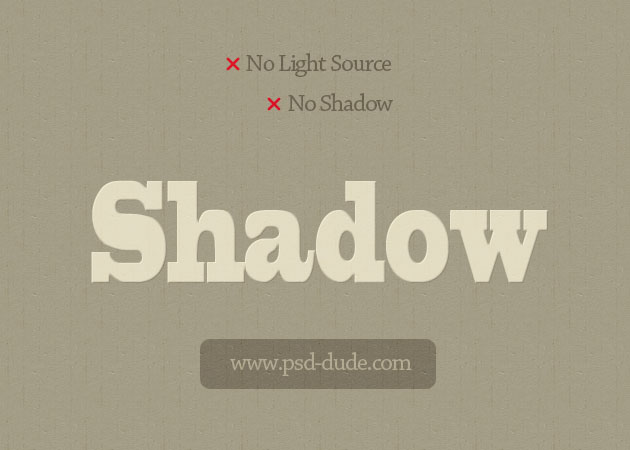
Let's start with a simple Text Layer, color #e4ddc6, and a Background Layer, color #a59d87. As you can see the background and the text have no color variations, so that means there is no light source.
Light Coming From the Front
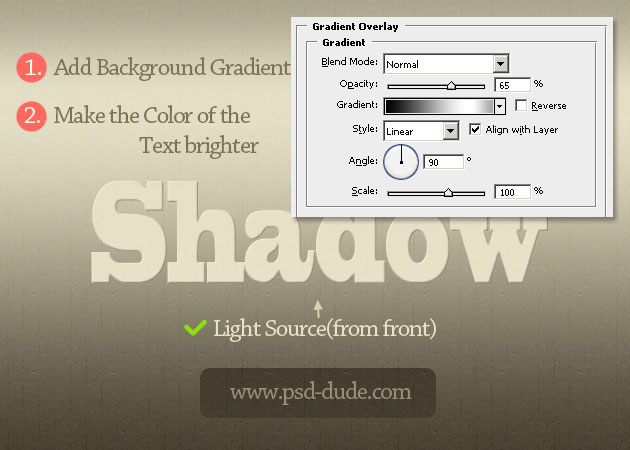
Now I will add a light source that comes from the front center towards the Text Layer. It is good to know that the distance and the intensity of the light source determines the opacity and the length of the text shadow.
The first thing that we have to do after the light is added, is to change the color of the text, making it a little brighter and also add a Gradient Overlay to the background.
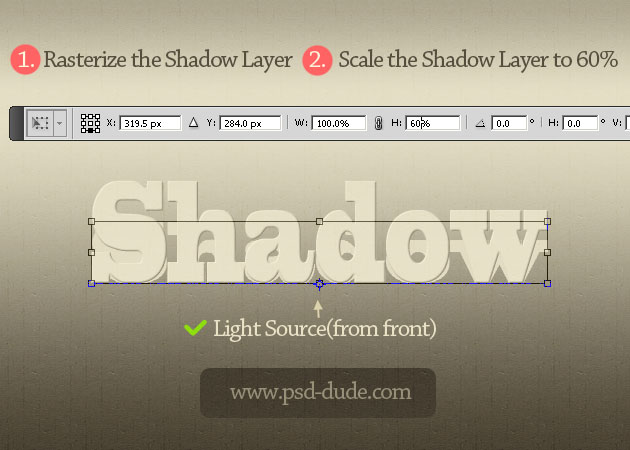
To create the text shadow we have to duplicate the Text Layer and rename the first text layer, Shadow Layer. Rasterize the Shadow Layer and resize it to 60% only on the vertical scale. Make sure you select the Reference Point Location like shown in the image.
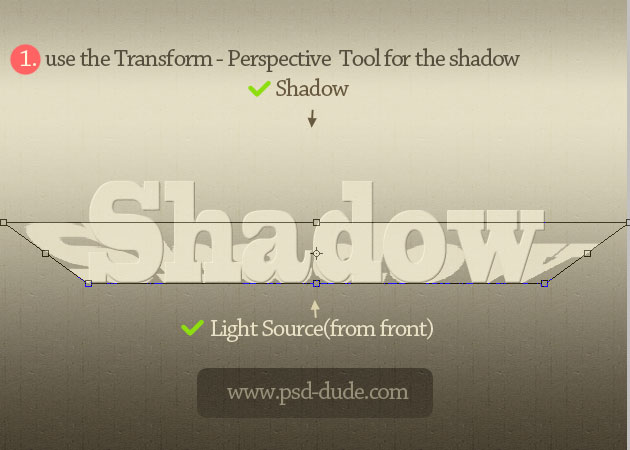
Use the Perspective Tool from the Edit, Transform menu to add perspective and create a realistic drop shadow effect.
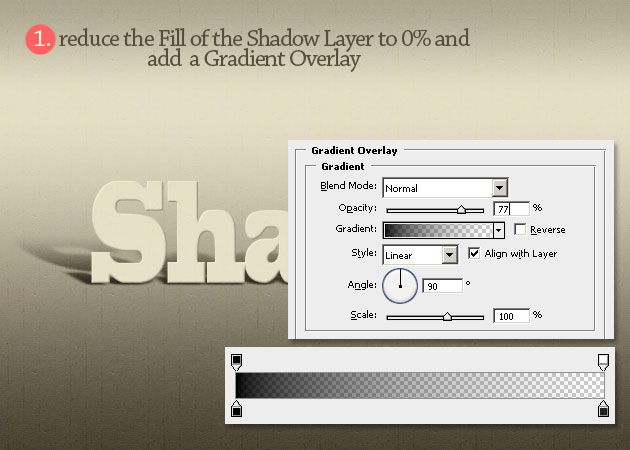
Reduce the Fill of this shadow layer to 0% and add a Gradient Overlay with transparency.
The last step is to add a soft Gaussian Blur effect and our text shadow should now look like this. If your background is darker all you have to do is to adjust the opacity of the gradient.

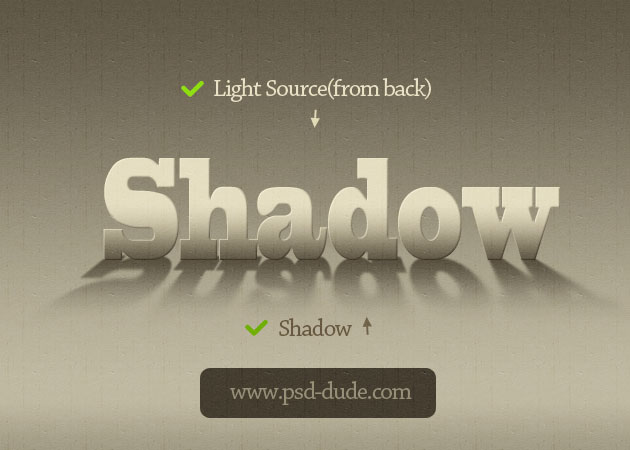
Light Coming From the Back
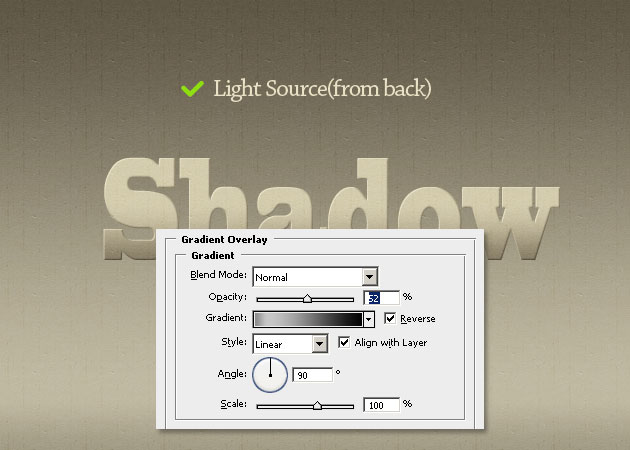
Another situation is when the light is coming from the back of the text. In that case you will have to add the same gradient for the Background Layer but with Reverse button checked.
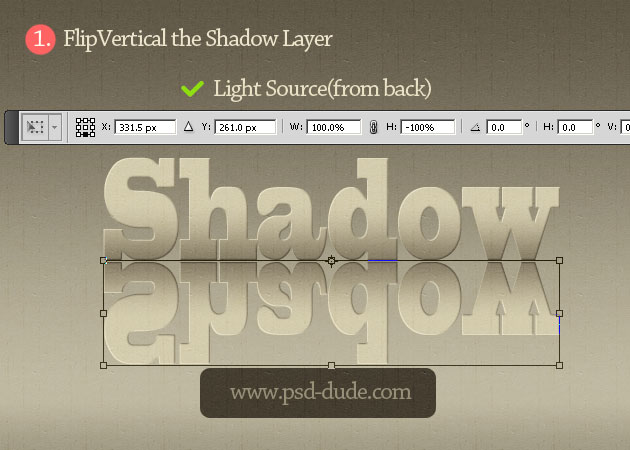
As for the text the steps are similar with the ones from previous case. The only difference is that you have to Flip Vertical the Shadow Layer after you rasterize it like shown in the image.
Add Perspective for the text shadow, reduce the Fill to 0% and add the Gradient Overlay effect. To soften the shadow apply again the Gaussian Blur filter.
Also very important is to add add a Gradient Overlay to the Text Layer, to darken the lower area of the text.
This is how your text shadow effect should now look like; I really hope it looks realistic enough.
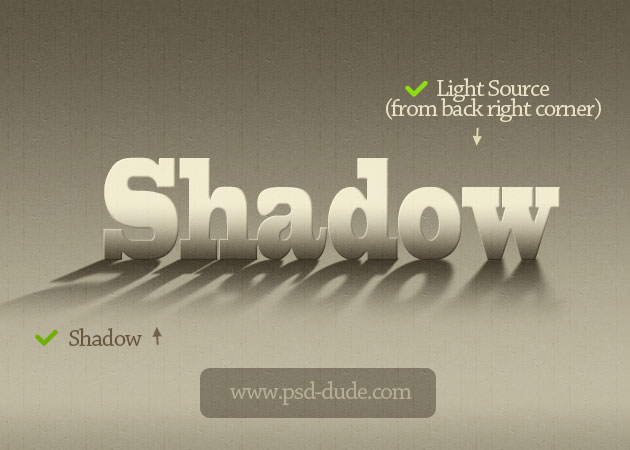
There are other situations in which the light is not coming from the center. Let's say is coming from the left side. In that case all you have to do is to distort the shadow of the text using the Skew, Distort or even Perspective Tools and move it to the right side.
4 comment(s) for "Create a Text Shadow in Photoshop"
I love this web ^^ reply