


And even if I will not use the popular red rose, hopefuly you will find this effect interesting enough. And I am sure you will, if you are a romantic kind of person. Don't forget that you can customize it as you wish, adding different roses brushes for example. Your creativity is the only boundary!
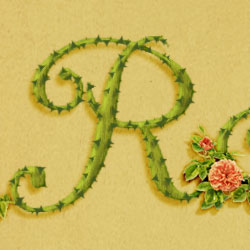
Preview of The Rose Text Effect
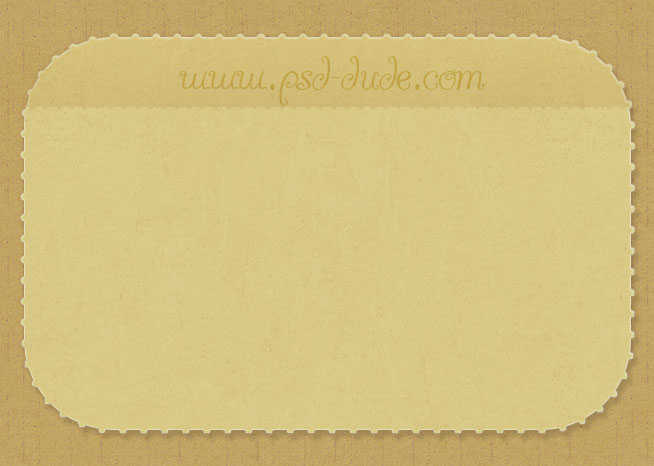
I will start creating a nice background that I consider will go very well with our text effect. But I will not go through the hole process; you will find it in the PSD file. For the Background I've used a simple carboard pattern, that works perfectly even if you decide to make a larger background because it's an 100% seamless pattern.
Above this layer add a rounded frame with a soft Drop Shadow and Inner Shadow effect. To make it look more grungy you can add another layer with an old paper texture.
You can use one of my label brushes for creating the text frame or you can use a vector frame, it's up to you.
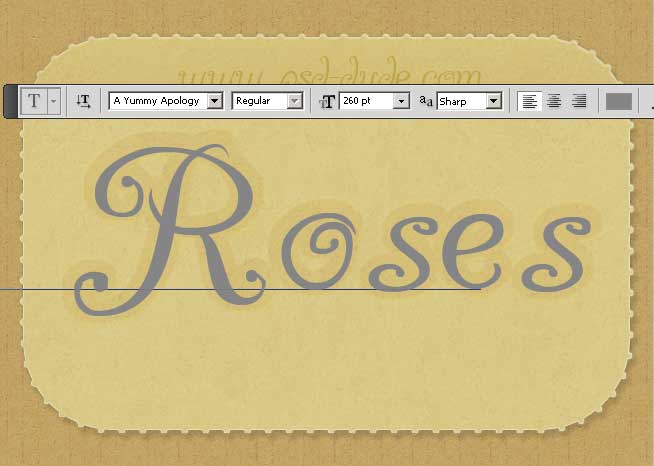
Create a new layer and use this curly font to type "Roses". The text color is not important and as for the size I have chosen 260pt. Call this layer Rose Text Layer.
If you don't know how to load this font in Photoshop you can read a basic tutorial on how to install new font.
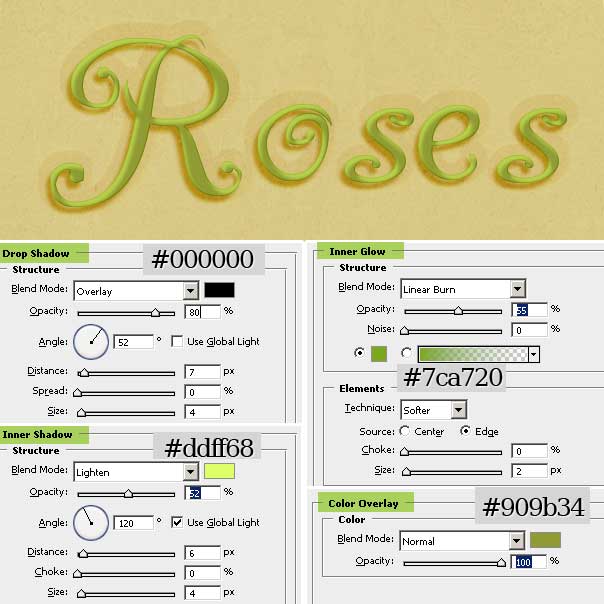
Now I will add some layer styles to our Rose Text Layer. So simply add the following styles Drop Shadow, Inner Shadow, Inner Glow and Color Overlay with the settings presented below. If you are not sure about the colors and other settings used, you can find all the information in the PSD source file.
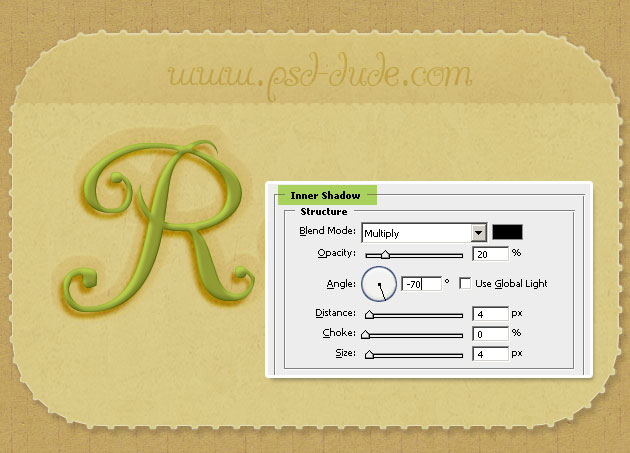
Duplicate the Rose Text Layer and add an Inner Shadow effect.
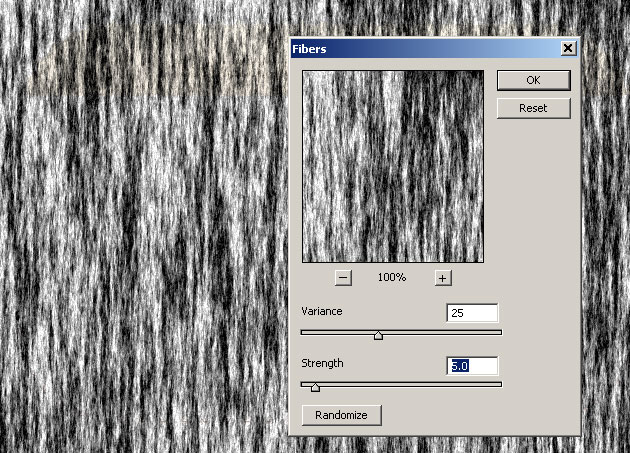
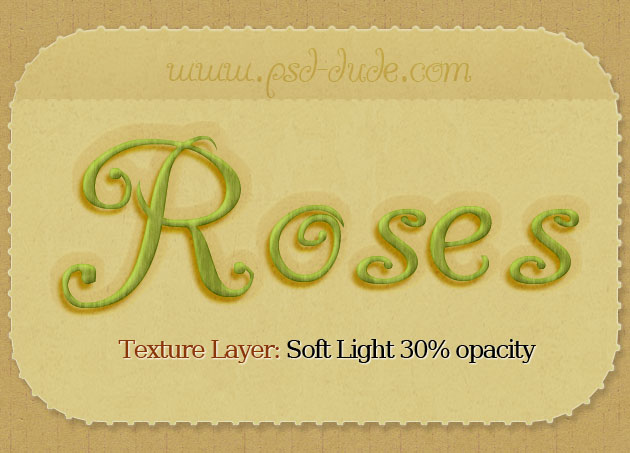
Create another layer above all the other layers and call it Texture Layer. Fill it with white color. Set the Foreground Color to white and Background Color to black. Apply Fibers filter with these settings:
Select the Rose Text Layer shape (press CTRL and click the layer Thumbnail). Add the selection as Layer Mask for the Texture Layer.
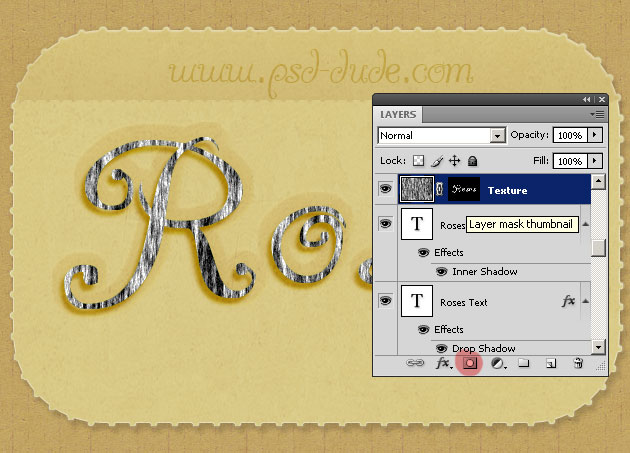
Set the Blend Mode of the Texture Layer to Soft Light, 30% opacity.
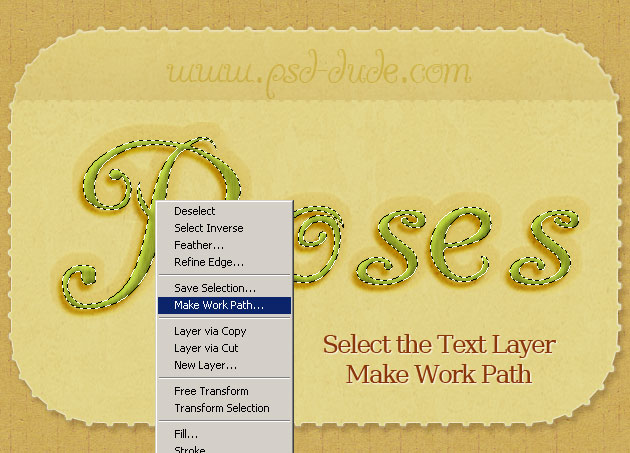
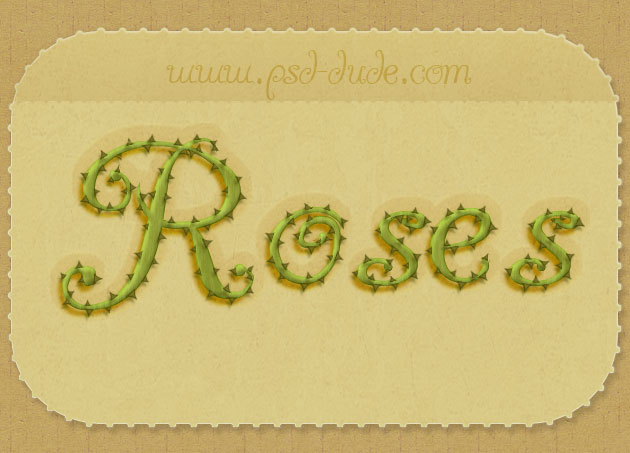
Make a new layer called Rose Thorns. Select again the Rose Text Layer shape (press CTRL and click the layer Thumbnail). Expandthe selection by 2px. Right click on the selection and choose Make Work Path.
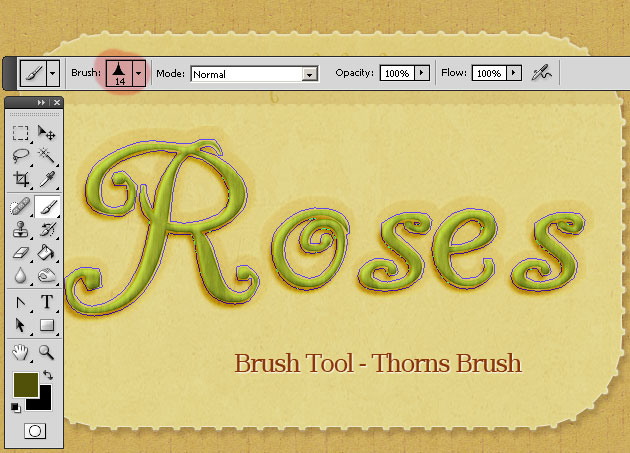
Pick the Brush Tool and from the list choose the Thorns Brush that you can download from the ZIP file along with all the other resources. Also set the Foreground Color to #515009.
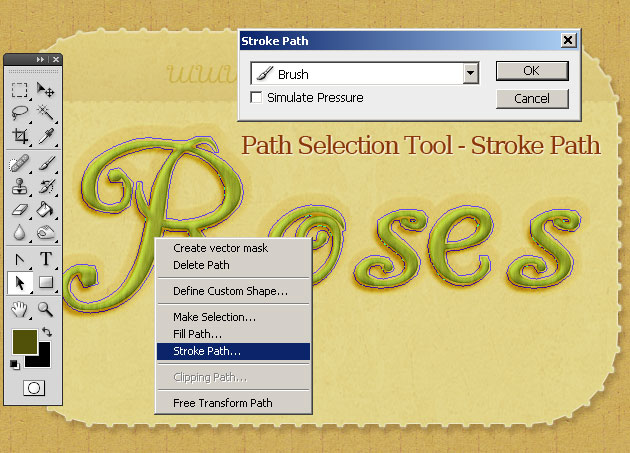
Pick the Path Selection Tool and right click on the Path. From the list choose Stroke Path.
You might have to use the Eraser Tool and fix by hand the little imperfections. You can even add a soft shadow to make them look more realistic. This is how your result should look like:
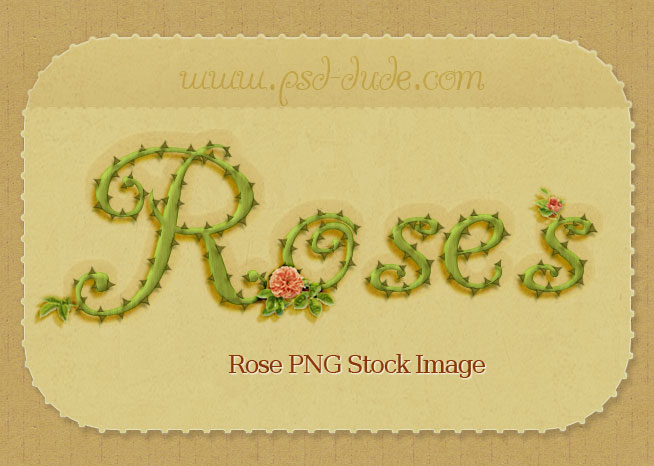
I will use this beautiful rose png image to add it to my rose text. Use different parts, leafs and flowers to add it to the text like shown in the image. You might have to adjust the Brightness/Contrast balance to match with the text color.
I have also added some layer styles that you can find also in the PSD file. This is how my rose text look so far.
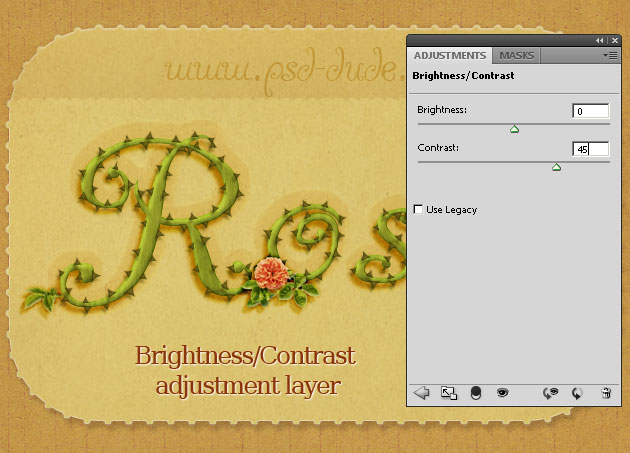
As a final touch you can add a old paper texture layer with Multiply, 30% opacity as Blend Mode. And I also added a Brightness/Contrast adjustment layer.
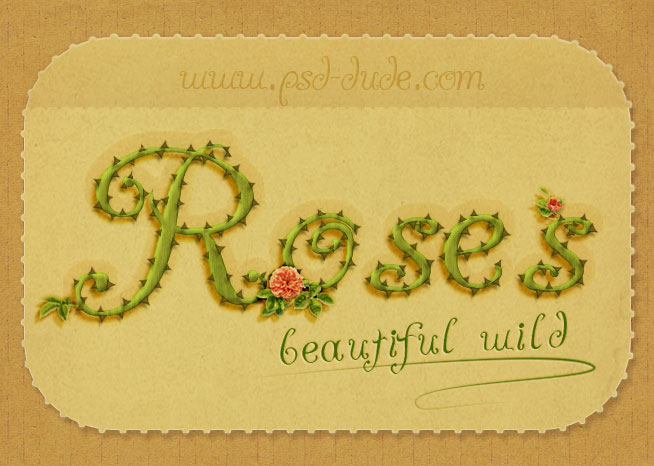
So this is the end of a new tutorial, here is the final result of our rose text effect, hope you like it. Don't forget to download the ZIP file(2MB) that contains not only the ABR file used in this tutorial, but also the PSD file.

12 comment(s) for "Photoshop Rose Text Effect Tutorial"