


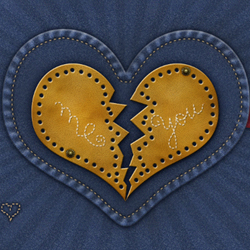

Preview of The Final Image
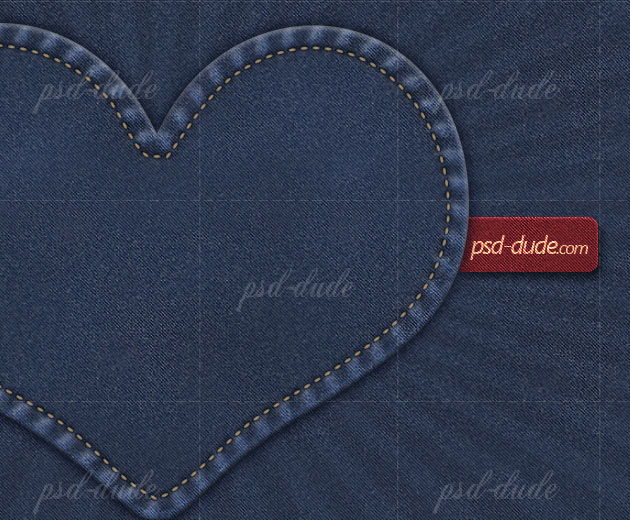
Here is what we are about to create, a nice jeans heart with stitch brushes and leather texture. If you like jeans and fabric inspired tutorials you can check out this tutorial.

Because I am making a Valentine Day Wallpaper I have to take into account the wallpaper size before I begin. As you know there are many different resolution sizes, for example 1600x1200, 1920x1080, and so on.
Usually, when I make a wallpaper, I create it at 1920x1200 px size. That way, since most people's resolutions are that size or smaller, the wallpaper comes out looking good. It's always better to shrink it than to try and stretch it.
Another trick is to use a seamless pattern for the background and to blend the other images with this background, so that if you need a bigger image you can easily add extra pixels. I will use this trick in my Valentine Day Photoshop tutorial.
Denim Pattern Background
I am aware that there are other tutorials that learn you how to create denim/jeans texture in Photoshop so this will not be my main focus. I will use instead a denim seamless pattern. If you don't like this pattern you can use one of the many Jeans Texture available for free on the internet. But if it hasn't the proper size it may not look so good
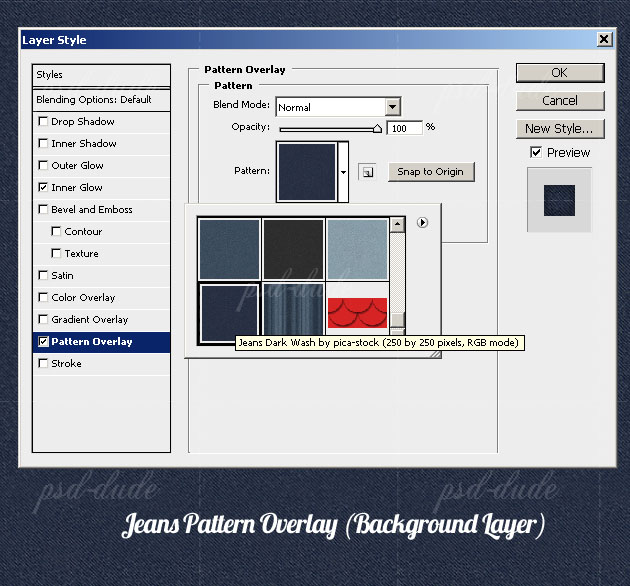
Call the first layer Denim Background and fill it with any color you want. I will make a denim background using these Jeans Patterns so load them into your Photoshop. Open the layer style window and add Pattern Overlay using the Jeans Dark Wash pattern.
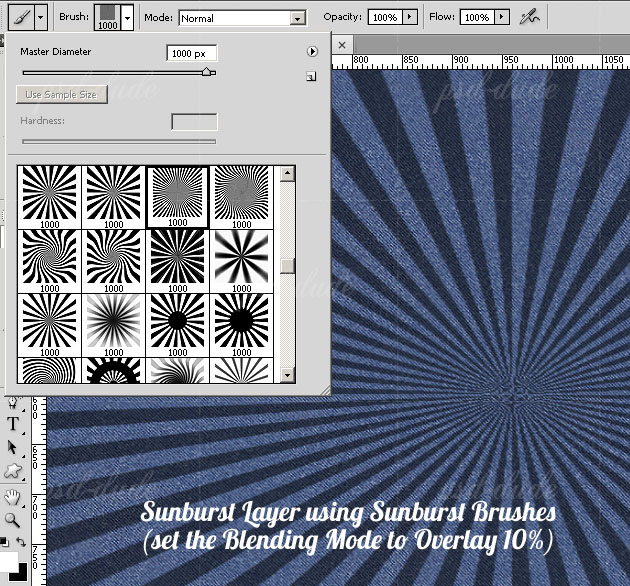
Create another layer and add a Sunburst using these Sunburst Brushes. Use the color white to make the Sunburst right in the center of the image. Resize it to cover the entire canvas. Now change the Blending Mode of this layer to Overlay 10% to obtain a more softer look.
Create a Jeans Heart
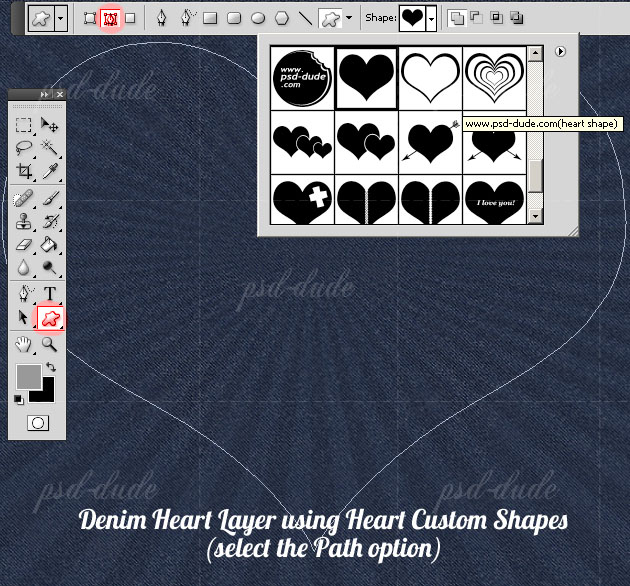
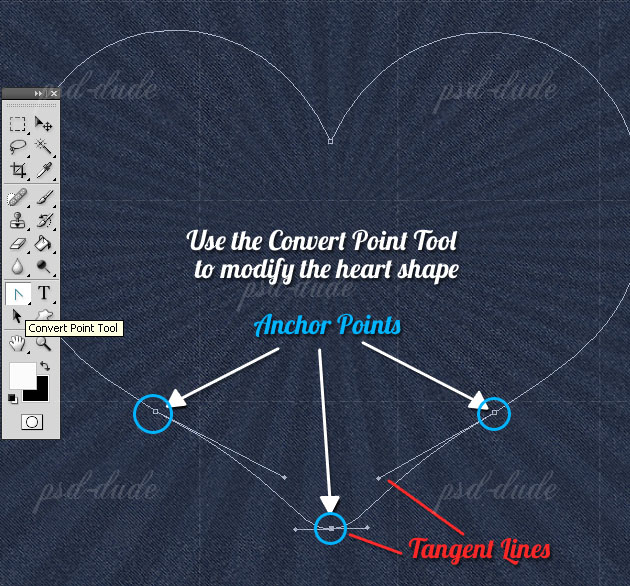
Download these Heart Custom Shapes and draw a simple heart shape in the center of the image. Make sure you have the Paths selected.
With the Convert Point Tool click and drag the anchor point. Without letting go, move the mouse around to obtain a curve. The line that is created is called the Tangent Line.
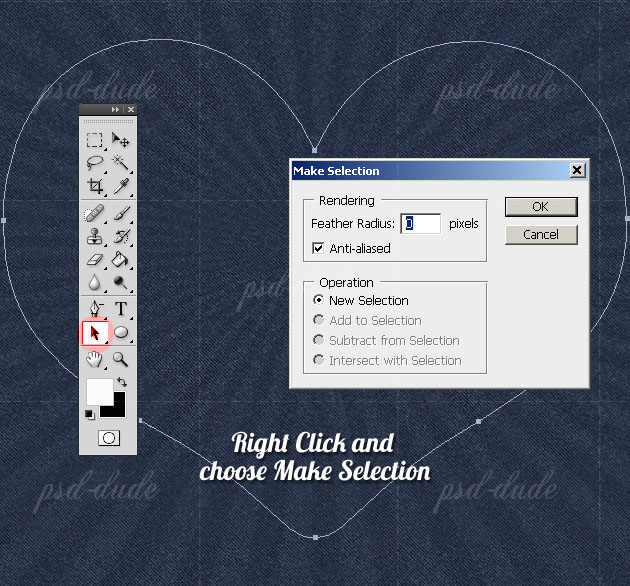
Select the Path Selection Tool, right click and choose Make Selection like shown in the image.
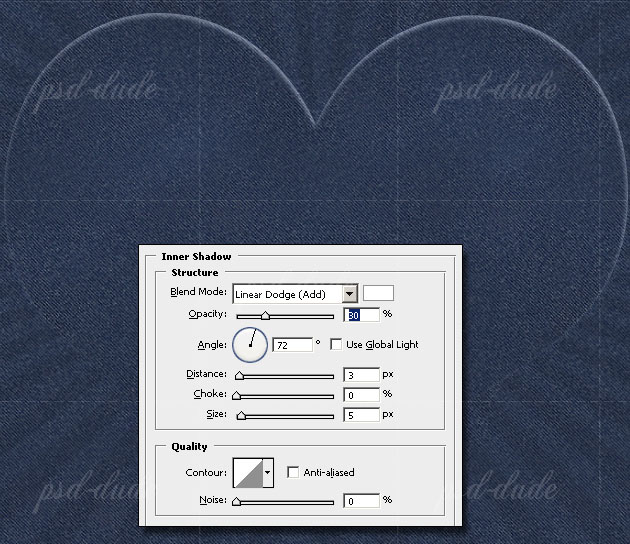
Go to the Denim Background Layer and press CTRL+J, the result is a Layer via Copy. Call this new layer Denim Heart and place it above all the other layers. Time to add some layer styles to this image so open the Layer Style window and add:
Inner Shadow
Outer Glow

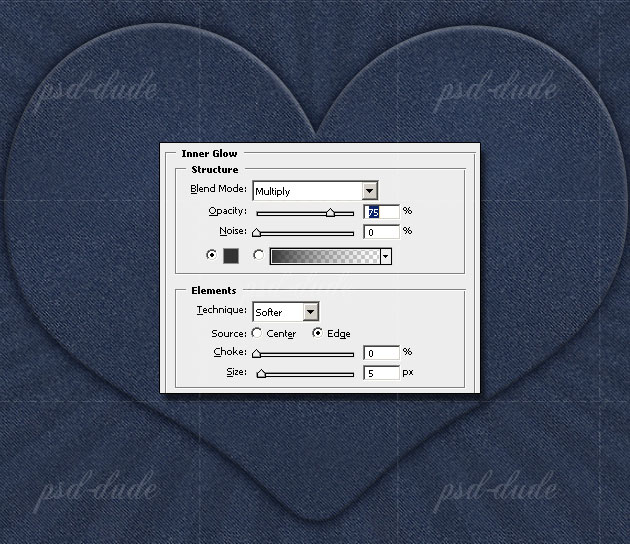
Inner Glow
Add a new layer and add it Clouds Filter using #373a3e and #84898d as Background and Foreground colors. Set the blending mode of this layer to Color Dodge 17%. A higher opacity will give you a lighter denim color so it is you choice how you want to look like in the end.
Jeans Effect in Photoshop
As I told you earlier it's not my intention to show you how to create a denim texture from scratch but this step requires some jeans related effects. I am talking about stitch effect and fabric folds around the edges of our new created Denim Heart.
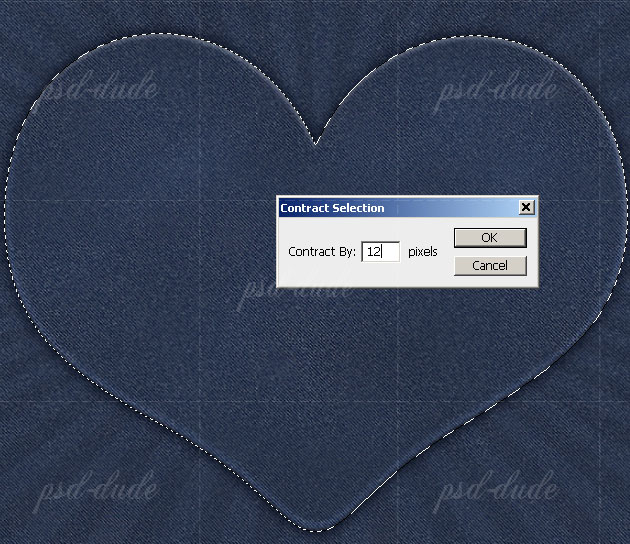
Let's start creating some fabric folds using a simple custom made brush. You can find it in my resources ZIP pack . Select the Denim Heart layer shape and go to Select Menu, Modify, Contract with 12 px.
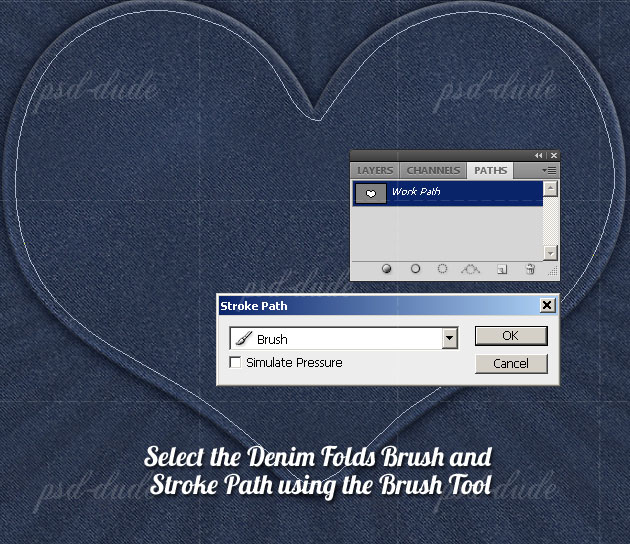
Convert this selection into a Work Path (right click on the selection). Create a new layer and call it Jeans Folds. Make sure you have the Denim Folds Brush selected and that the Foreground color is white. Go to the Paths Tab and right click on the Work Path like in the image and choose Stroke Path:
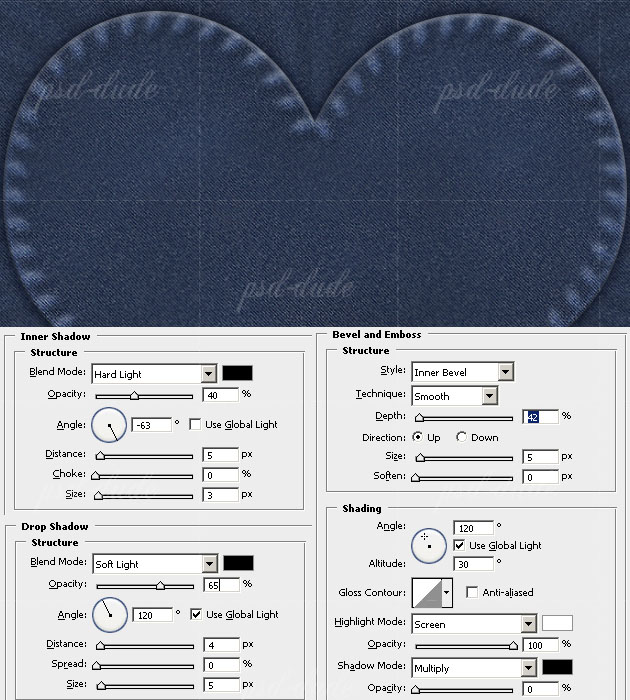
Set the blending mode to Overlay 60% and add some layer styles like shown in the image.
Stitch Effect in Photoshop
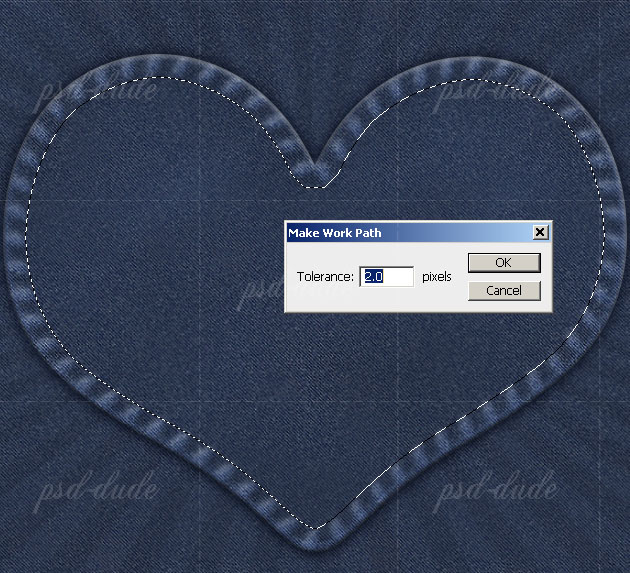
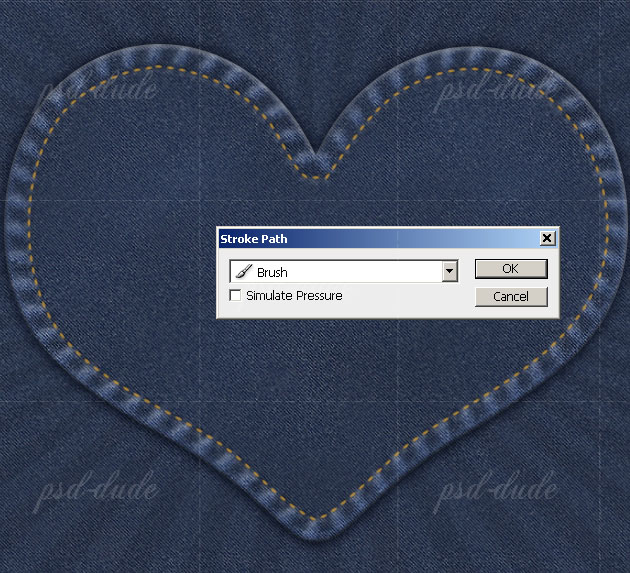
Load the Stitch Brush that you'll find in the same Zip resources file. Create a new layer above all the other layers and call it Stitch Effect. Select the Heart Shape and Contract the selection by 22 px. Make Work Path from this selection.
Set the Foreground color #c8932e. Select the Stitch Brush for the Brush Tool and go to Paths Tab. Right Click on the Work Path and choose Stroke Path.
To make it look more realistic I will now add some layer effects like Drop Shadow and Outer Glow. Follow these settings:

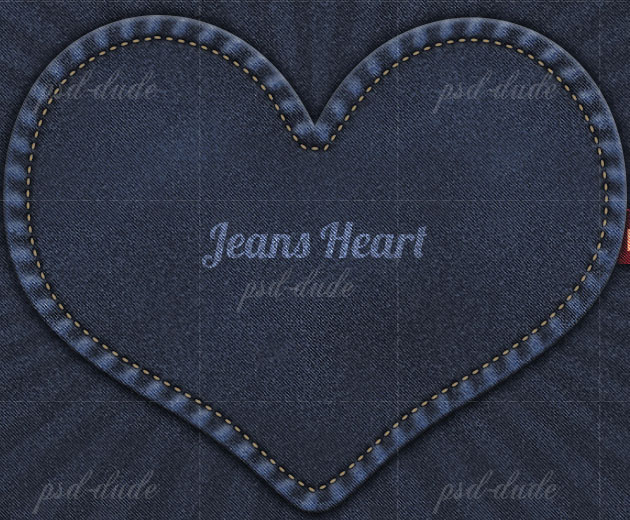
Your Jeans Heart it should now look like this:
Fabric Label Made in Photoshop
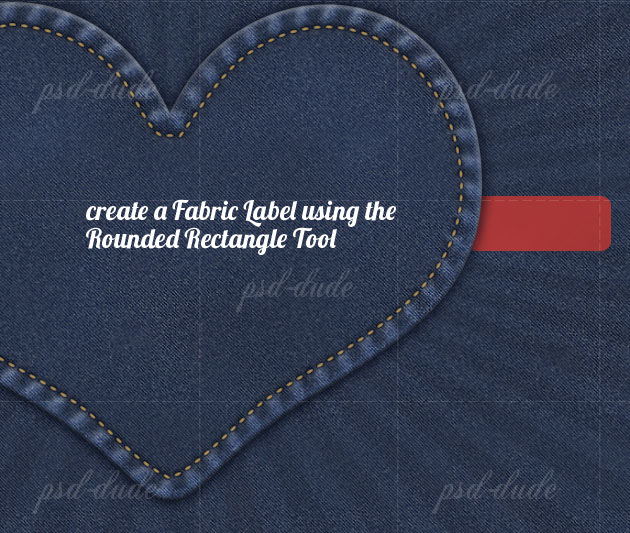
Use the Rounded Rectangle Tool to create a label. Call this layer Fabric Label and place it below the Denim Heart Layer.
Open the Layer Style Window and add Drop Shadow, Inner Shadow and Pattern Overlay. By the way, the most important thing is to set the color of the label #9b3232. The Pattern Overlay used is the same Jeans Dark Wash pattern used in the first step.
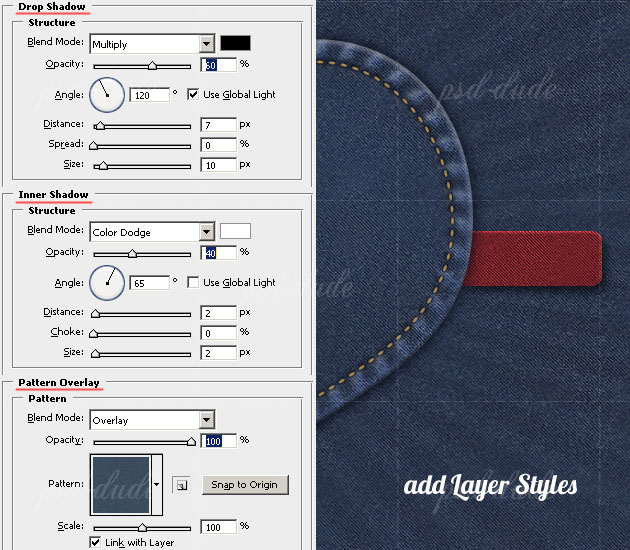
I wrote my website name "psd-dude.com" using the Segoe UI free font. Set the Blending Mode to Color Dodge 100%.
Leather Heart Label
To make this heart label I will use a leather texture . I picked from the list this beautiful free leather texture but you can of course choose another one. Copy the texture into Photoshop. Change the color by adjusting the Hue/Saturation balance. Make sure you check Colorize.

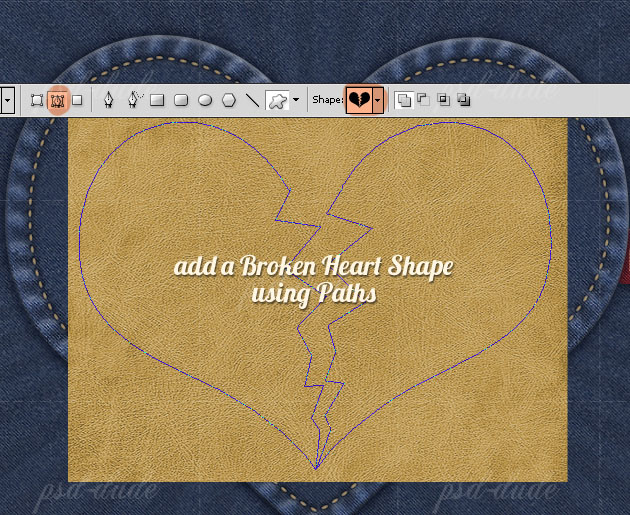
Open the Heart Custom Shapes list and add this broken heart shape using Paths. Make a Selection out of this shape. Press CTRL+J to make a Layer via Copy extracted from the Leather Texture Layer.
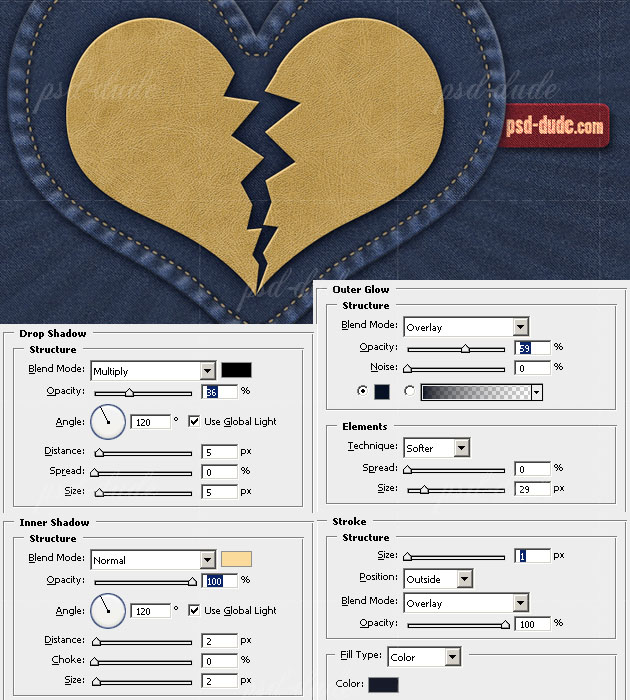
Add some layer styles to the Leather Heart Layer like Drop Shadow, Outer Glow and so on:
Set the Dotted Brush for the Eraser Tool. You will find this brush in the ZIP resources file. Select the Broken Heart Shape and Contract it by 17 px. Transform the selection into a Work Path and Stroke using Eraser Tool.
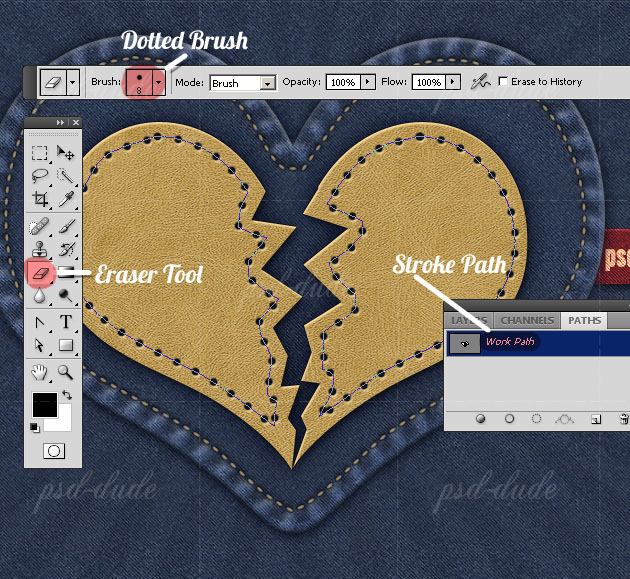
 Depending on the size of your heart shape you will have to adjust the size of the Dotted Brush and
the Spacing between dots, otherwise your result might not look so good!
Depending on the size of your heart shape you will have to adjust the size of the Dotted Brush and
the Spacing between dots, otherwise your result might not look so good!
Vintage Leather Effect
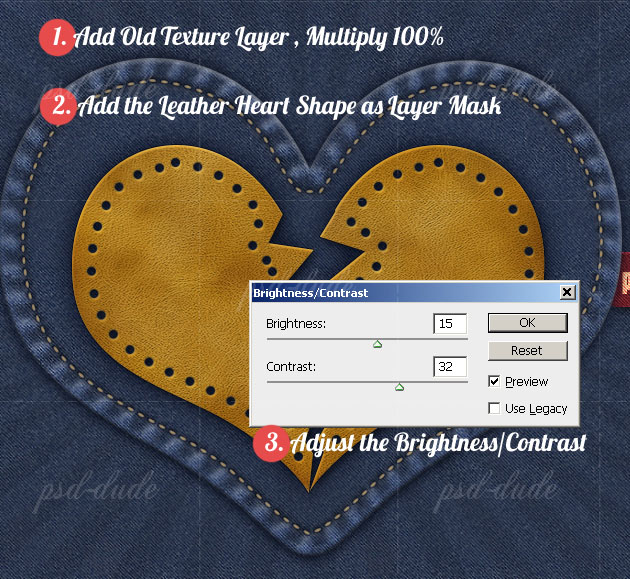
To make the leather look more realistic and beautiful I decided to add it an extra texture. So in another layer copy an Old Paper Texture. Select the Leather Heart Shape and add it as Layer Mask to the Old Paper Layer. Set the Blending Mode of the Old Paper Layer to Multiply 100%, You can adjust the Brightness and Contrast Balance to obtain the best result.
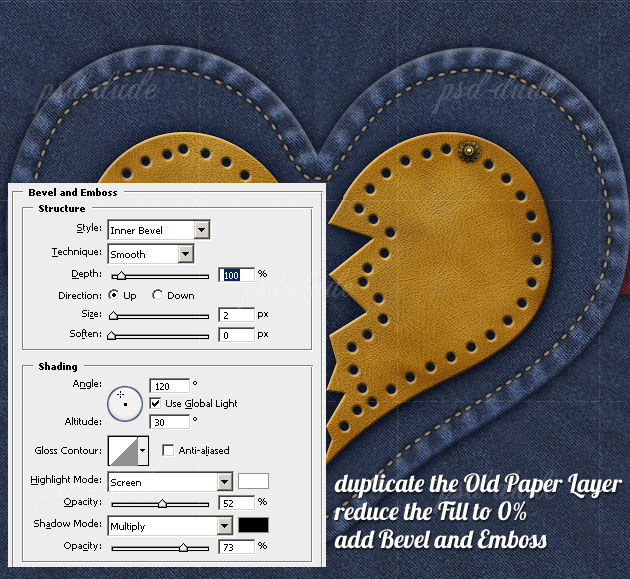
For a 3D look, duplicate the Old Paper Layer, reduce the Fill to 0% and add Bevel and Emboss like shown in the image:
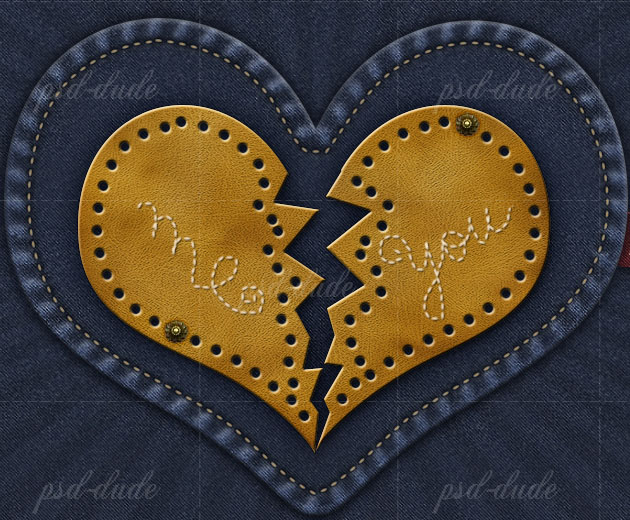
After adding the Denim Background, the Denim Heart, the Leather Heart and the Stitch effects, our image should now look like this:

Stitch Text Effect
Create a new layer and call it Handwriting Layer. Use the Stitch Brush to write by hand a text on the Leather Heart. Use the #ffeace color for the brush and also add a Drop Shadow effect, 1px shadow and distance.
Valentine's Day Wallpaper
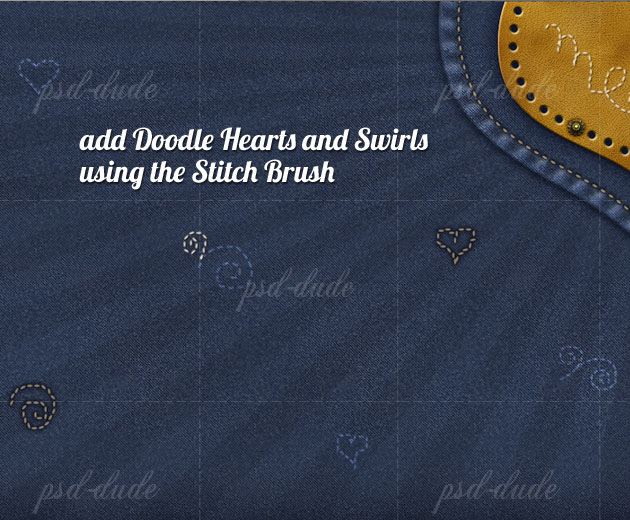
For the final touches I decided to use some small details using the Stitch Brush. Using freehand drawing, add small hearts and swirls made in doodle style. I added this details in Handwriting Layer, in Stitch Effect Layer and a new created layer Stitch Overlay. In this new layer use a the color white for the brush and Overlay for the Blending Mode of the layer.
Here is the final result for the Valentine Photoshop Wallpaper with Jeans Heart, I really hope you like it. In just a few days we will give you the free wallpaper for desktop and iPhone, just in time for Valentine's Day!

44 comment(s) for "Valentine Photoshop Wallpaper with Jeans Heart"
your work looks great, I love the fact that you added your own style and details...this is the most important part! reply
but can you tell me how to make the denim buttons you have added after the vintage leather effect..???
I am glad you liked the tutorial...your result looks great, I love the message you have added ("you make my world go upside down" :)) and all the other details!
About the buttons I have forgot to mention that I have taken hem from this image. Simply crop the buttons, add a little shadow around them where they meet the leather surface, and that is all!
reply
gracias, una abrazo guapaaaaa
un abrazo a ti tambien!!!! reply
My favourite style is the jeans&country style. This is a very nice tutorial for me.
Thanx again!!! When I create the own image I will send it to you.
Sorry for my English. reply
I'm glad you liked my tutorial and also I am very grateful you decided to share your result with us ... looks very nice ! Keep up the good work :) reply
i have problem, i am stuck on making stitch brush after shadow jeans effect. I have made work path and succeed with brush stitch. But the problem is, the direction of this brush stitch is always horizontal, although i have choosed Shape Dynamics. reply
I don't know what to say about that...maybe you should upload the result where you have problems so that I understand better; also include in the image a printscreen for the brush settings! reply
One Question, which step did i miss, so that the sunbrust layer still on the shape heart?
Keep up the good work Nita! reply
Aujourd'hui, je me suis bien amus??e avec vos tutoriels...
Merci encore une fois de partager vos cr??ations et de nous permettre de les r??aliser.
----
And yes it's me again: D
Today, I had a great time with your tutorials ...
Thank you once again for sharing your creations and allow us to achieve.
I am really impressed by the result, looks great! reply
Chaque jour je d??couvre un peu plus les possibilit??s de cr??ations offertes par Photoshop.... Et c'est gr??ce ?? des personnes qui comme vous prennent le temps de tenir un blog explicatif. Alors oui, j'appr??cie votre travail ?? sa juste valeur.
C'est juste, G??nial :D
-----
Hooo! thank you it is very nice to read this compliment, especially for a self-taught. Every day I discover a little more design possibilities offered by Photoshop .... And it is thanks to people like you who take the time to blog explanatory. So yes, I appreciate your work to its fair value. This is just Awesome: D reply
source: http://cborg.ru
anyway thank U reply
http://gyazo.com/69ff46456b10f0d0158bbe554d09b315
i think for a better look, the folds should be multiply, at least is what i did. i still try to figure what is better for a flowery pattern ;)
ty once again psd-dude reply
This is old post but thanks for this awesome tutorial. I made couple years back android home and lock screen, thanks to this tutorial. Here's link to that and thanks for your great work!
http://mycolorscreen.com/2013/03/21/denim-home/
this is what i came up with