


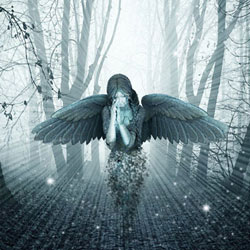

Sad Angel Photoshop Tutorial
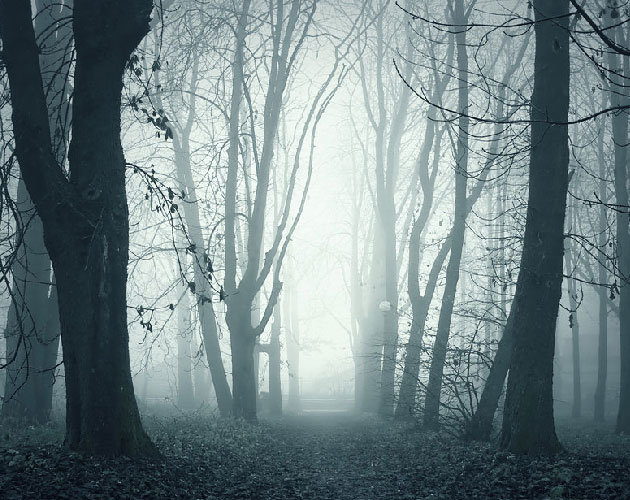
This is the first time I use a premade background mainly because I found this beautiful Ghostly Forest Path image so inspiring. I was fascinated not only by the beautiful color tones but also the mood of the image.
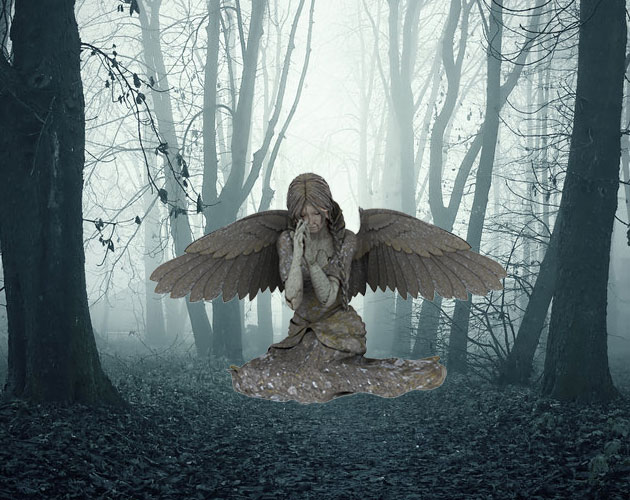
Place this beautiful angel image in a new layer called Photoshop Angel. The good news is that is already cropped so I little less work with that annoying cropping process.
Resize the angel PNG image so that it fits with the rest of the image and place it in the center of the image like shown below.
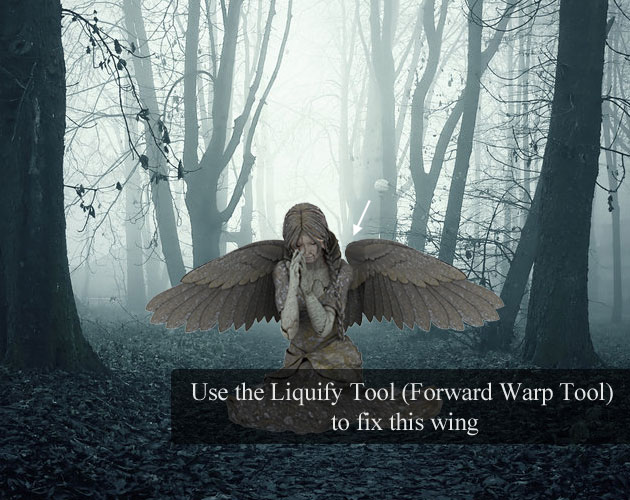
Choose the Liquify Tool and with the Forward Warp Tool try to fix the angel wing like shown in the image.
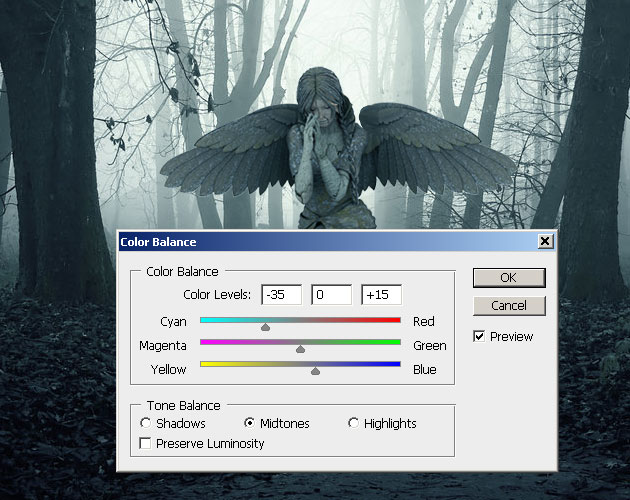
As you can see there are big color differences between the angel and the background images. To fix that problem we have to open the Color Balance window and make the following settings:
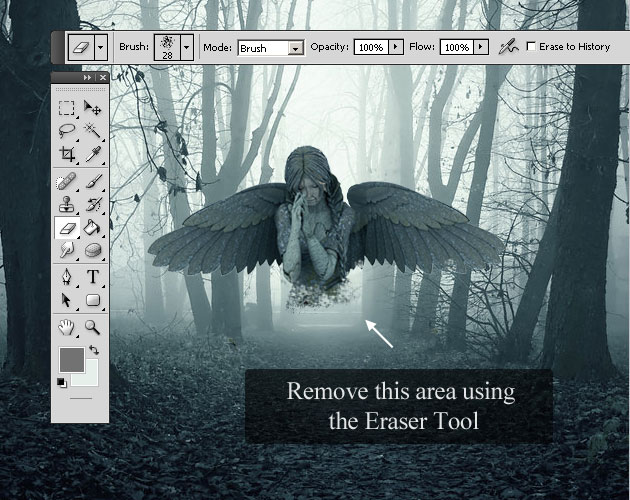
Move the angel up to look like she is floating in the air. Use the Eraser Tool with the custom made brush (Noise Brush), that you will find in the ZIP pack, to erase this area from the angel image.
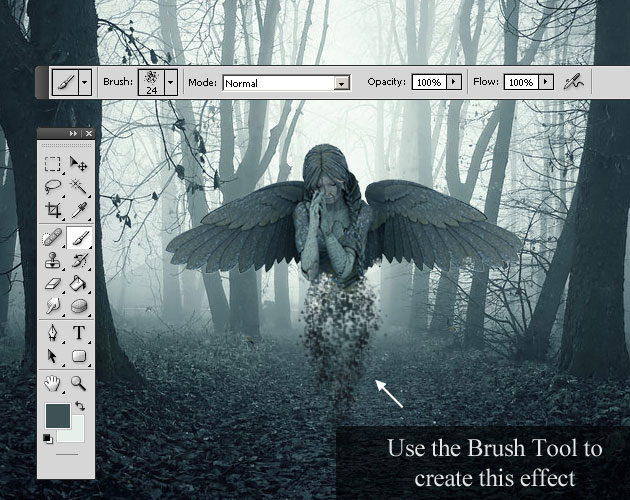
Create a new layer called Disintegration Effect and with the same Noise Brush but this time attached to the Brush Tool add the missing part of the angel. For the color use the Eyedropper Tool to pick different tones of color like #3d5153 for example.
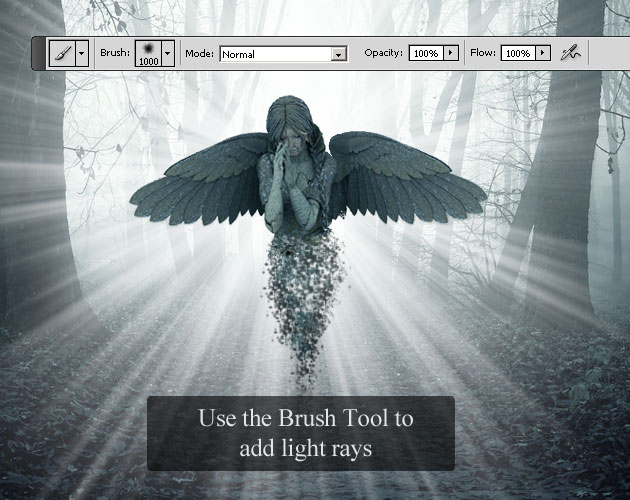
Add a new layer, but this time place it behind the Angel Layer, and call it Light Rays. Pick the Brush Tool and using the color white add a light in the background. Use the from this beautiful set of light ray brushes.
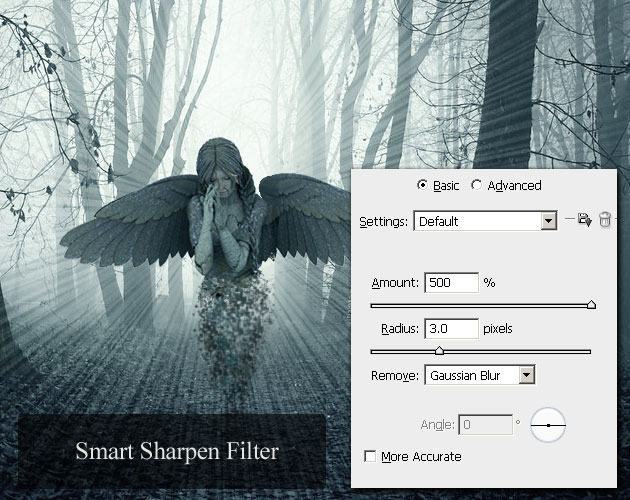
Apply the Smart Sharpen Filter to the Light Rays layer, twice, to make the rays more thiner. Change the Blending Mode to Soft Light, 50% opacity.
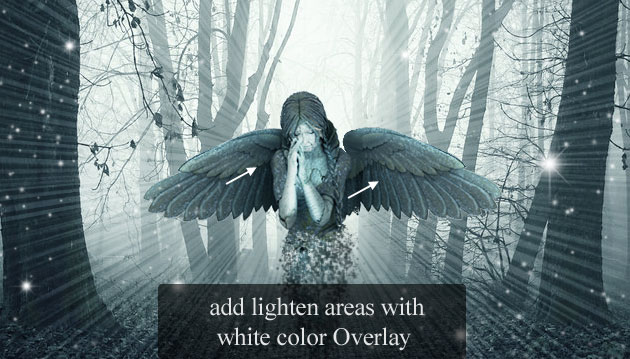
Create a new layer and add these sparkle brushes using white color. I've used the Sparkle 1 and Sparkle 4 brushes like in the image.

For the final touches I have added a new layer, and painted with white color over the areas that I wanted to lighten. Set the Blend Mode of this layer to Overlay, 70% opacity. Use a Soft Round Brush.
To add more contrast, create a Brightness/Contrast adjustment layer and set the contrast to 20. Add also a soft vignette.

16 comment(s) for "The Sad Angel Photoshop Tutorial"
Thanks
Dan reply
The brush file was made with CS4 I really hope it works in CS5 also! reply
About the edit button Iwe thought about it many times but as we are developing the site ourselfs (from zero, not using wordpress) we have a long list of things that need to be updated or added.
Regards,
John reply
I am sorry to hear that you can't make this tutorial work, but I write everything that I did. Maybe if you attach an image of your result I can figure out what you are doing wrong! reply
I would've edited my last post but you can't after it's posted maybe you could come put an edit button in
Dan reply
I've been trying this sadangel tutorial and I can't seem to get the bottom of the angel to look like the photo..keep in mind that I don't use brushes too often
Thanks
Dan reply
this is the second of your tuto I realize, here is my result :