Preview of the Final Image
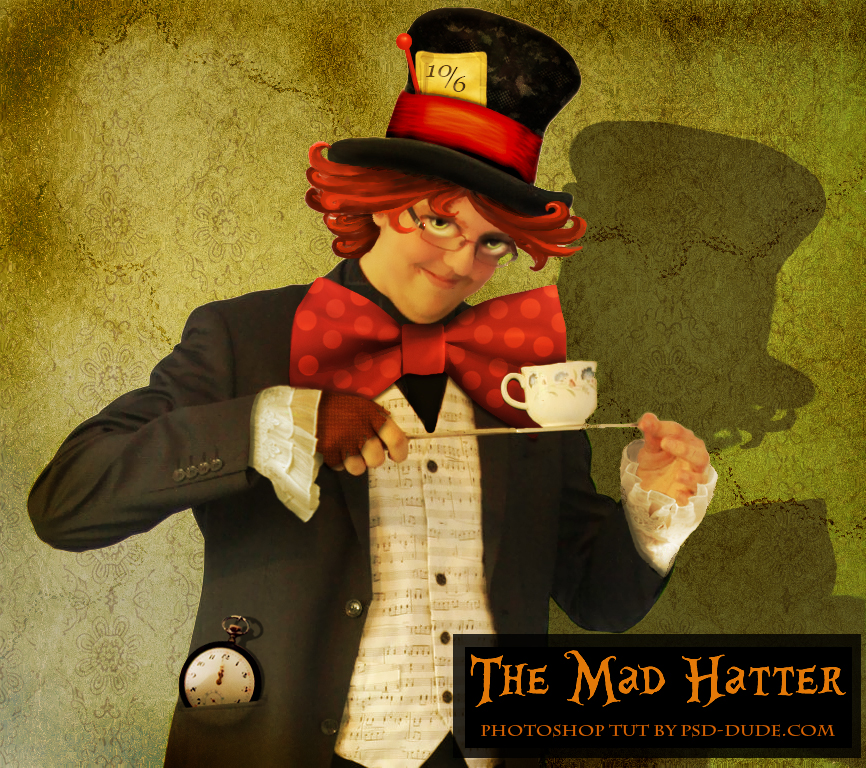
Step 1 How to Make The Mad Hatter Hat
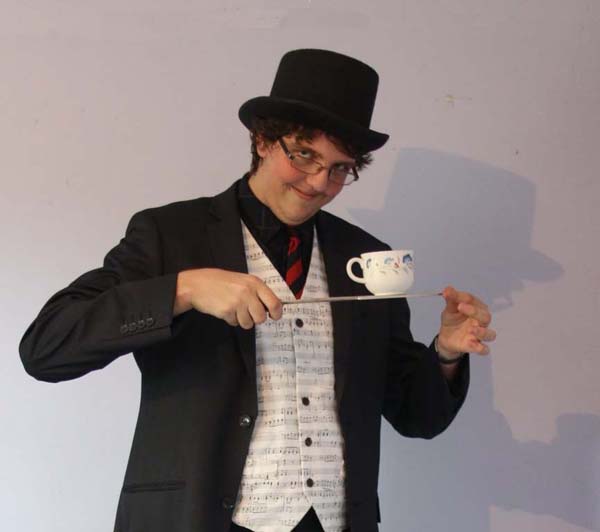
I have found a really nice photo on deviantart.com Mr. Hatter VI by ~MaithiranStock so I decided that I had to make this photo manipulation.
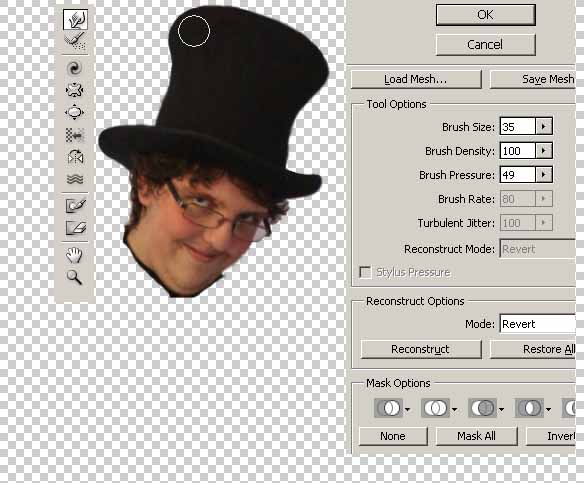
Use Filter - Liquify Tool (Shift+Ctrl+X) and with the Forward Warp Tool change the hat shape like in the image:
Another thing that I have to change are the eyes. Download the big size image with the hatter and crop the eyes. Create a layer for each eye and place them in the right place. Start blending by erasing carefully the skin and keeping only the eye. Use the Blur tool to soften the edges.
Like in any blending process you need to work slowly and take care of every detail.
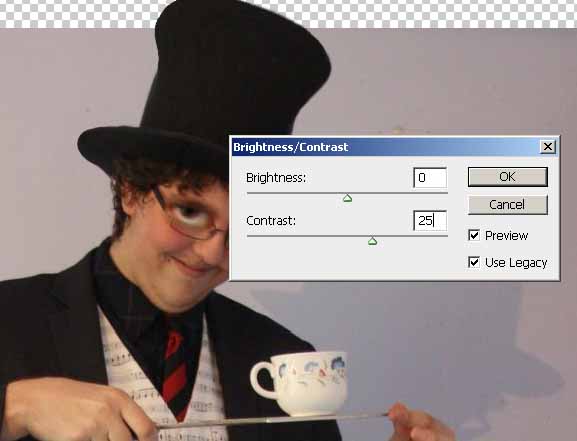
Go to Image – Adjustments – Brightness/Contrast and increase contrast like in the image:
Another thing you have to do is to use the Brush Tool to paint over the eye with #655d47 color. The size of the brush is 3px. Use also the Dodge Tool to lighten the white area of the eye. After you treat the both eyes you should obtain something like this:
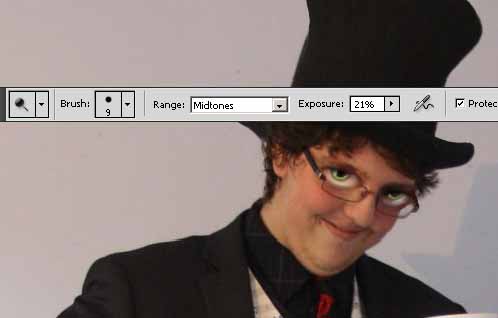
Step 2 Add a Few Fancy Details to the Mad Hatter Hat
Now let's add some features from the mad hatter character. For the hat I will paint a scarf over. So with the Pen Tool draw a simple shape, color #d52d00:
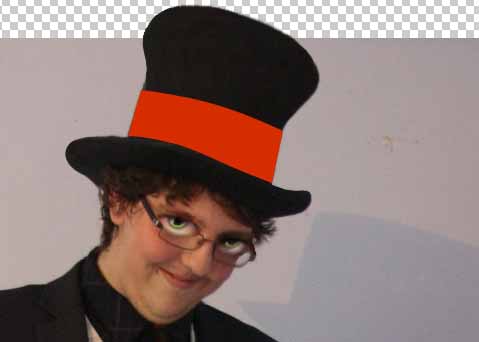
Rasterize the layer and with the Burn Tool selected do the following settings and draw little curly lines like in the image:
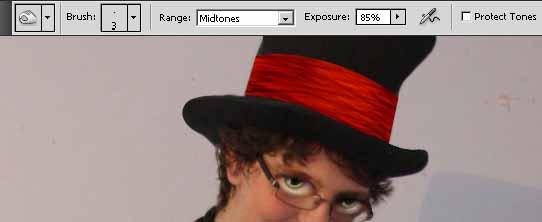
Do the same but this time with the Dodge Tool:
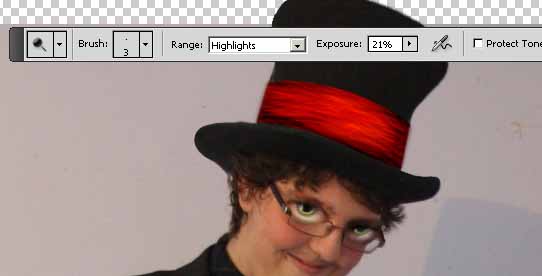
Add light shadow and light with the same tool until you obtain a good result. This is the best result I could obtain in 5 minutes with the mouse not the graphic tablet.
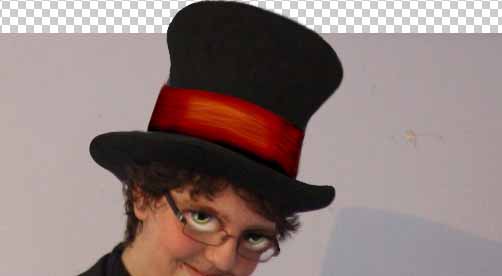
Now lets add some more features. Add a card with the text “10/6 “ attached on the hat.
Copy this image THE_QUEEN by *QBit71
and resize it. Use the Clone Tool to gently hide the queen image. You can actually fix just half of the card the visible one . If is a really powerful tool.
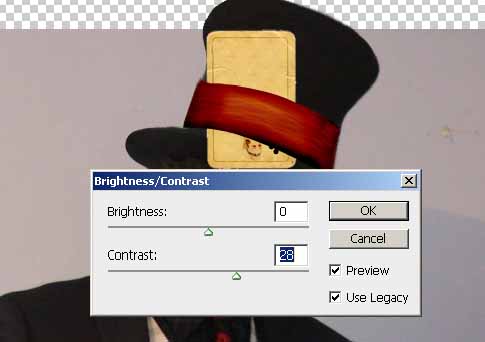
Change the contrast a little and than use the Warp tool from the Edit - Transform – Warp.
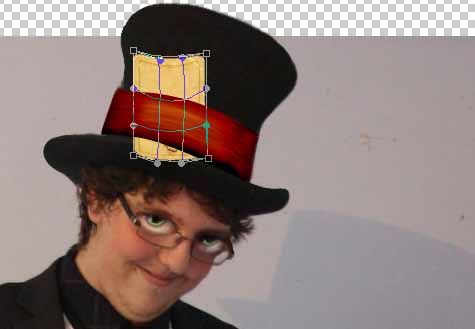
Erase the bottom part and use the Burn/Dodge Tool to add a more old look to the card. Also add with the Burn Tool a shadow where the scarf meets the play card.
Add the text 10/6 , Georgia , Italic, 24 pt , Sharp, color#3e3522. Create 3 text layers one for each character. Rasterize the 3 text layers and with the the Dodge Tool try to lighten the color of the text on small areas to look more like it is written on the card and to blend even more.
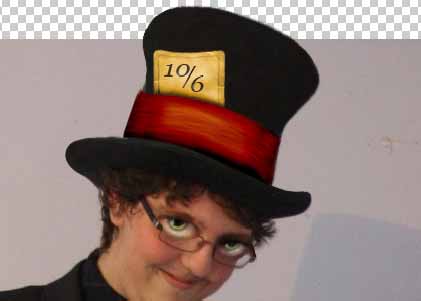
Another thing is to add a hat accessory like in the image. Simple shape with Burn/Dodge Tool light accents and of course don't forget to add a black shadow opacity 35%.
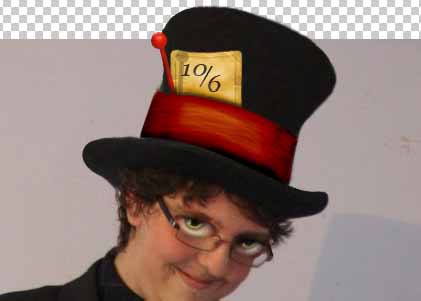
Add lace to the hat. Copy this nice lace texture Lace 4 by *gild-a-stock and place it over the hat, remove the unnecessary part. Change the blending mode of lace layer to Soft Light 100%.
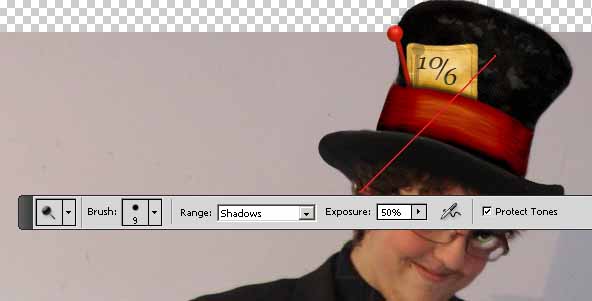
Use also the Dodge Tool in the indicated area but this time in the actual hat layer to make the lace pattern more visible!
Step 3 Apply Skin Smoothing
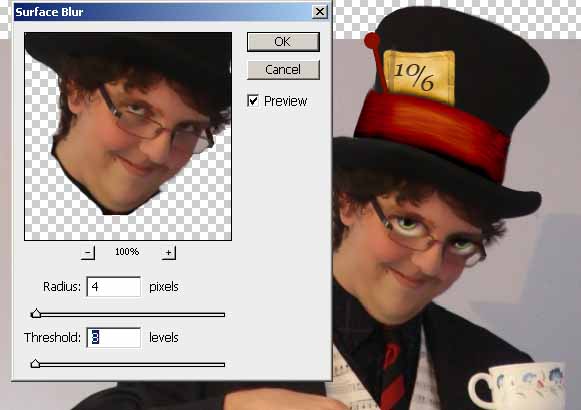
I forgot to do something. Select only the face area and copy paste it in another layer than add Surface Blur like in the image:
Step 4 Add the Neck Bow
Let's add the Pink Bow by ~RandomResources . As you can see it is a glossy plastic bow and I need fabric texture. So copy, crop and resize the bow to 50%. We will adjust the size later if needed. So the next thing to do is to reduce the light parts. For that use the Eyedropper Tool to pick the color and then with the Brush Tool cover the white areas.
You will have to work carefully to obtain a good result.
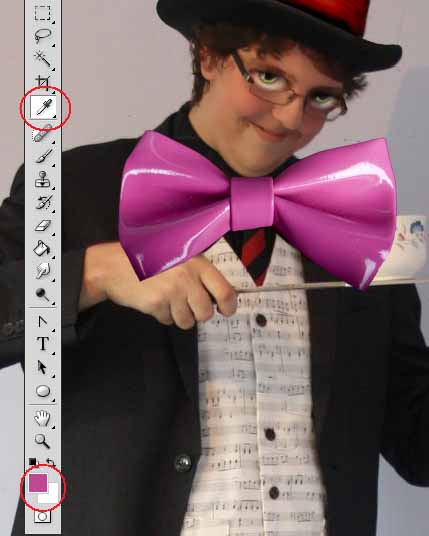
You will have to obtain something like this:
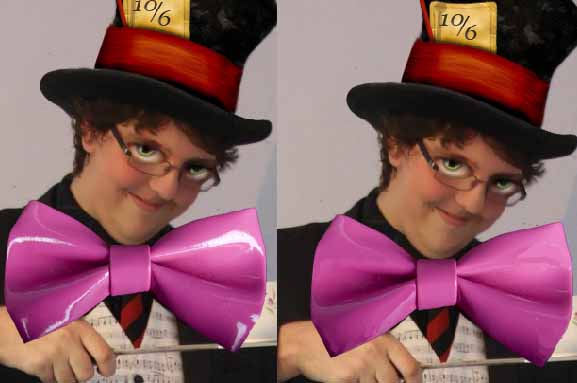
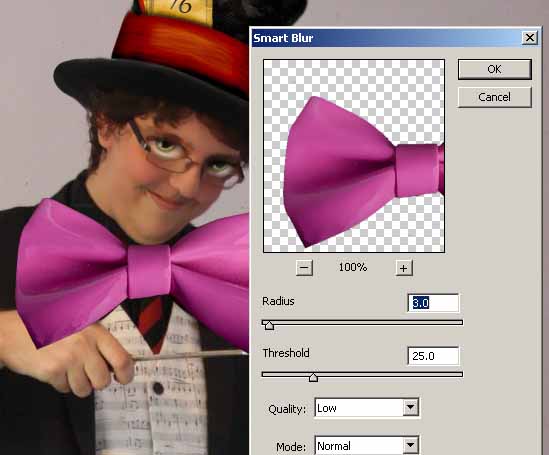
Use the Filter – Blur – Smart Blur with the above settings to smoothen the surface. It looks like silk now not like plastic.
Let's change the color of the bow with Image – Adjustments – Hue/Saturation
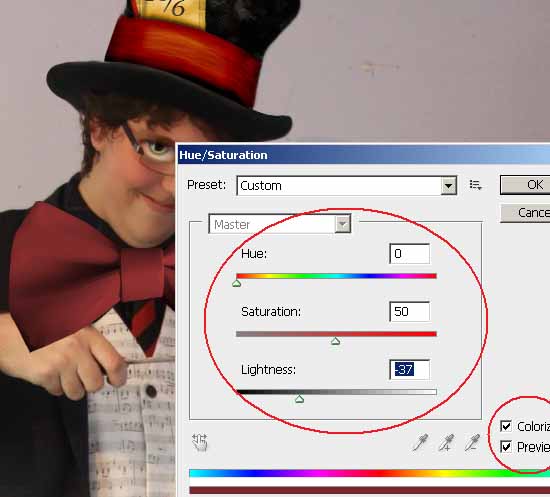
Ok! Use the Burn/Dodge Tool to darken/lighten parts of the bow, for example add the face shadow.
Another thing that we have to do is to place the bow under the hand and tea cup. For that we must to gently erase that areas. Duplicate the bow layer and work with the duplicate in case you don't succeed with the erasing part!
For good results lower the opacity of Bow Layer to 50% so that you can see exactly what areas need to be removed!
So this is the result so far :
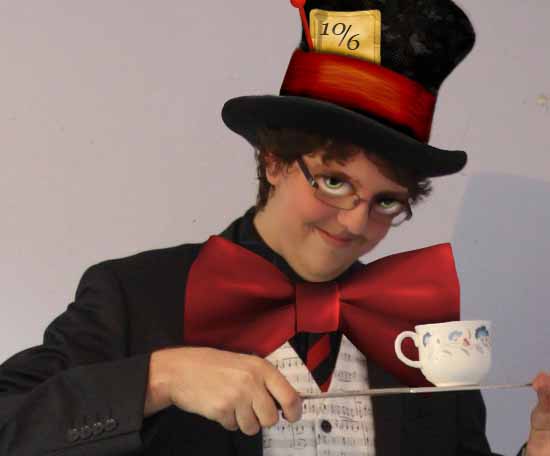
Create a new layer, select the shape of Bow Layer and color it in black in this new layer. Place it below the initial layer. This will be the shadow. Change the opacity to 45% and make sure the shadow drops only on the surfaces that are below the bow, the rest erase it.
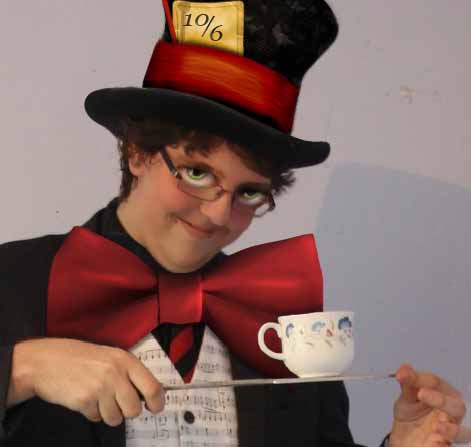
Another thing is to add pattern to the bow. With the Brush Tool , size 20 px , color white, draw in a new layer above the Bow Layer round shapes. Change the blending mode to Overlay, 70%. To darken some areas I have used the Eraser Tool, opacity 20%. We will obtain a realistic result.
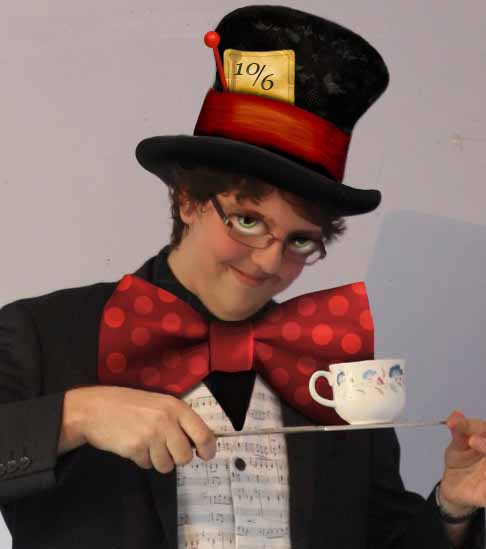
Step 5 Add the Mad Hatter's Old Pocket Watch
I will add now an old watch in the Mad Hatter s pocket. So copy this old watch Stock 18-02 by ~deadshadows-stock and resize it and place it like in the image.
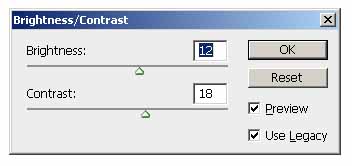
The treatment for this image is relative easy. I will first change the Brightness / Contrast balance :
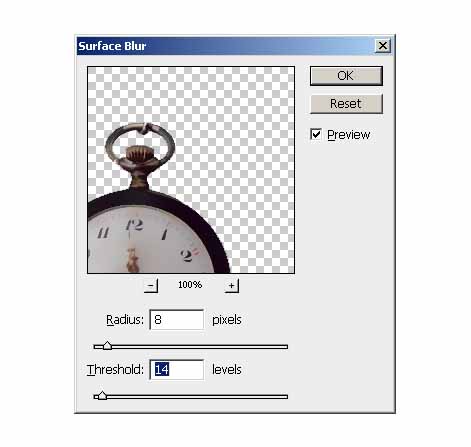
Remove the background and keep only the watch without the chain. Add Surface Blur:
Now make a selection of the area that is inside the pocket and remove it from the watch layer. With the same selection copy a part from the pocket (mad hatter initial image) and paste it into another layer. The reason for that is to create he illusion that the watch is in the pocket. For this layer make the following settings:
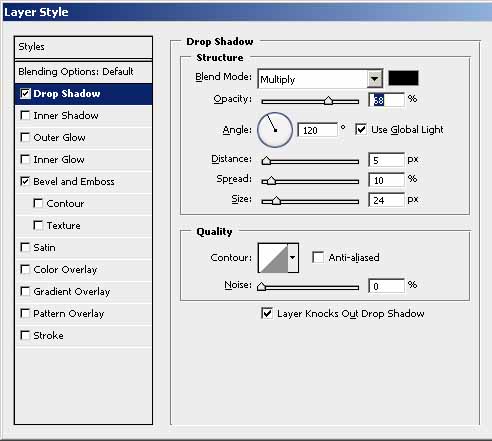
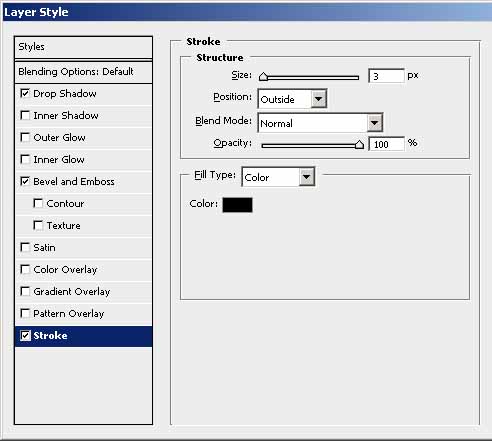
Duplicate the watch layer. Make the bottom watch black and move it and rotate it a little. Change the opacity to 60%. Now the result is this:
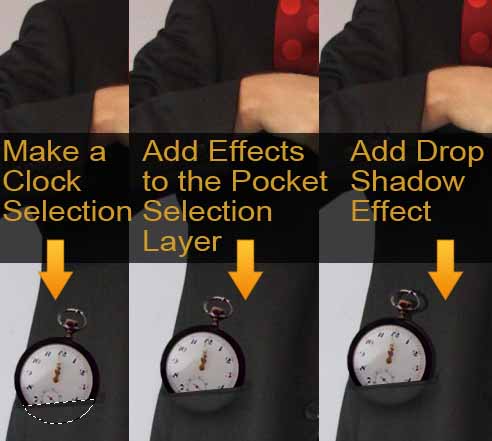
Step 6 Add The Sleeves and The Glove
In this step I will first add a glove to the Mad Hatter on the right hand. Create the shape of the glove in another layer with the Pen Tool, paths selected. Fill Path with the color #815136 .
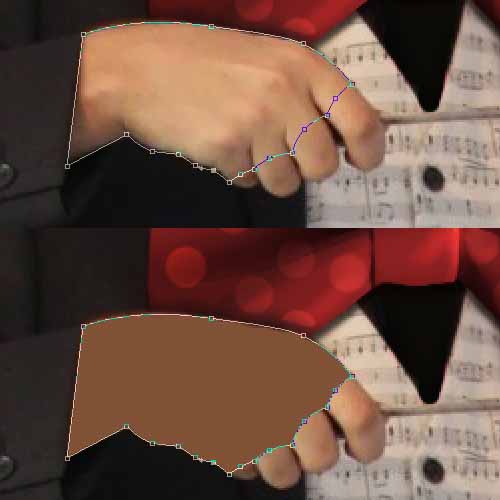
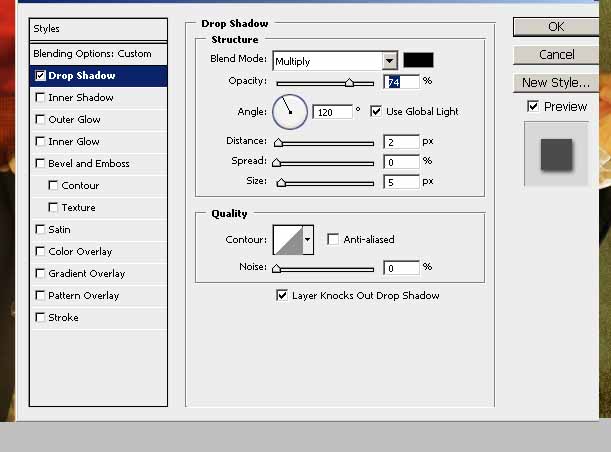
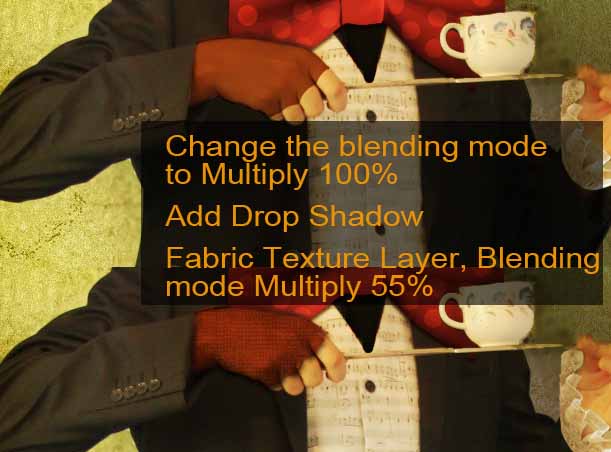
Change the Blending mode of this layer to Multiply 100%. Add Drop Shadow like in the image:
Add another layer below this one and copy this texture Fabric 5 by *texurestockbyhjs
, resize it and rotate it in place. Select the Glove Shape and crop the fabric texture. Change the Fabric texture Layer to Multiply 55%.
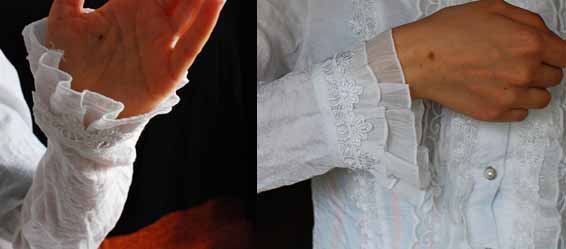
As for the sleeves part I have decided to make my own stock photos because I did not find proper ones. So here are the images for the right and left sleeve.
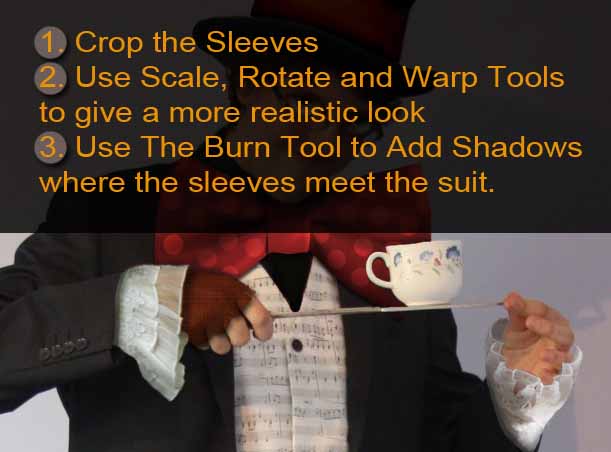
All I have to do is easily crop only the sleeves, resize them and put them in place. It is an easy yet time consuming step. You will have to use Warp Tool also to gie the right perspective.
Use also the Burn Tool to darken the areas where the white sleeves meet the suit dark sleeves. Try to obtain a realist look.
Step 7 The Hair
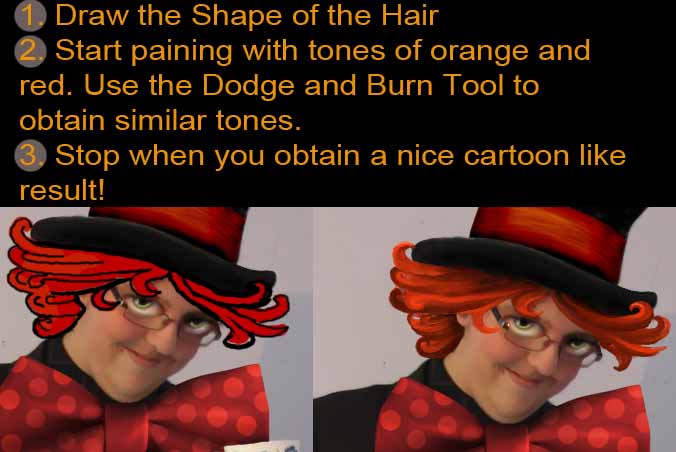
Well the hair is always a challenge for me. I will try to digital paint it with my digital tablet. I am not good at hat but I will do my best.
Draw the Shape of the Hair. Start paining with tones of orange and red. Use the Dodge and Burn Tool to obtain similar tones.3. Stop when you obtain a nice cartoon like result.
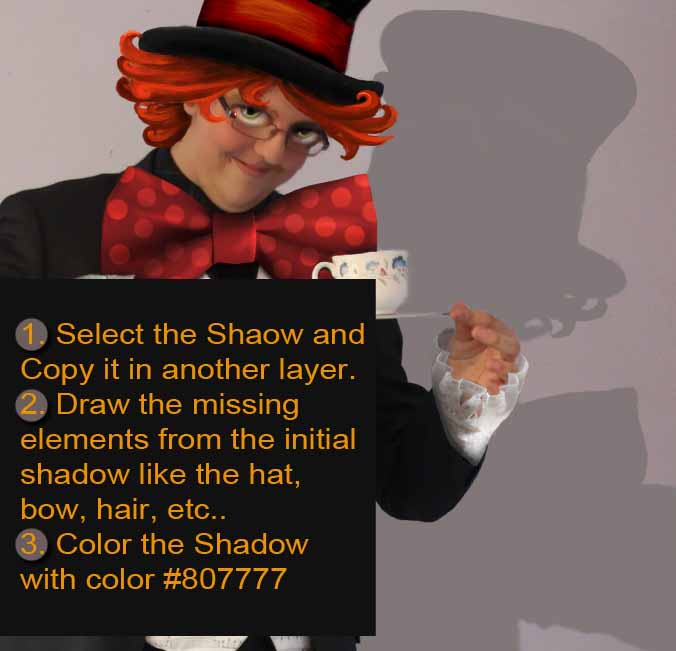
Step 8 Mad Hatter Shadow
When all the Mad Hatter pieces are in place, select the old shadow from the initial layer and place it in another layer. Draw the missing elements like the hair, bow, hat, etc. Color the Shadow with color #807777.
Step 9 Add Background Texture
Create a new layer below all the layers except the initial layer and fill it with color #396708. Change the blending mode to Overlay 100%. Select the Mad Hatter shape and remove the selection from this background 1 layer.
Create another layer this time above all the layers. Copy this beautiful green texture Texture by ~calajane
Change the blending mode of this layer to Overlay 100%.
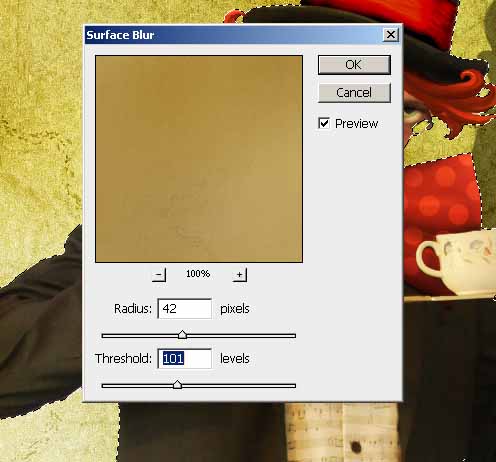
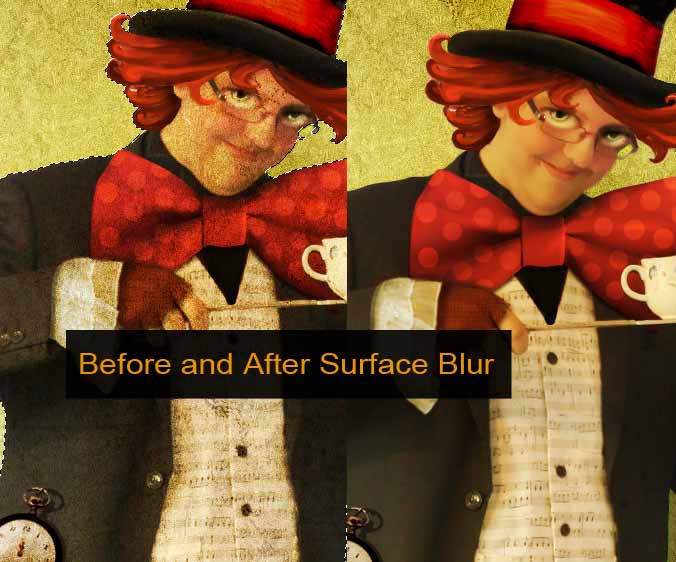
Another ting that you must do is to select again the shape of the Mad Hatter and with the Background 2 Layer selected, add Surface Blur.
Add the “The Mad Hatter” text with a very beautiful font inspired by Tim Burton's Alice in Wonderland movie logo http://www.dafont.com/alice-in-wonderland.font
So this is the final result ! I hope you like it!

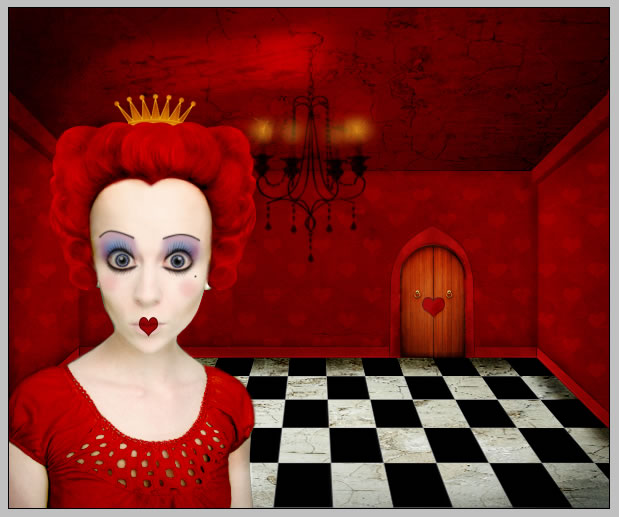
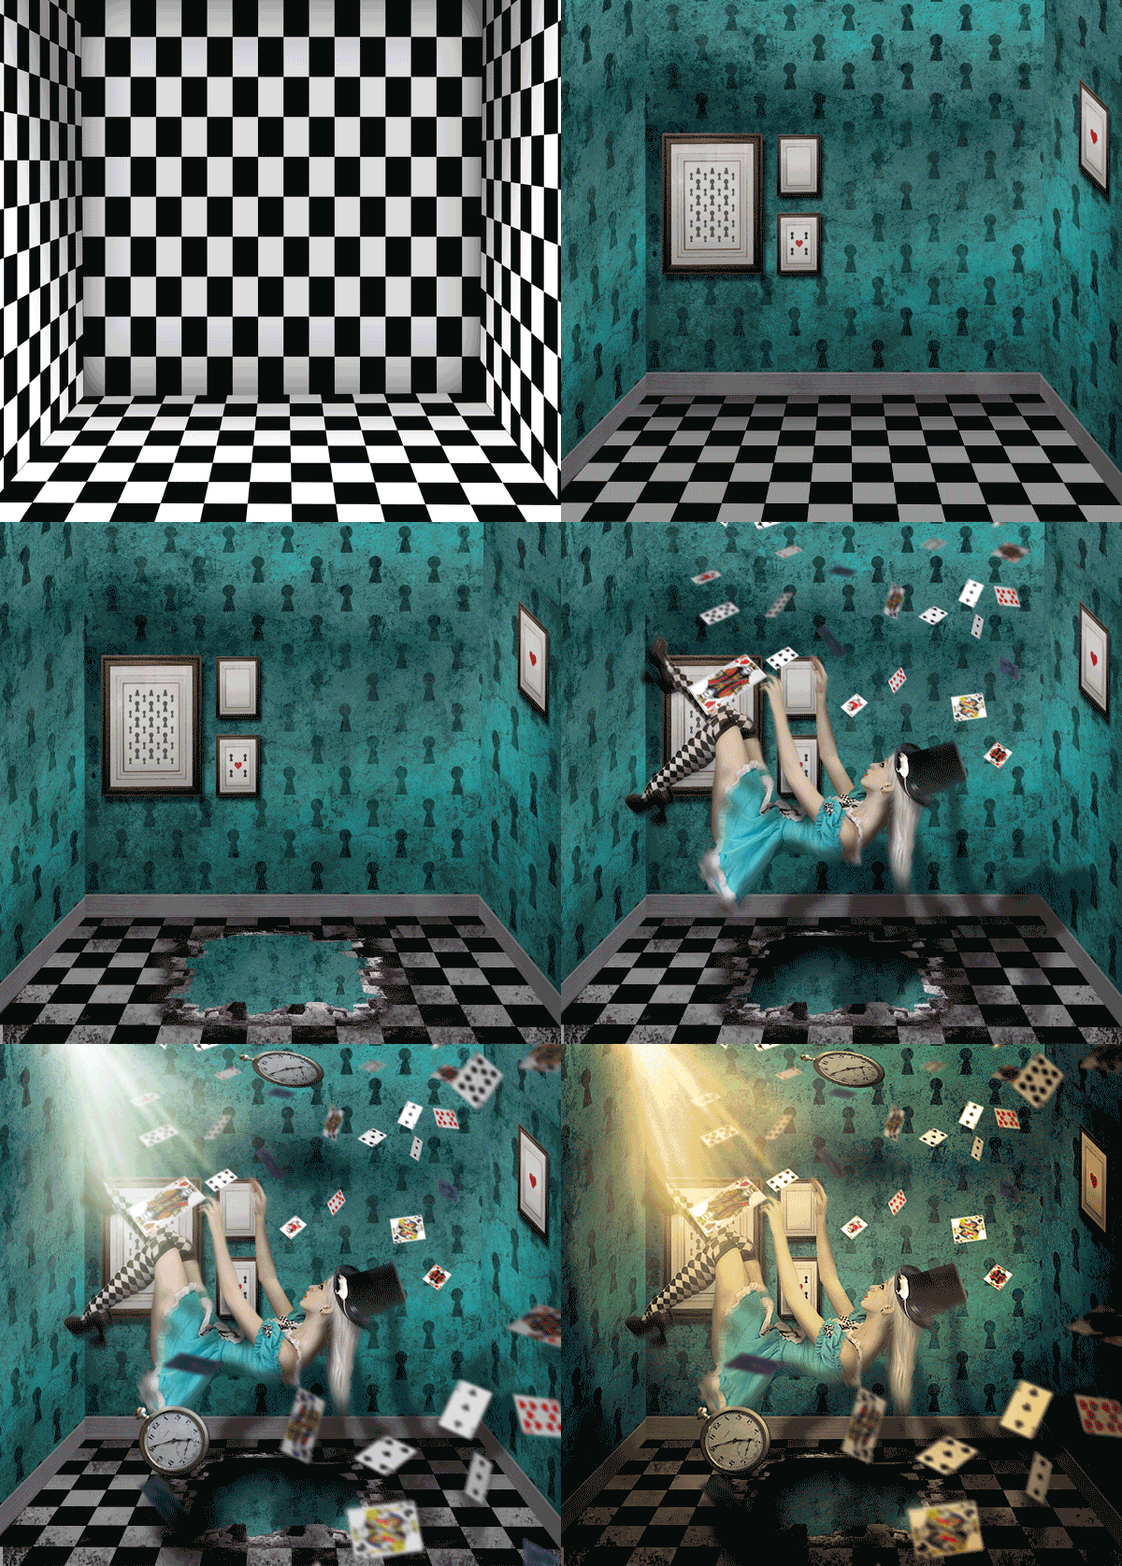
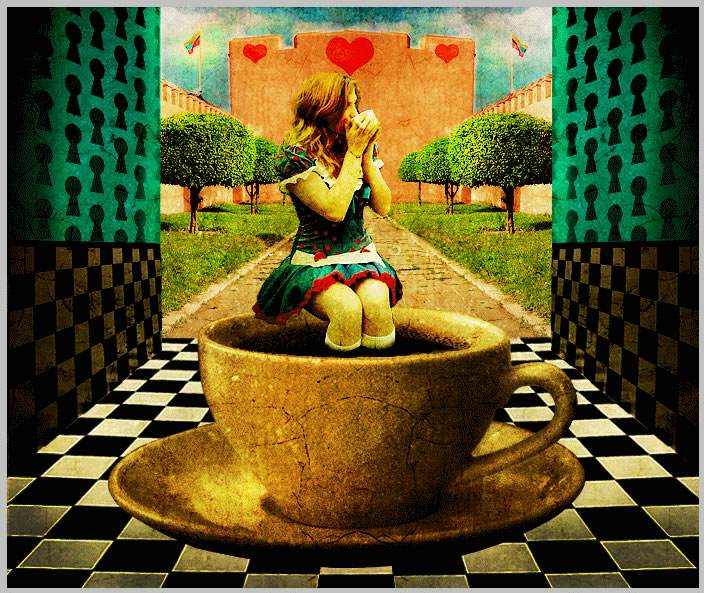
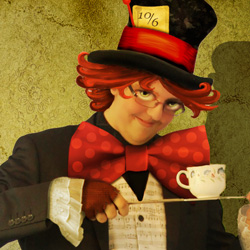
If you liked this tutorial maybe you want to also take a look at these tutorials:





30 comment(s) for "The Mad Hatter from Alice in Wonderland Photoshop Tutorial"
As for you Juraga thanks a lot for letting others to use your image, this work would not exist without your contribution!!! reply
u don't have regular mind>>>
keep going n i think I understood it completely
thnx
BAKOOR reply
reply
try to follow steps of the tutorial, practice is the best way of learning
good luck :)
reply
multumesc :) reply
great job. reply
reply
Thanks. reply
I am not an expert on painting hair so, here is a quick tutorial on how to digitally paint realistic hair in Photoshop:
http://b0o-b0o.deviantart.com/art/Digital-Painting-tutorial-pt-2-40310699
http://www.photoshoptutorials.ws/photoshop-tutorials/photo-manipulation/how-to-create-an-alice-in-wonderland-inspired-artwork-with-photoshop/
Yeah, that's me... That's some epic work, bro! reply
I have added you to freeitsolutions directory reply
thanks for this tutorial.keep it up! reply
xoxo, Mary ? reply
Thanks reply