This is our 9th tutorial for text effects so if you like it you might also be interested in taking a look at the text effects category. If my tutorials are not enough, I can only do so much, you can also take a look at my list of great tutorials on how to create different text styes. Here is the list: the best text tutorials on the internet.
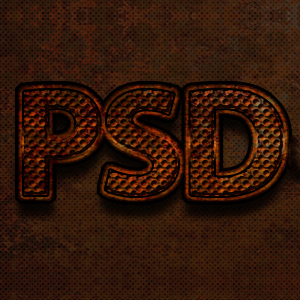
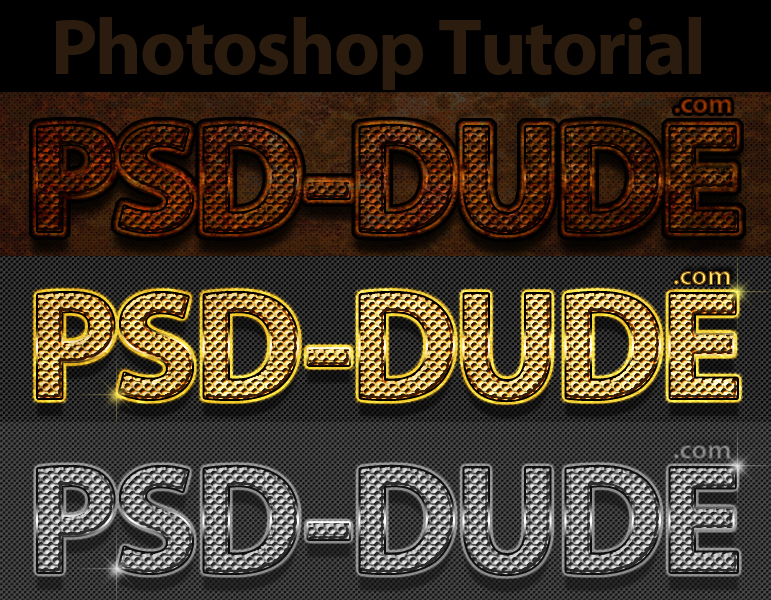
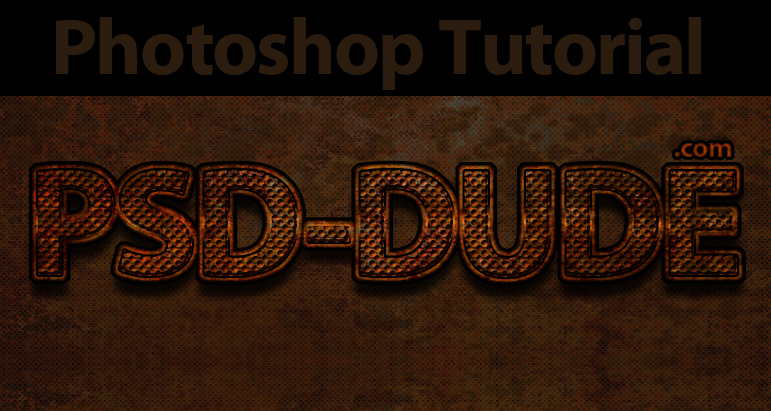
Silver and Gold Text Effect with Rust: Photoshop Tutorial Final Result
How to Show the Photoshop Guide Grid
First I will create a pattern in Photshop to use it in the next steps, to create
a bumped text effect.
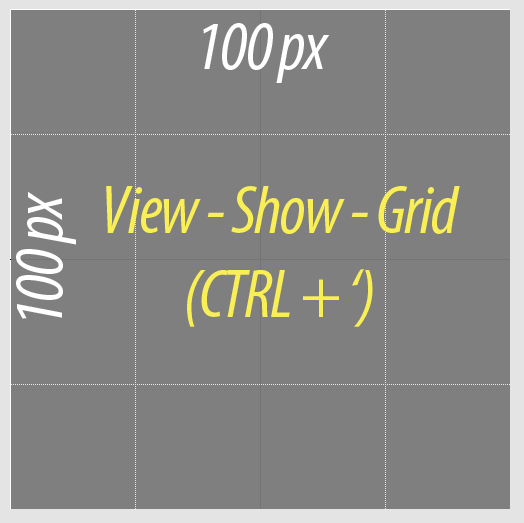
So open a new file, size 100x100 px. Draw a rectangle shape, color #888888. Now
you can Zoom In (CTRL and +) to see the canvas better.
When drawing shapes it is important to see the grid. A Grid in Photoshop is made
of horizontal and vertical lines that help you draw in a more accurate way. These
lines will not be visible when we save the the work in a file format. For that to
happen you have to go to View Menu, Show, Grid (CTRL and ').
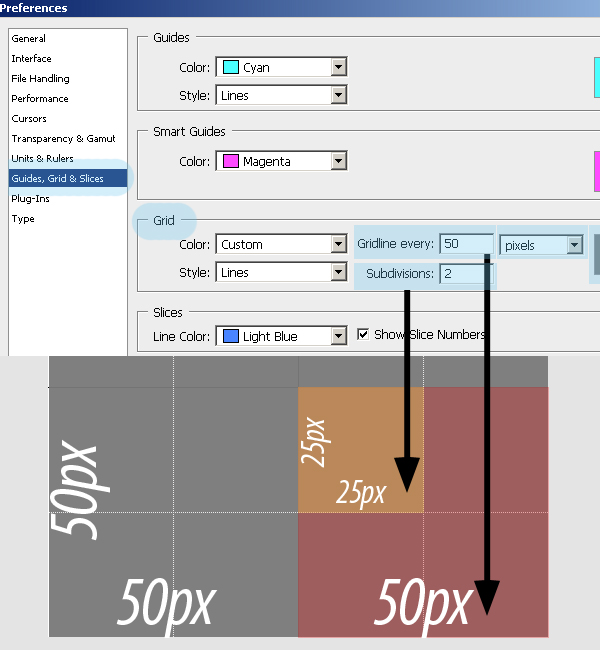
Our canvas is 100 px width and 100 px height. We can actually customize the Grid
from the Edit, Preferences, Guides Grids & Slices menu. In this window you see
a Grid Section. Here you can change the color of the grid and also the number of
lines. So in this case we have Gridline at every 50 pixels and 2 Subdivisions. This
means that our Canvas is divided in 4 equal areas of 50 pixels and every area is
divided in other 4 areas of 25 pixels.
So it is important to customize your grid and canvas size so you obtain a useful
grid, with a center defined and equal areas.
Custom Shape in Photoshop
Ok, now let's return to our gray rectangle. Draw a circle in the center of the rectangle, with 50px diameter. Press SHIFT to draw a perfect circle.

Click the Vector Mask Thumbnail of the Circle layer and press CTRL + C. Click on the Vector Mask Thumbnail of the Rectangle layer and press CTRL + V.

Now move the Circle Layer in the top right corner of the rectangle so that a 1/4 slice of the circle remains in the visible area.

Now move the circle 3 more times so that we cover all the remaining corners. After one move copy the circle in the rectangle layer. Finally, hide the Circle Layer. As a result we have only one visible layer, the Rectangle Layer. Intially the rectangle had only one vector and now if you select it you can see that it has five more circles in the same layer.

The next step is to extract the circle vector shapes from the rectangle and obtain a new vector shape. To do that pick the Path Selection Tool, hold the SHIFT pressed and select the five circles.

Now press Substract from shape area, like shown in the image:

Actually this is a 5 minutes process so it is nothing complicated once you understand it. You can save the shape for further use if you find it interesting(Edit, Define cUstom Shape).
Create a Pattern in Photoshop
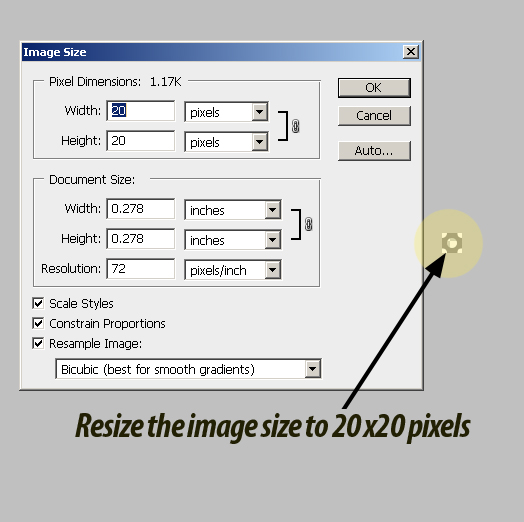
You know our image has 100 x 100 pixels. Go to Image, Image Size and resize it to 20 x 20 pixels.
The Rectangle Layer will still be a vectorial layer. The idea was to make a pattern out of this shape. But first let's apply some cool effects. Double click on the layer and add Drop Shadow and Bevel and Emboss like in the images below:


Now simply go to Edit, Define Pattern and call the pattern BumpCircles. This is how our pattern will look like applied to a red and orange layers.You can see it has transparency.

Text Layer Style
Ok, now we are going to create the actual text effect using the pattern made in the previous steps. So open a new document, size 800x400 px. Fill the background layer with a color #505050. With the Horizontal Type Tool, write your text. My text is PSD-DUDE with capital letters. I have wrote "PSD-DUDE" instead of a more appropriate text like "RUSTY METAL" because of the internet theft. If someone puts the images on another website without credit, at least you can see the original owner. So from now on, I will write the site name, use watermarks to protect my work. The initial settings for the text layer are : font Myriad Pro, bold, size 155px, color #8d4b0a.

Double click on the layer and first add Drop Shadow effect like in the image. Be careful to uncheck Use Global Light so that the shadow isn't applied to all the layers.

Add Inner Shadow, use black for the color of the shadow.

Add Outer Glow, use the color #c6ac46 for the glow.

Add Stroke, 2 px, gradient color with black and white.

Realistic Bump Effect With Bevel and Pattern
There are two more effects that need to be added, Bevel/Emboss and Pattern. Let's start with Bevel and Emboss.

Then add a little Contour to the Bevel and Emboss Effect like in the image:

I will also add Texture to the Bevel and Emboss effect. From the list pick the pattern that we have created in the previous steps, BumpCircles. Set the Scale to 50% (the pattern will resize to 50%) and the Depth to +100 (depth of the bump effect). The texture effect transforms the pattern image in grayscale and simulates a bump effect based on this image (white is up and black is down). If the depth is greater than zero it is applyed the pattern image in grayscale (white is up and black is down). If the depth is smaller than zero it is applyed the Inverted pattern image in grayscale (again white is up and black is down). If the depth is zero the effect is not visible.

The last effect is the Pattern Overlay. I will apply the same pattern, BumpCircles. Set the scale to 50%, the same scale used in Bevel and Emboss Texture.

Rust Metal Text in Photoshop
So this is the effect so far. As you can see it made of one style layer. You can now apply by adding another layer so many effects, I will show you how to create a rusty metal and also a shiny gold metal using this layer style. I have found this incredible beautiful Orange Rusty Texture by RavenMaddArtwork. Create another layer below the Background Layer and Text Layer. Copy the Orange Rusty Texture in this layer. Press CTRL and click the Text layer's thumbnail to select the text. Go to Select, Modify, Expand and set Expand by 6 pixels (that represent the 6 px Outer Glow Effect of the Text). Return to Orange Rusty Texture Layer and press CTRL+C and CTRL+V to copy paste the selection. Call this new layer Rusty Text Layer. Place it above the Text Layer and change its Blending Mode to Multiply 100%.

Add a 3 px, black, outside Stroke to the Rusty Text layer and also Drop Shadow like in the image:

For the final touch reduce the opacity of the Orange Rusty Texture Layer to 20% and change the Background Color to #28170c.
How to Make a Rusty Metal Text Effect
How to Make Gold Text Effect in Photoshop
There are a lot of ways in which you can make gold text using Photoshop. The easiest way is to use use one of the pre-made styles in my list of free gold text effect PSD files.
If you replace the Rusty Text Layer with a Gold Text Layer , modify of course the Background and add little sparkle effects you will obtain. So use this Gold Texture by WanderingSoul-Stox but first you need to resize it to cover our text and also to change its Hue/Saturation Balance like in the image:

Select the text like you did for the Rusty Text and copy the Gold Texture Text into another layer. Change the Blending Mode to Overlay, 100% opacity. Remove the Gold Texture Layer and use a dark gray color for the background. Add sparkle effect, you can use a brush or you can easily create one yourself and you obtain a really cool gold effect.
Gold Metal Text Effect

Silver Text in Photoshop
In a similar way you can create a silver metal effect. This time you can use a silver texture or you can simply adapt the colors, to have only grayscale tones. The result would look like this:
Silver Metal Text Effect

Rusty Gold Silver Metal Text Effect
PSD file
*Redistribution of These Files is Not Allowed!If you've enjoyed this tutorial, make sure to also check out my list of Gold Text Photoshop Tutorials.
No comment(s) for "Rusty Silver and Gold Text Effect"