


Step 1- Change the Skin Tone
Ok,
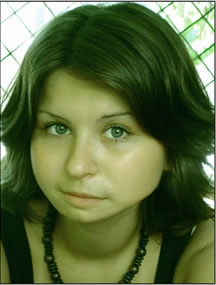
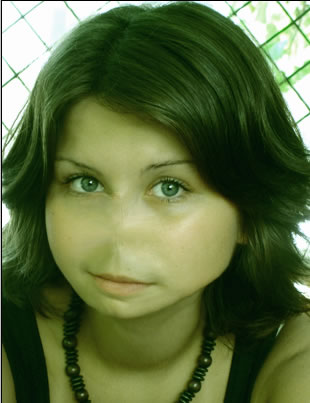
Lets take a nice picture.I use this site stockvault.net for my tutorials.
For this tutorial I've chosen the photo:

Ok download the photo and resize it to a normal size. You can crop it like a did .
Duplicate the girl layer because it is important to have the initial photo.
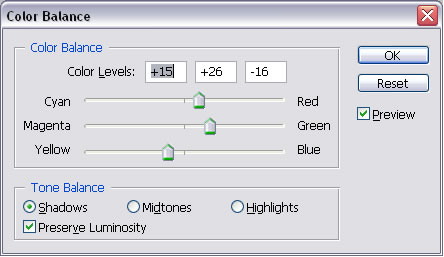
Now lets change the color of the photo. Go to Image - Adjustments - Color Balance and do the following settings
For the shadows:
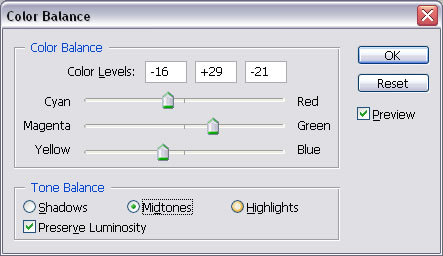
For the Midtones:
For the Highlights:

Now go again to Image - Adjustments - Hue/Saturation and do the following settings:
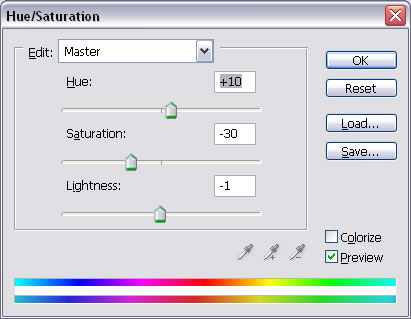
The idea is to obtain a nice green tone; you can of course play with the colors and do different than I did .This is not the finall color I am sure, after we chage the face we work with color balance again.
Step 2 -Change the Face Features
Lets change the face figures ; go to Filter - Liquify and pick the Forward Warp Tool .the size 61, brush density 84 and brush pressure 35.
Here we have 4 missions:
the shape of the face: change the shape of the face making it a little smaller..look at the picture below and you will see exactly how .
Now lets hide the nose with Spot Healing Brush Tool or simply copy/paste a part of the skin(and place it in fron of the nose, merge the 2 layers .and than use the Spot Healing Brush Tool again)
This is the result .the nose is still visible
Take the Sopt Healing Brush Tool and easily hide the nose.I used brush 14, type proximity match.
Don't worry if the result is not quite perfect .we will paint it in the final step.
Step 3 - Add Makeup
Create a new layer and call it Makeup; in this layer add a little black makeup to the eyes.with opacity 24%.
Go to Filter - Blur - Gaussian Blur and make the folowing settings:
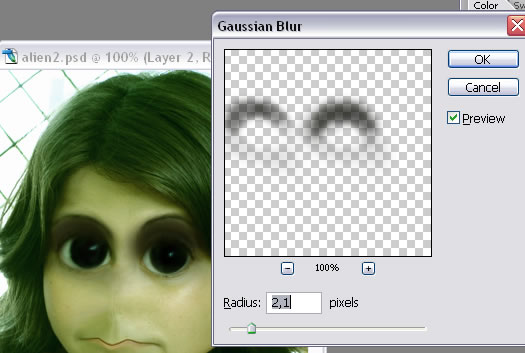 and also add 2 points in the nose place.
Step 4 - Modify the Hair and Skin
With the Liquify.Forward warp tool I have changed the shape of the hair. With the laso tool I took a little skin from the forehead and place it on the hair to look like a part of the hair is missing..i used Blur, Smudge, Burn Tool and opacity of the layer 76 % to look real. Now merge the 2 layers ..alien and the part of the skin.
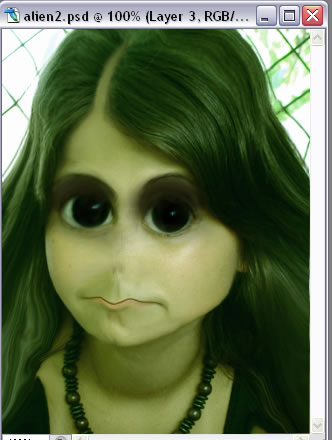
You should now have a photo like that.
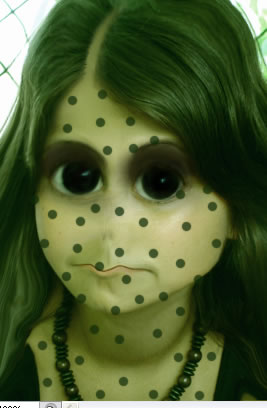
Create a new layer and cover the skin with Brush tool color #e6f809.except the eyes; go to filter - blur - gaussian blur and than change the blending mode to Color, opacity 55%.
Create another layer.. lets make little circles on the skin with green Brush Tool .
Something like this:
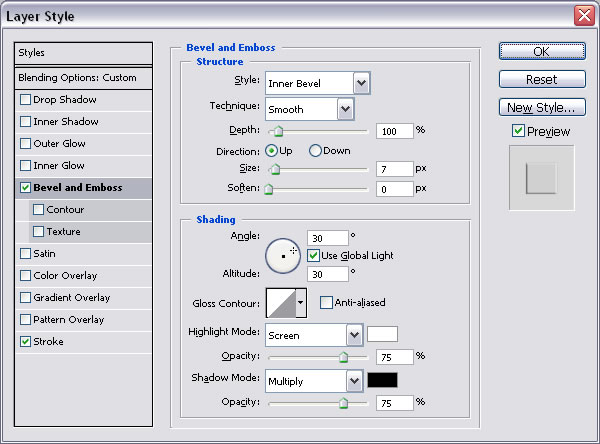
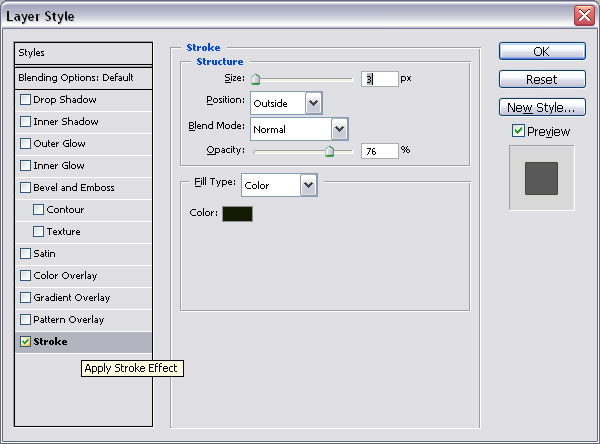
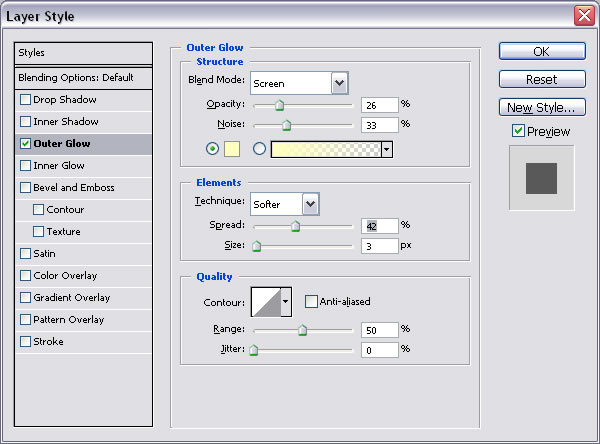
GO to Filter- Blur - Gaussian Blur (set 1,6) and also set: at the blending options of the layer Blend mode: to Overlay opacity 65% , Check Bevel and Embossed (see the picture below) and check also Stroke (size 1 px and color dark green opacity 8%)
Now I burned a little the photo of the alien ; parts of the skin, the eyes and the hair.
Go to Blending options of this photo and do the following settings:
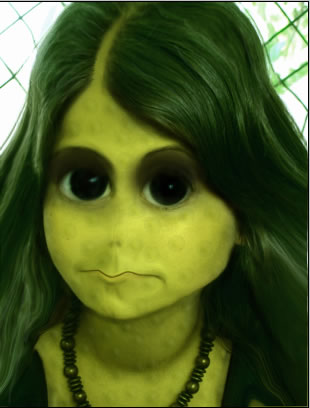
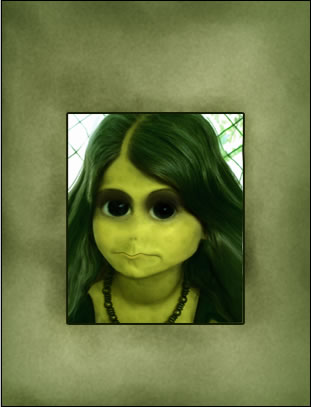
This is the result we have so far:
Step 5 - Create The Background Paper
Now, make a group(name it Alien) with all the layers and resize it to 60 %....you can ajust the size as you wish.
Make a new layer and call it Paper and put it behind the Alien Group .draw a square with color #bfcaa2.
Choose the following colors :
Foreground: d0d4a2 Background: 79814b
Go to Filter > Render > Clouds.
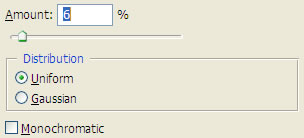
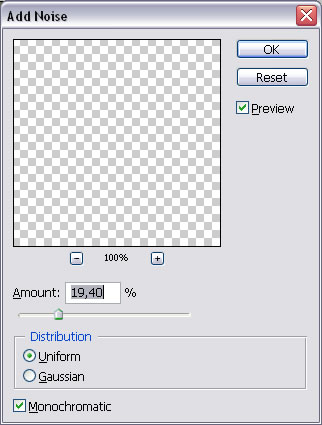
Now in the same Layer go Filter > Noise > Add Noise. and set the following settings:
Filter > Blur > Gaussian Blur. And set the following settings: radius 0,7 px
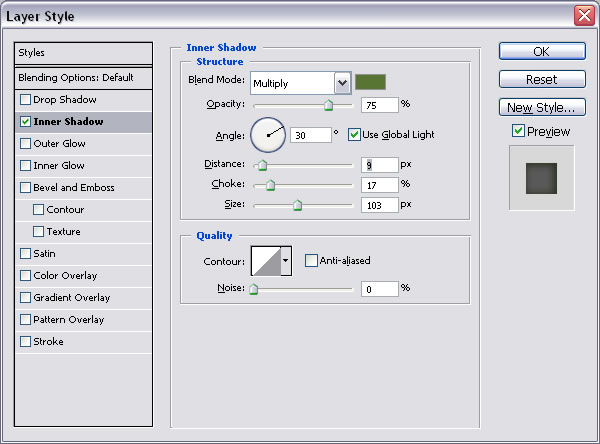
Go to Blending Options and check Inner Shadow like in the picture below:
You can burn parts of the paper for extra effect..
This is the result we have so far:
Step 6 - Write the Text
For the text part I choose this font alienencounters you can download it for free. With this font write "WANTED". Dodge parts of the text to make it look old:

Under Wanted text write "DEAD OR ALIVE" with arial

For this layer go to Blending Options and do the following settings:
Add a little noise like in the picture below:
Write 20,000 space$ below the photo.

Write "REWARD" below the photo with the same font as "WANTED"
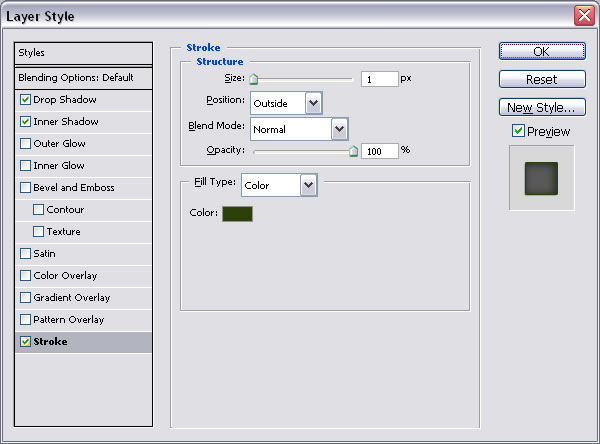
Return to the Paper Layer and for the Blending Options check stroke like that:
Now delete the paper edges and than easily blur the edges.
Add this grunge texture in a new layer above all the layers and set the blending mode Color Burn opacity 40%.
I've created a new layer to hide the background of the alien girl..with the color 646e30 and Brush Tool I �ve painted the bacground area and than I set the Blending mode of this layer to Darken.
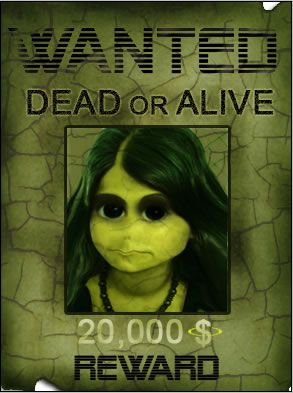
This is the final result:

4 comment(s) for "Make an alien out of a real girl or woman in photoshop"