


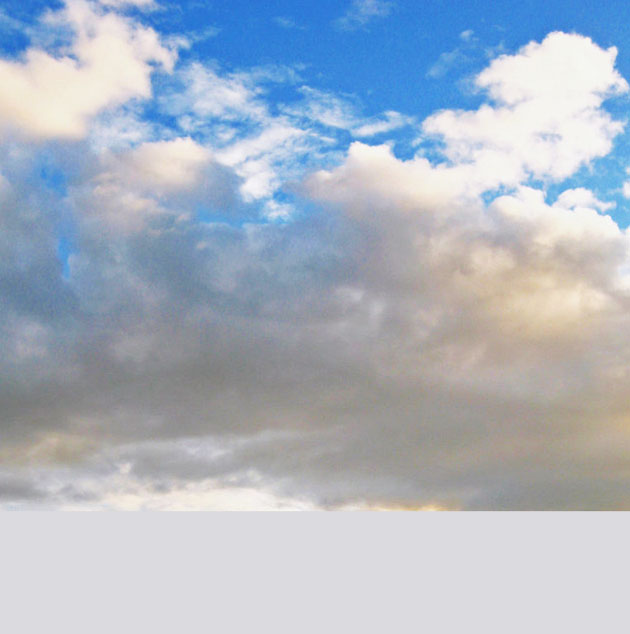
Open a new PSD file and copy all the stock cropped images. The first layer is the Sky Clouds layer that we are going to leave just the way it is, only with the beautiful Fairy Tale Clouds stock image. You can erase the lower part of the image or you can use a layer mask to hide it. As you can see the image covers just a half of our canvas. We will have to fill the missing area in the next steps.
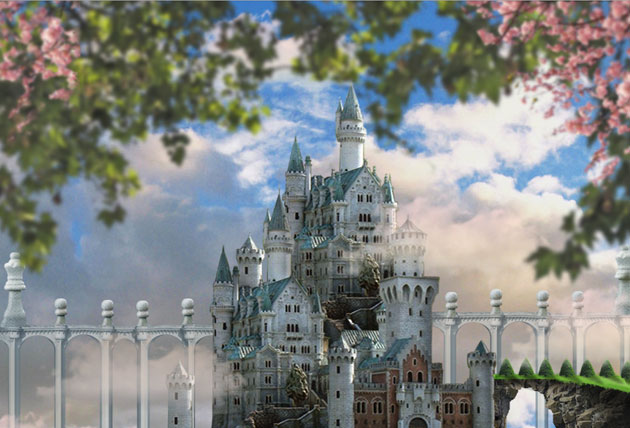
 Fairy Tale Castle
The second layer will contain the Castle stock image. So place it in the center and crop it like shown in the image. To remove the background I have used the Pen Tool to make a selection. This is not the final castle shape, we are going to adjusted in the following steps.

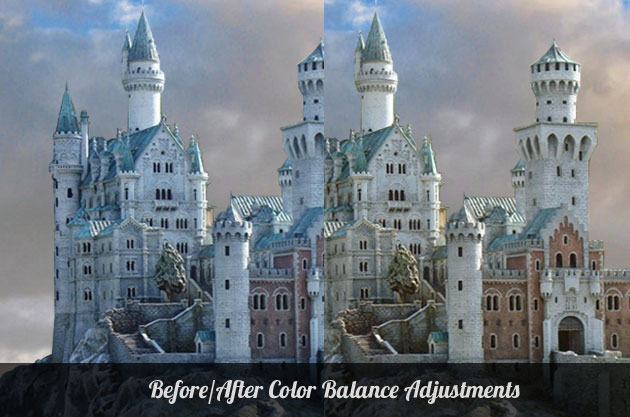
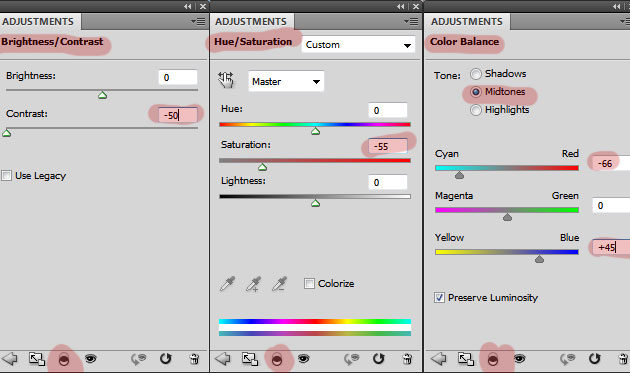
Open the Image> Adjustments>Color balance and change the Midtones colors to remove the blue tone from the Castle stock image. If youy want to use a non invasive color change you can use a adjustment layer
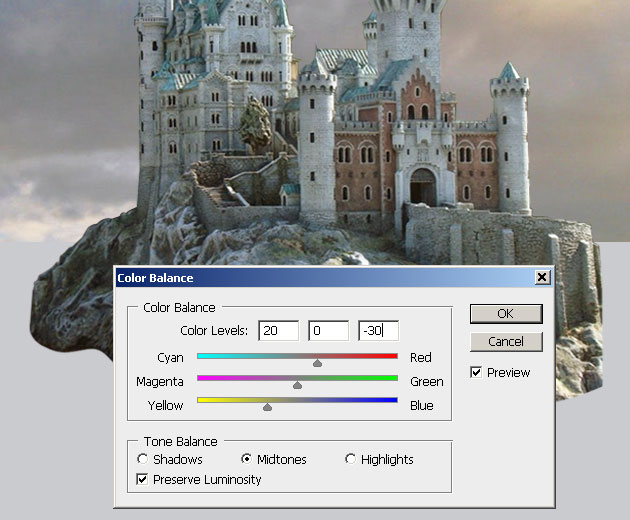
Here is the before and after Color Balance Adjustments. You can see that the castle tone colors match even better with the Sky color after these changes.
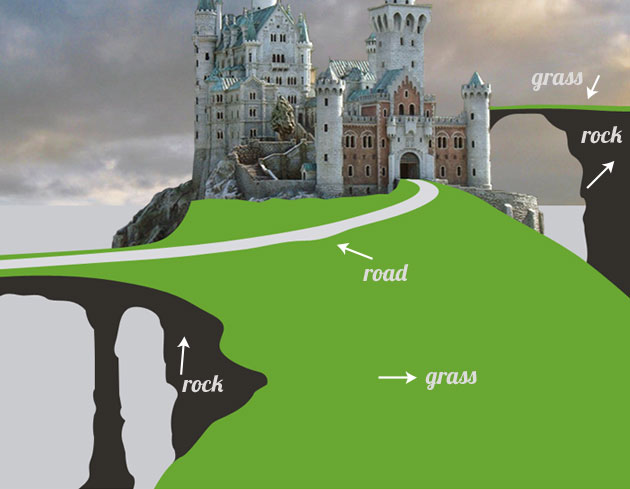
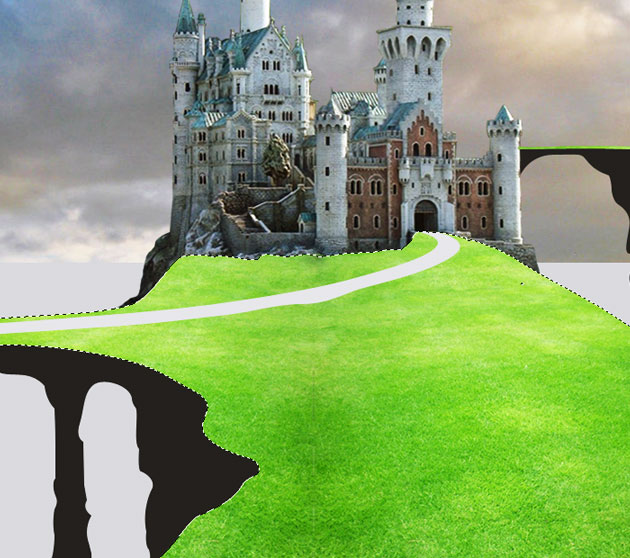
With the help of the Pen Tool, draw the scene. There are five shapes, two for the rock, two for grass and one for the road. That way it will be very easy to texture each of these shapes.
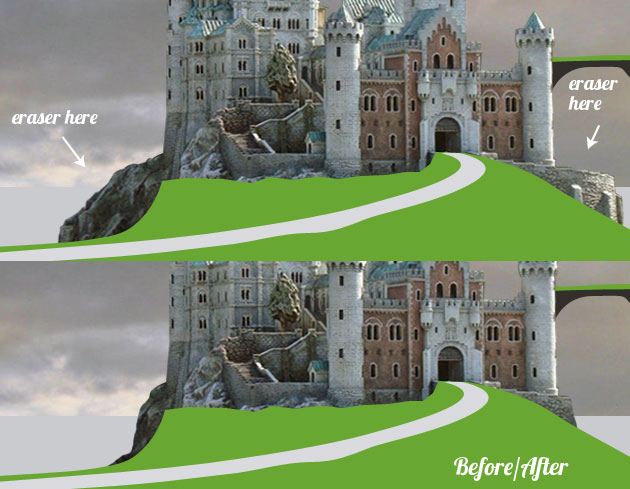
Before we begin to texture the shapes created above, let's use the Eraser Tool to delete some parts of the Castle Layer and blend it better with the new added shapes.
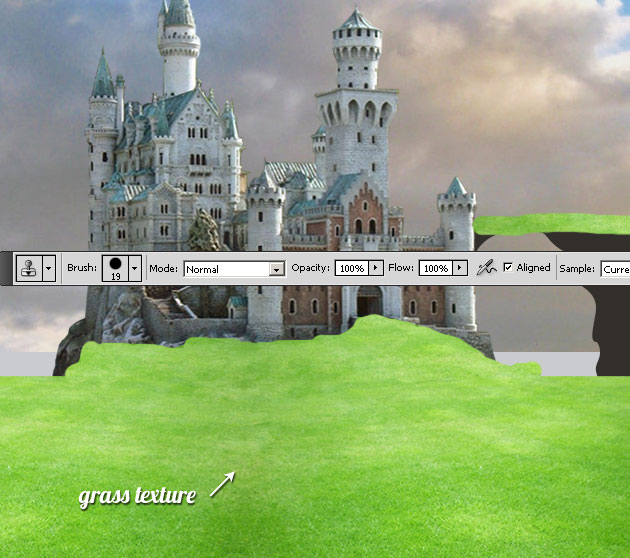
Resize the Grass Texture and duplicate it to cover the entire grass shape area. You can use the Clone Stamp Tool to fill and fix the missing parts.
Select the Grass Shapes (press CTRL and click on the Vector Mask Thumbnail) and make a layer via copy(CTRL+J) from the Grass Texture layer.
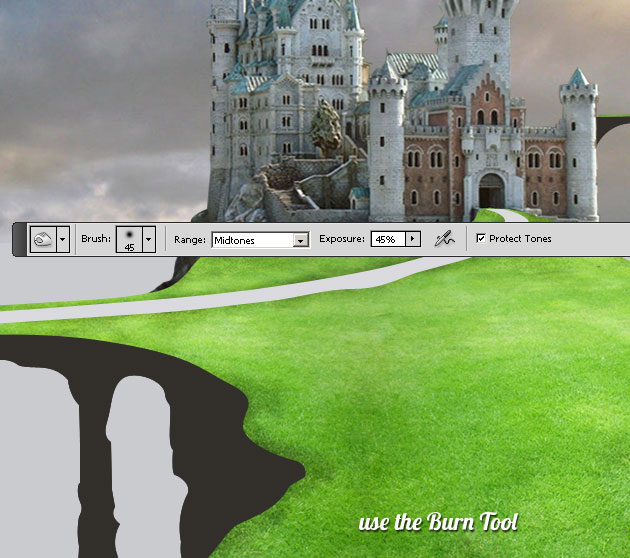
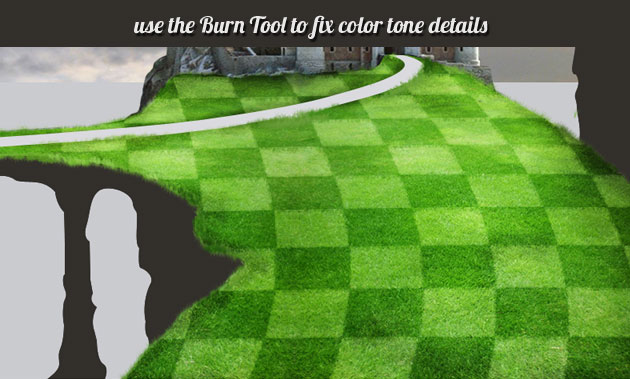
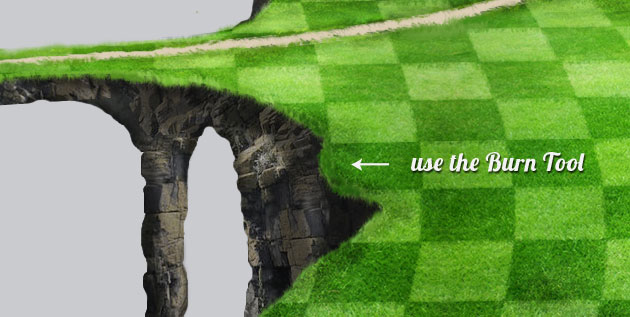
Use the Burn Tool to darken the area along the road path. Use the same tool to create depth and a 3D look.
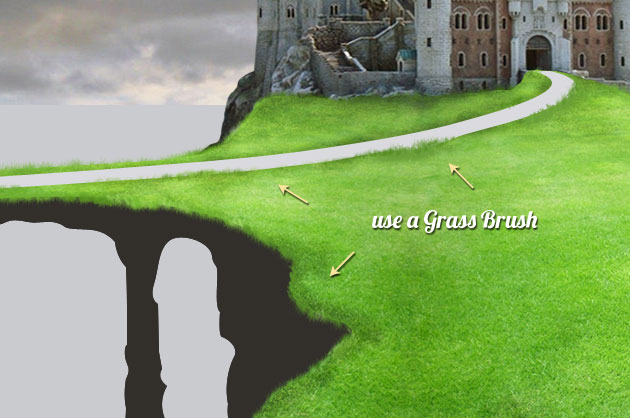
Create another layer below the Grass Texture and call it Grass Brush Layer. Use a grass brush to add some grass along the grass shape edge. This grass brush is made using the predefined Grass Brush that comes with the CS3. Use different tones of green color. Use the Eyedropper Tool to find a similar color to the grass area that you are painting under.

In a similar way add grass along the Road Path and other areas. Make sure you place this new Grass Layer above the Road Path Layer. You can change the size of the brush and you can use the Dodge/Burn Tools to adjust the color.
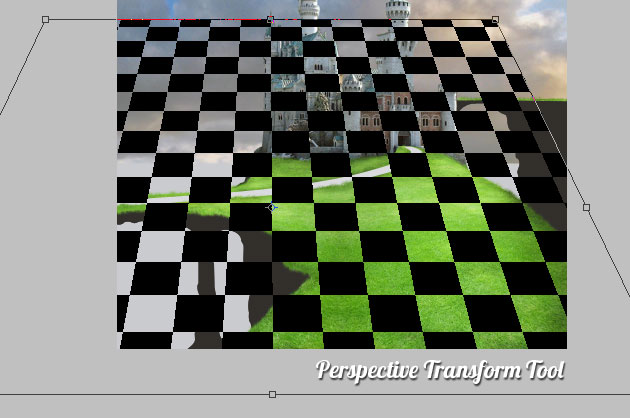
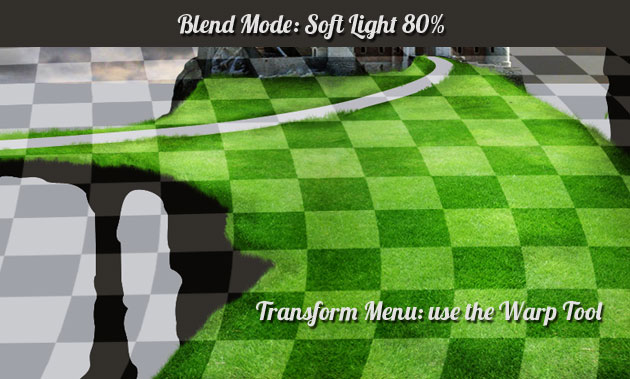
In this step I will use a simple Chess pattern. Use the Perspective Tool to distort the Chess Pattern Layer like shown in the image.
Set the Blend Mode of this layer to Soft Light 60%. Use the Warp Tool from the Edit> Transform menu to distort the chess pattern to follow the landscape shape.
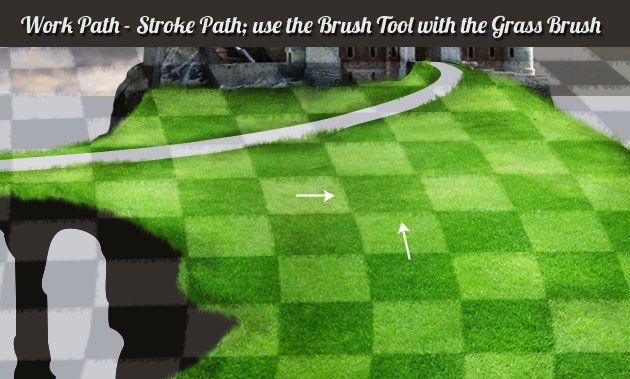
Select the Chess Pattern Layer shape (press CTRL and click on the Layer Thumbnail), transform it into Work Path and Stroke Path using the Grass Brush. The color for the brush is black, 100% opacity.
Select the Grass Shapes (press CTRL and click on the Vector Mask Thumbnail), expand it by 2px and add it add Layer Mask for the Chess Pattern Layer.
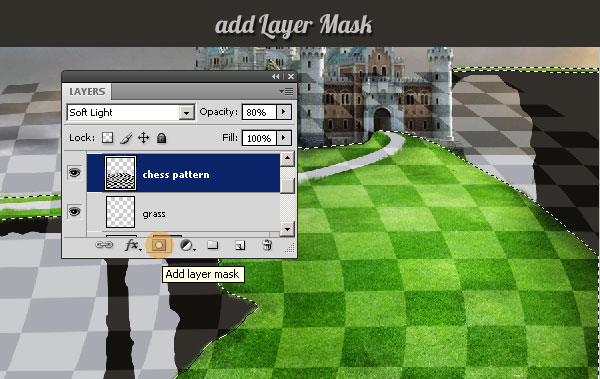
Make sure you place the Chess Pattern below the Road Layer. Adjust the Grass Brush Layer using the Burn Tool so that all the layers added so far blend well one with another.
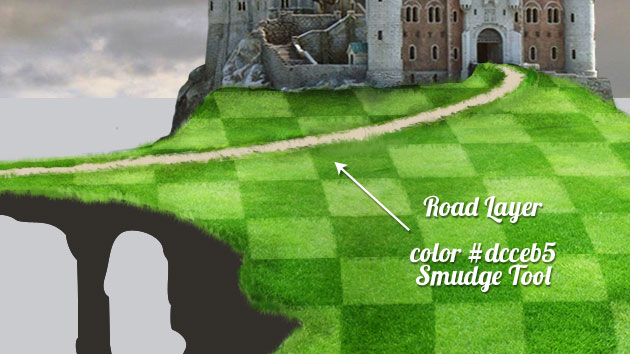
For the Road Layer choose #dcceb5 as color and rasterize it. Use the Smudge Tool to integrate to road with the grass.
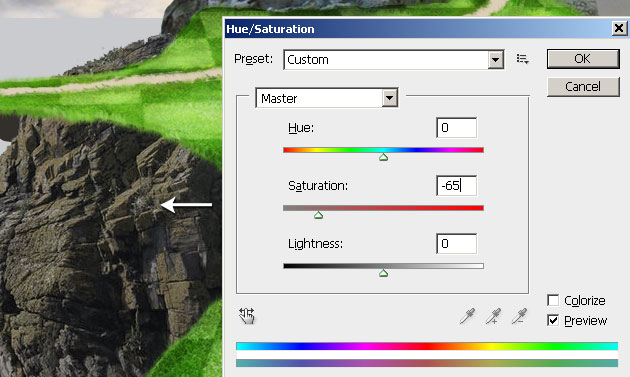
Use the Little Island stock image and use the Hue/Saturation adjustment layer to desaturate the colors, like shown below:
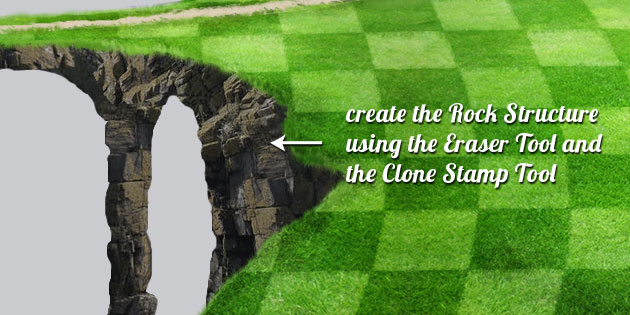
Use the Eraser Tool to delete some areas from this texture and to model it after the Rock Shape. You will have to duplicate some areas and blend them together to obtain a realistic stone structure. Whenever is necessary use the Clone Stamp Tool to add missing areas from different parts of the Little Island rock texture.
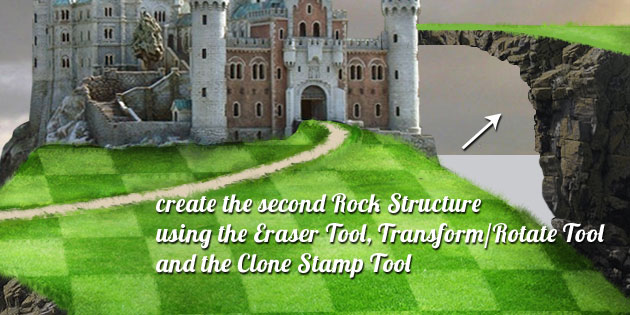
For the Rock Structure from the right side of the image you have to resize the texture and use the method from the previous step. Don't forget to also use the Transform/Rotate Tool to obtain different rocks.
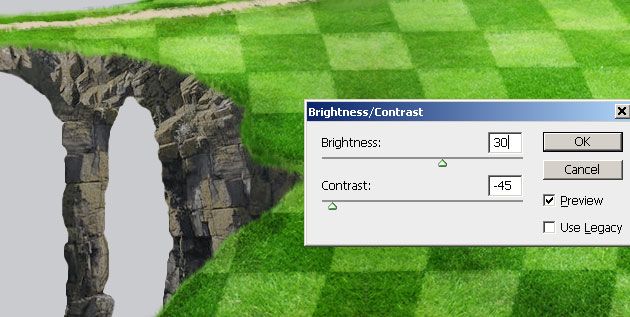
Change the Brightness/Contrast balance for the Rock Structure layer and also use the Burn Tool to darken some areas:
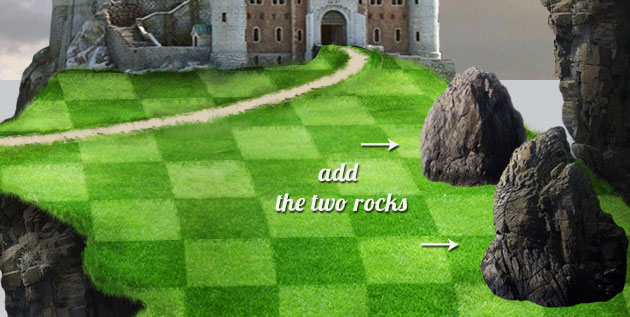
Using the Little Island stock image and the Rock 1 Stock image add two rocks like in the image. Resize and adjust the color of the two rocks. Use the Eraser Tool to adjust the shapes of the two rocks. You can even use a Gradient Overlay(Soft Light 85%) with a transparent black(100%) to black(0%) gradient map, so that the lower part of the rock to become darker. The idea is to blend all the pieces together as good as possible.
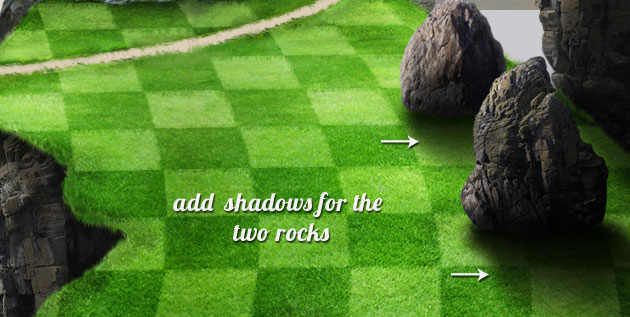
Duplicate the two Rock Layers and Flip Vertical. Use the Perspective Tool to distort the layers. Use the Gaussian Blur to soften the edges. Make the Shadows black and reduce the opacity to make them look more realistic. If necessary use the Eraser Tool with a Soft Round Brush and different opacity levels to adjust the shadows and to make them look like in the image. Learn more about how to cast shadow in Photoshop
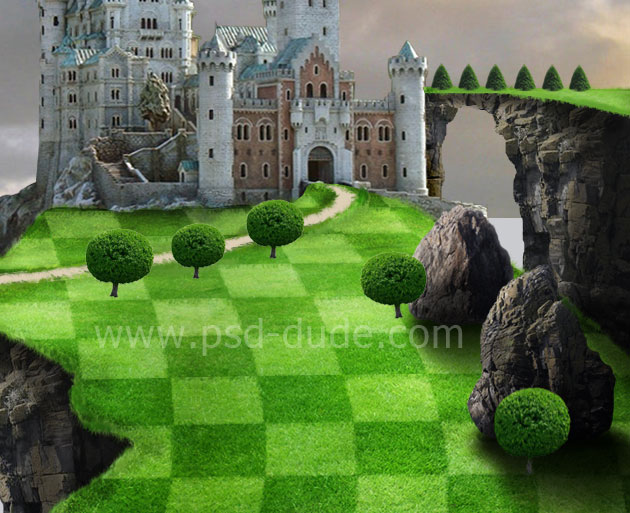
I will now use these tree PNG stock image to add several trees around the landscape. Duplicate and resize the trees like shown in the image. Use another garden trees stock image to crop some trees and place them on different spots.
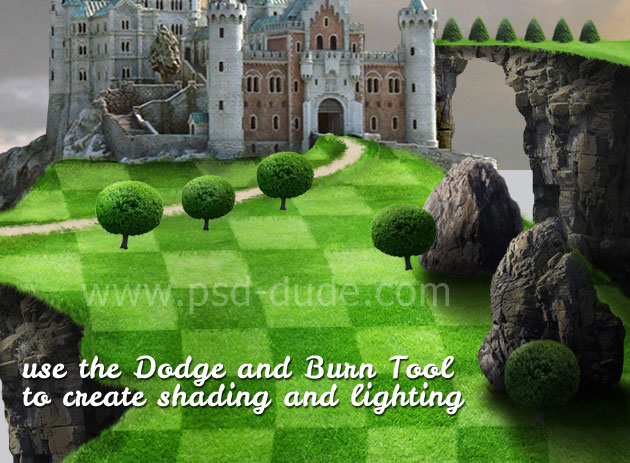
Use the Burn Tool and the Dodge Tool to create shading and lighting for each tree according with the light source.
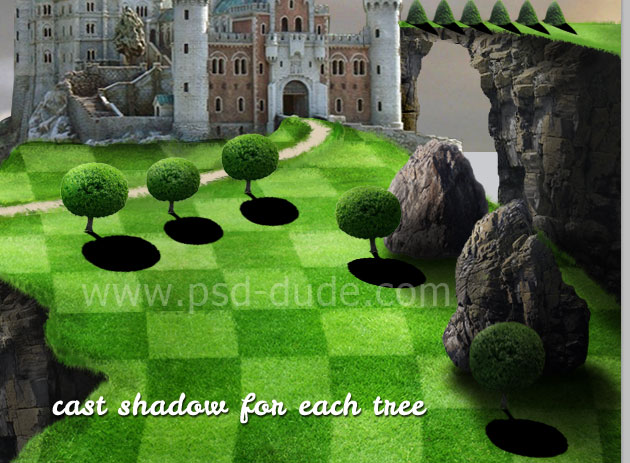
To create a realistic effect you will have to add a shadow effect for each added tree. Here is how you can cast realistic shadow in Photoshop
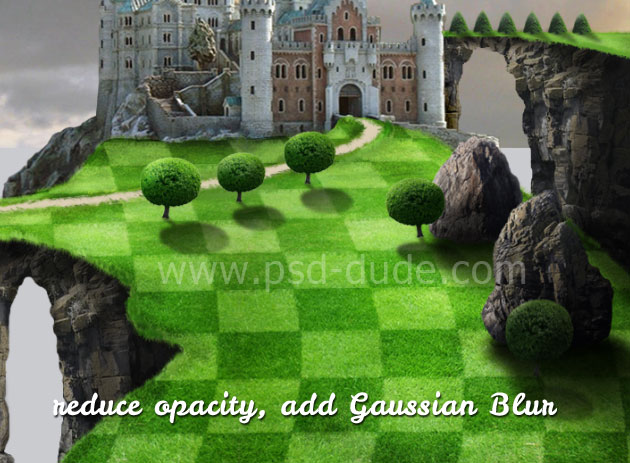
Reduce opacity for the shadows and also add a Gaussian Blur effect.
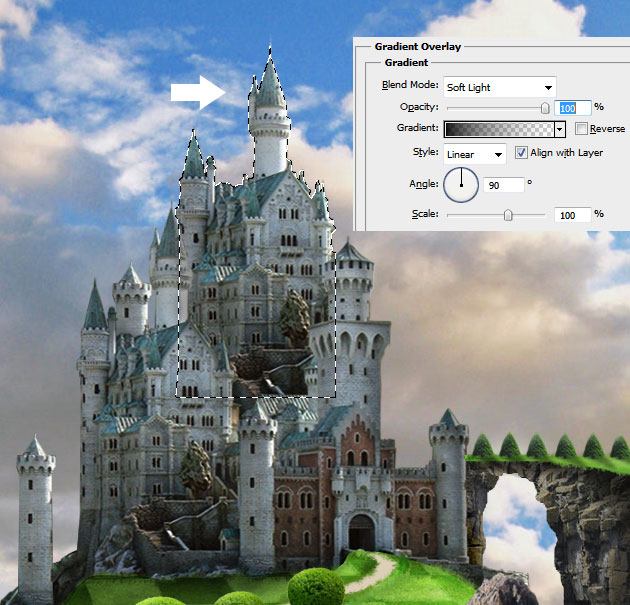
I want to make the castle taller and look more impressive; for that I will make a selection from the initial castle image and simply make a Layer via Copy. Place the castle selection behind the initial Castle layer; also darken the bottom area using a Gradient Overlay with Soft Light blend mode.
Use this Bridge Paris stock image, use a Selection Tool and simply remove the background. Resize/rotate/transform the bridge and place it like shown in the image.

To fix the color, saturation and lightness issues for this image I will add three adjustment layers: Brightness/Contrast, Hue/Saturation and Color Balance
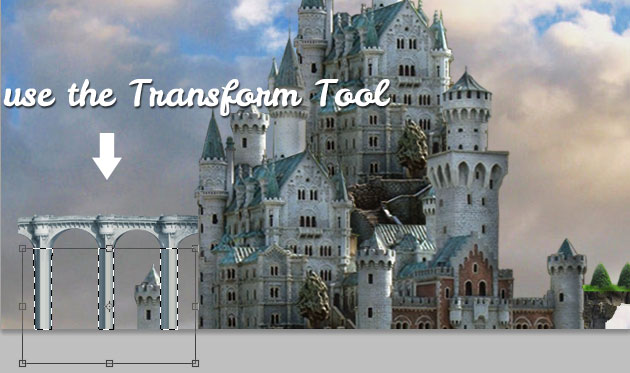
To make the bridge taller simply make a selection like in the image and use the Transform Tool to add height.
Duplicate the Bridge Layer with the Adjustment Layers and place them one near the other like shown in the image.

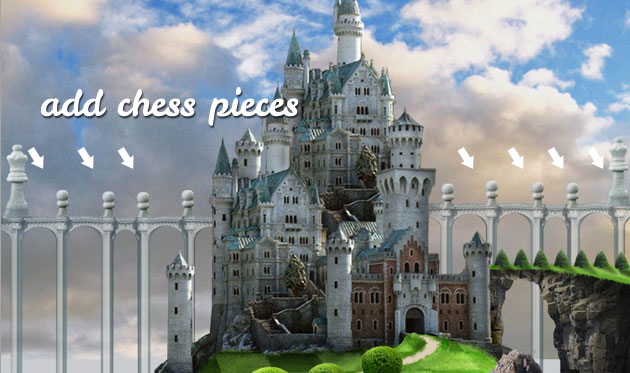
To make the castle look more creative I will add some chess pices like chess pawn and Chess Queen to the bridge; you can add on the castle too. Use adjustment layers like we did for the bridge stock image.
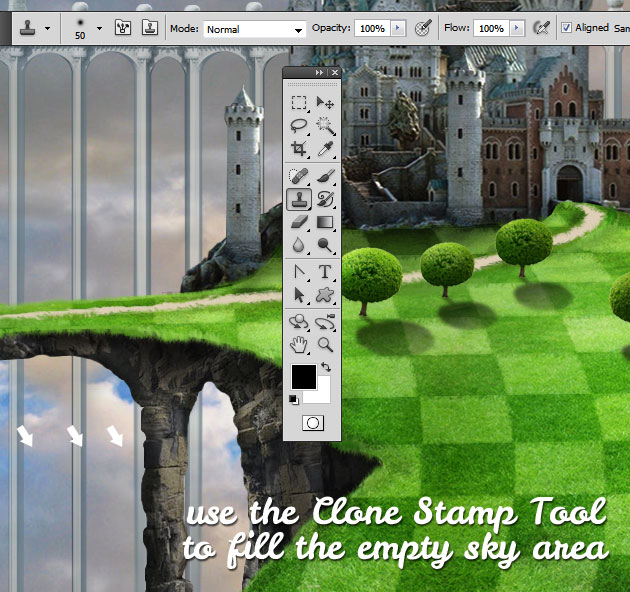
Now let's fix the sky area; simply go to the Sky Clouds layer and use the Clone Stamp Tool to fill the empty area.
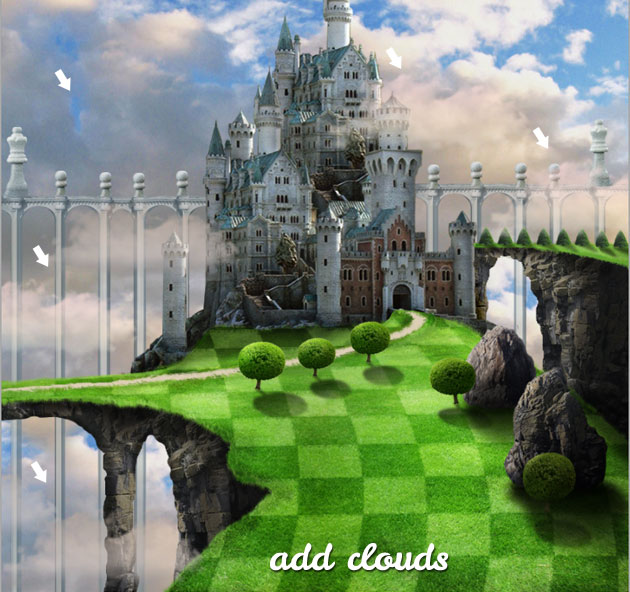
Use some realistic clouds brushes to add clouds in different areas over the castle, bridge, etc to obtain a soften look; you can even use the Clouds Filter (black and white color, blend mode Screen)
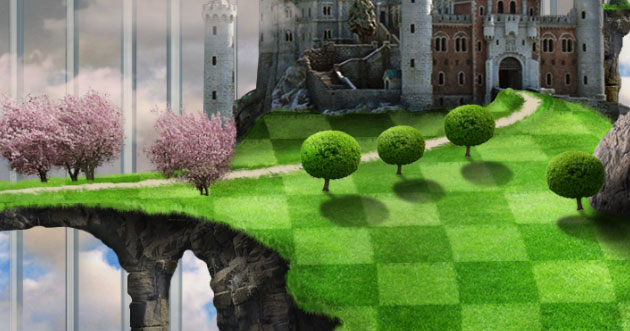
I will also add some cherry blossom trees. Use a Selection Tool and also the Eraser Tool to cutout a few trees. Use a Spatter brush for the blossom area to obtain a realistic cutout.
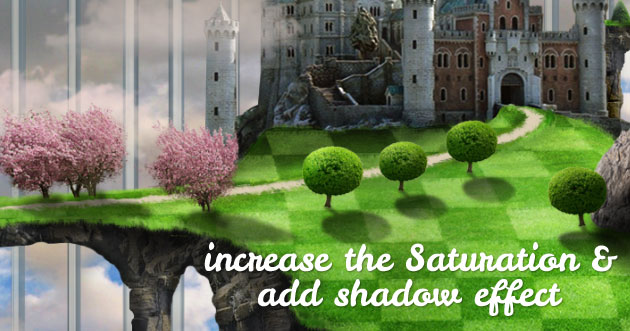
Increase the Saturation a little bit for the cherry trees and also add a cast shadow effect for each tree.
I will now create a nice frame effect for this fairytale photo manipulation using this leaves PNG stock image. Simply add the stock image and use the Eraser Tool to adjust the leaves so that you obtain a good look of the castle. I have also added a soft Gaussian Blur

In the same way add over the leaves this cherry blossom stock image. You will have to remove the background and to add cherry flowers creatively. Use also the Gaussian Blur filter.
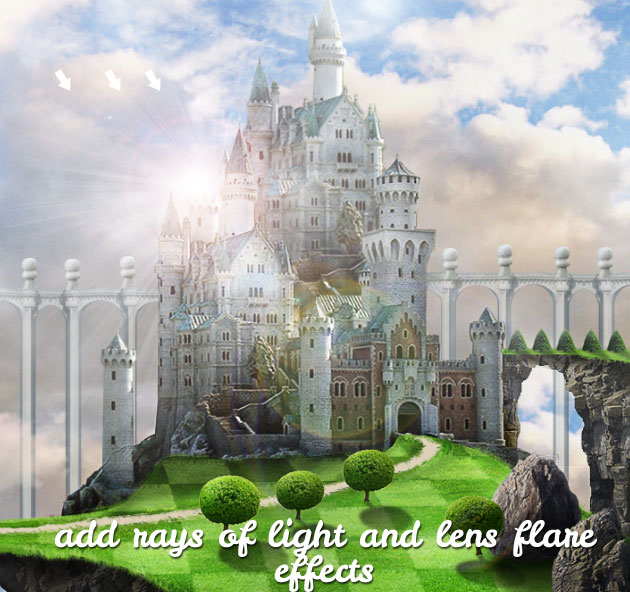
So this is the end of the tutorial. All you have to do is add a little light effects; add some rays of light brushes in a new layer. I have used "burst 2" from this set. Also I have added other light effects by using these lens flare brushes.
To adjust the color tones you can use a Photo Filter adjustment layer or you can add a Gradient Map with the colors that you want or you can use both.
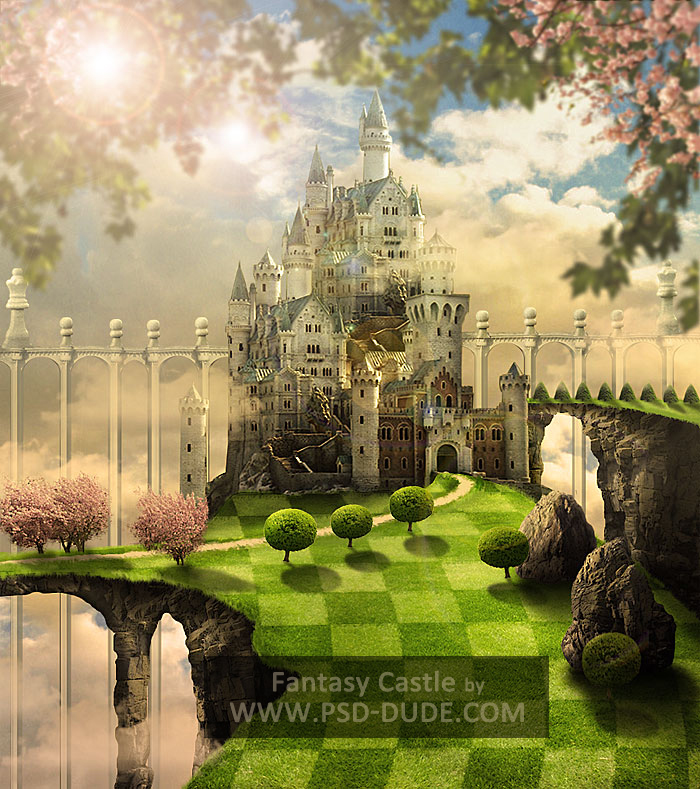
Here is the final result for this fantasy castle photo manipulation inspired by the White Queen Castle from the movie Alice in Wonderland. I hope you've enjoyed this new Adobe Photoshop tutorial and I am as always waiting to see your results!

19 comment(s) for "Create a Fantasy Castle in Photoshop Inspired by The Movie Alice in Wonderland"
just 1 thing is disturbing me and that is light of the building.
your light source is on left side so that's why your highlights should be on left side and shadow on right side. it's my suggestion. reply
http://www.youtube.com/watch?v=vd3z44g36Og#t=125
how to use the Pen Tool to create shapes in Photoshop. reply
I was told once if you have nothing nice to say dont say it.
reply
reply
Here is my realization:
http://www.chez-mireilled.com/article-un-chateau-merveilleux-avec-photoshop-119015298.html
reply