


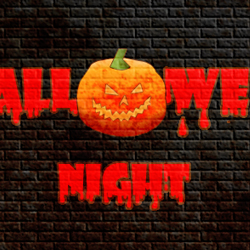

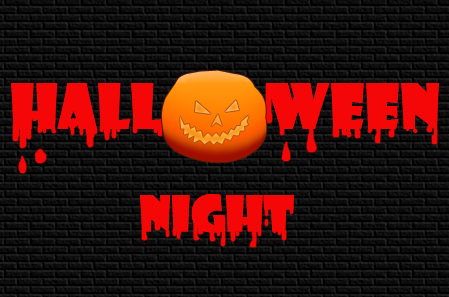
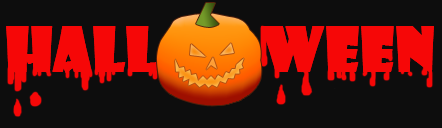
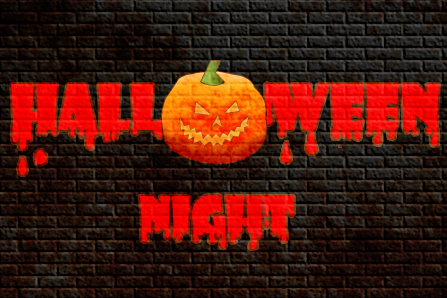
This is one of my first Photoshop tutorials so it really needs a little update; so I have made another preview image for the Halloween graffiti. You can take as a reference this wall paint effect tutorial; the only change is the dark color that can be obtained with a simple Brightness/Contrast adjustment layer and also a vignette. For the background I have used a brick wall texture; for the font I have used this Halloween Blood Font and also this pumpkin shape. The text and shape is blended with the brick texture using the Color Dodge blend mode.
Step 1 - Find a Halloween Text
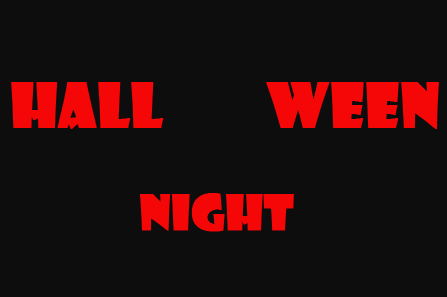
Open a new psd document 450(width) / 300 (height) pixels. With the help of Rectangle Tool draw a black rectangle and call this layer Background. Now I need a nice text font and the best I could find in my photoshop font family list is Showcard Gothic . Of course you can look for other font family in the free large databases available on the internet. So write 3 text "HALL" , "WEEN" and "NIGHT". For the two text "HALL" and "WEEN" I did those settings, the red color is #f60707.

For "NIGHT" text I did the following settings, the red color is also #f60707.

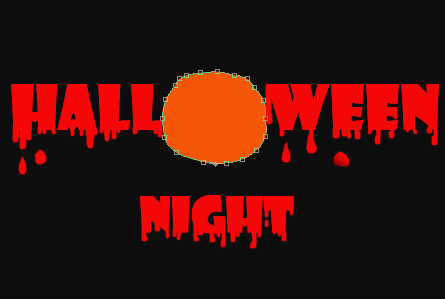
So far I have 4 layers and my psd image looks like that. As you can see in the image below there is an empty space instead of "O" letter. I will draw there a nice looking Halloween pumpkin.
Step 2 - Text tunning
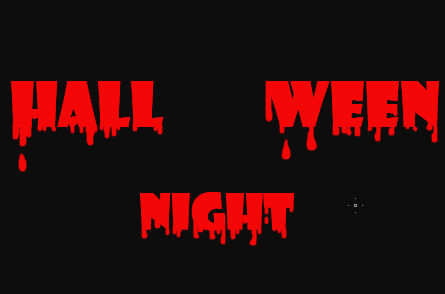
Select the two layers "HALL" and "WEEN", right click and select Rasterize Type. Than select one more time the layers, right click again and choose Merge Layers this time. Set the foreground color #f60707. Now with Brush Tool, size 4 , opacity 100%, draw blood drops from the text.

Rasterize the "NIGHT" layer and draw the same blood drops. You will have to obtain something like this:
Step 3 - Draw the Halloween Pumpkin
Lets draw a simple pumpkin shape with Pen Tool. Call this layer Pumpkin.
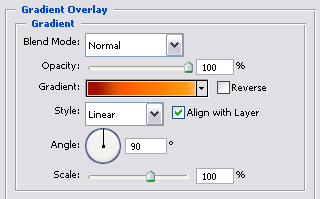
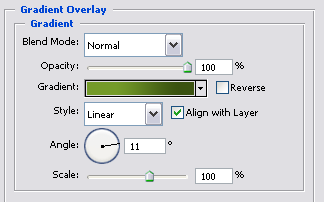
The shape is nice but the color is too flat so I have to apply a gradient. The problem is that if I go to Blending options of Pumpkin layer , the style is only linear, radial, angle, reflected and diamond. I don't like either of this styles. So I will draw another layer, a rectangle. Call this layer Pumpkin Shadow. Place this rectangle above the Pumpkin layer. To this layer I will add a gradient. Lets go to Blending Options, check Gradient Overlay and do this settings:
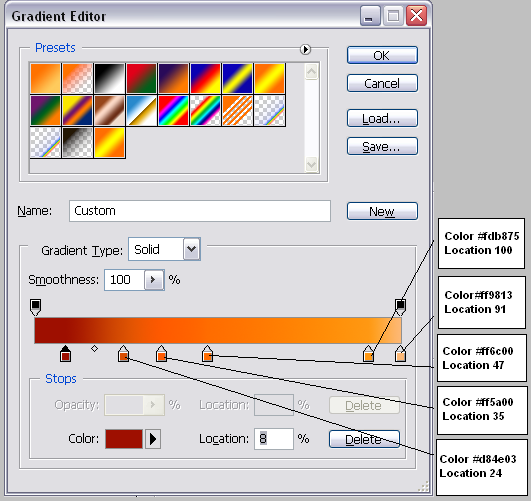
For the gradient I've chosen this colors for the gradient:
Step 4 - Apply the Gradient to the Halloween Pumpkin
The next step is to adjust this layer to take the shape of Pumpkin layer. To do that we will use Warp Tool. But first duplicate this layer and merge the two layers Pumpkin shadow and Pumpkin Shadow copy. Set the opacity of this new layer to 95% to be able to see also the Pumpkin layer. Now go to Edit - Transform - Warp and start adjusting the Pumpkin Shadow layer. As you can see I have marked with yellow dots the points that you can drag to give to the initial rectangle a round shape. It is important to drag down the 4 points inside and in that way we will obtain something between linear and radial gradient.
With CTRL pressed click the Thumbnail of the Pumpkin layer. You will see that a selection of the Pumpkin layer has been made; be careful to work in Pumpkin Shadow layer and press CTRL+C and CTRL+V. A new layer will appear; call this layer Pumpkin Gradient. Hide the Pumpkin Shadow layer and the Pumpkin layer.
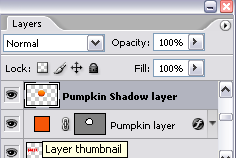
Go to Blending Options of the Pumpkin Gradient layer and set the stroke to 1 px size and color # 4d1e0b.
Step 5 - Add face features to the Halloween Pumpkin
The next step is to add nose, eyes and mouth to the Pumpkin. First you need to Zoom In the image to work with better precision.
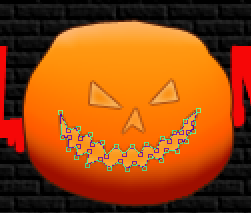
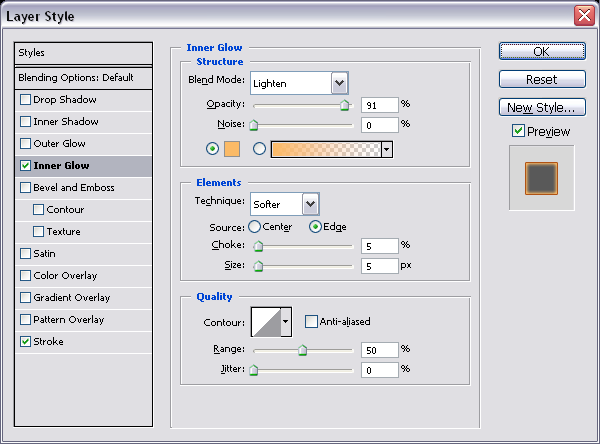
Set the Foreground color #f98701. I will draw the eye first with the Pen Tool. Than go to Blending Options of this layer and do the following settings for the Inner Glow(color # fbba66 and Stroke color # b05213) .
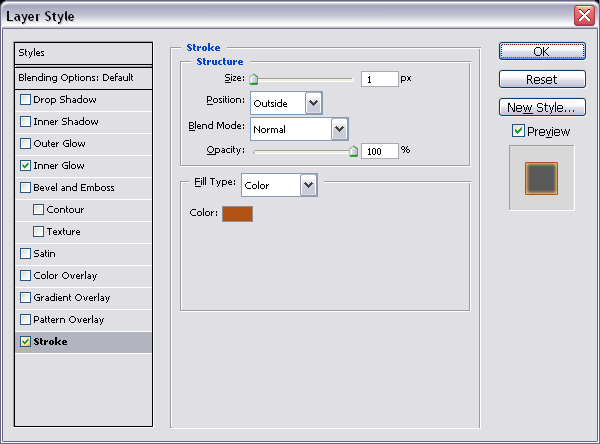
Now you can draw the other features of the face because they will inherit all the settings for the Blending Options ; other wise you will have to set them manually.
Step 6 - Add a tail to the Pumpkin
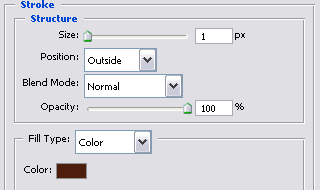
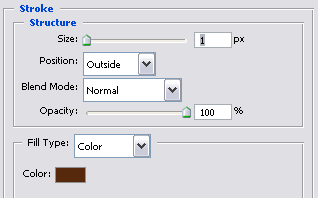
With the same Pen Tool draw a tail and apply a linear gradient. Be careful to set style linear and the angle 11, this means that the gradient will be vertical.
Set also the stroke size 1 and color # 56280c.
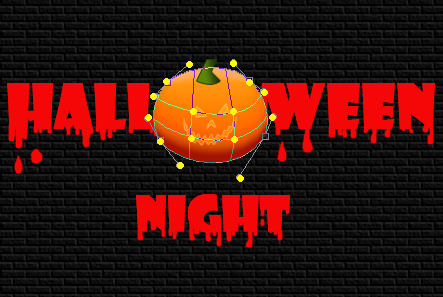
Step 7 - Add brick texture
Until we add a texture to the entire image lets add a stroke to the text layers; color #5a2810, size 2; the reason was to look more like a graffiti. And for making the pumpkin more scary take the Burn Tool and darken the area around eyes, nose and mouth.

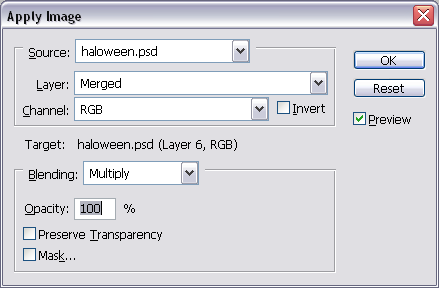
Now lets do the final retouch. Go to Layer - New - Layer. Than go to Image - Apply Image. The result is a new layer that contains an image with all the visible layers merged. Call this layer Final Image.
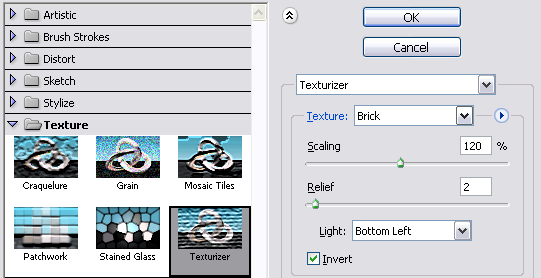
We will add now a brick texture. Go to Filter - Texture - Texturizer and choose brick texture.
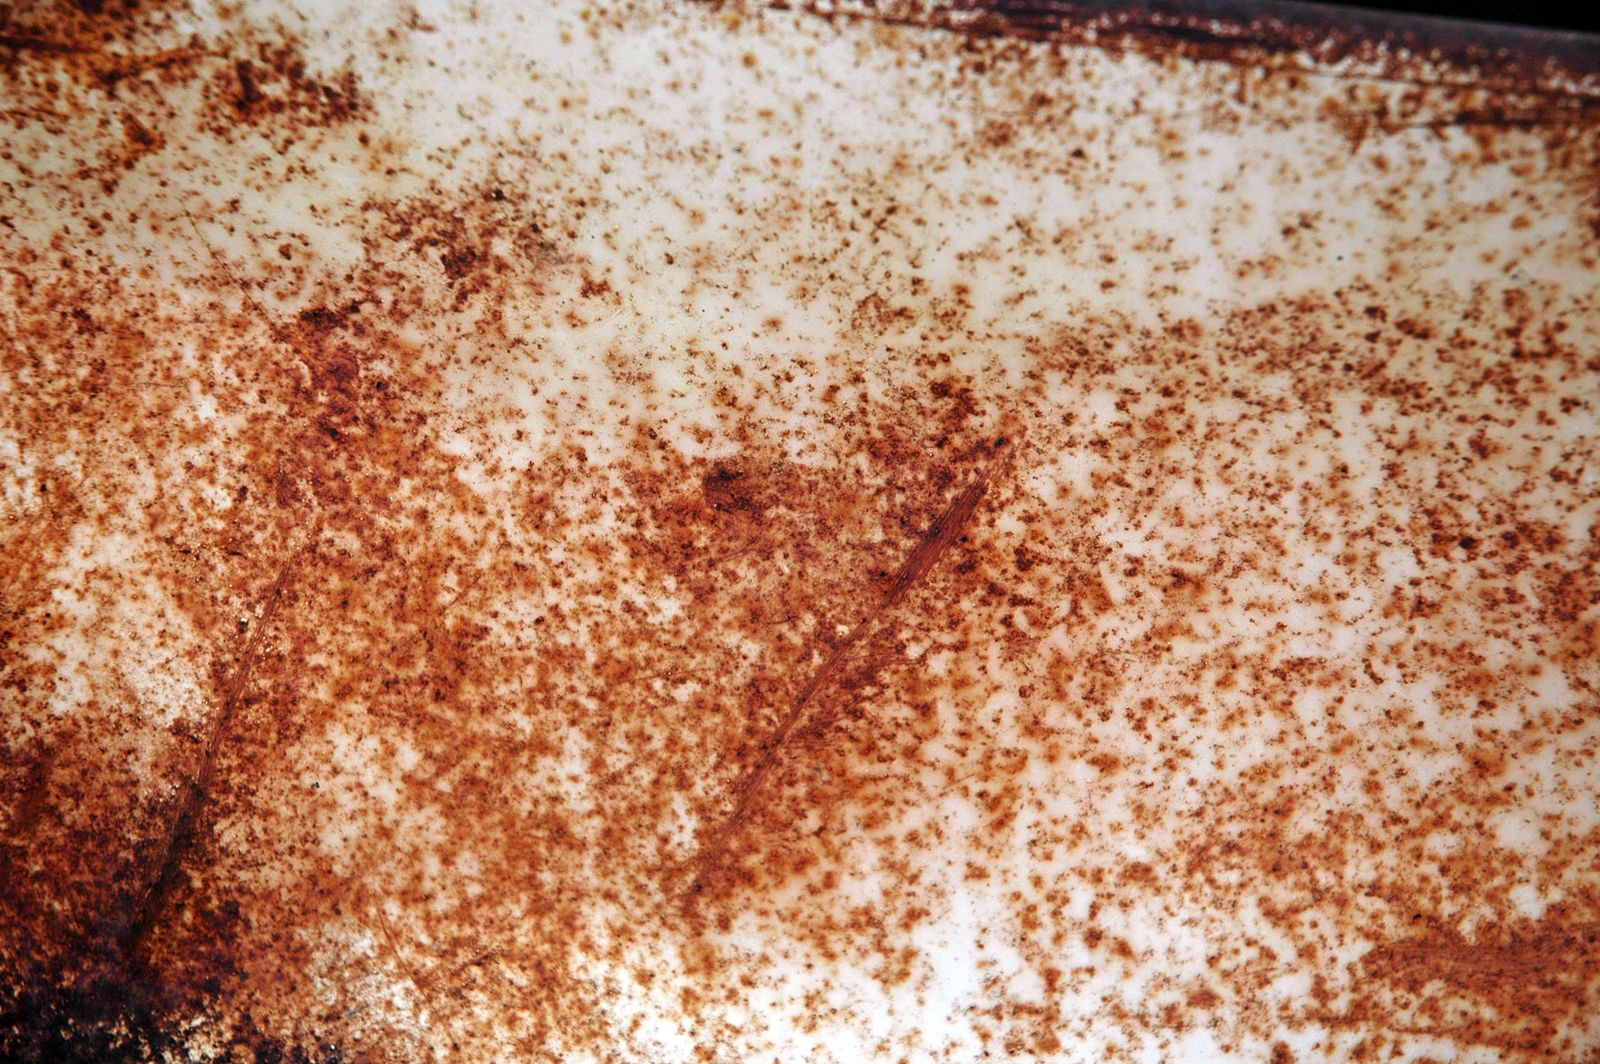
It is a good result but the color is too flat so I will add an extra texture. Go to TextureKing and download this rust texture , copy it into a layer on top of Final Image layer; than scale it to 50%(edit-transform-scale) and change the blending mode of this layer to Soft Light 100%. This is the final result!

2 comment(s) for "Halloween Graffiti Text Effect"