


Step 1 - Create the Rainbow
Create a new
document with this size:400/400 pixels.
The rainbow
contains as we know six colors.
We will star by creatinga new document 400x400 pixels.
There are many ways of drawing a rainbow, with the Pen Tool for example.
But i will use another tehnique, the easiest i guess:
1. with the Elipse Tool draw a circle with color red. You need to right click the
layer and choose Blending Options; Stroke 1px and the color light orange.
2. duplicate this layer - go to Edit - Transform Path - Scale and do the following
settings :for the width 85% and height 85%; now color this circle orange
3.duplicate this layer, scale againg with 85% and choose yellow color
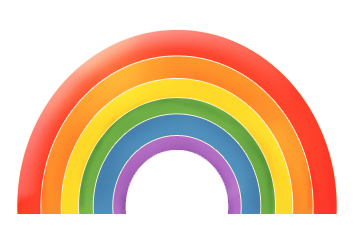
4.do the same with the other layers. the colors for the rainbow are: red, orange,
yellow, green, blue, purple.
You will obtain something like this:

Now select
all six layers and scale them with width 120% and height 140%.
Now duplicate the purple layer and scale it 80% both with and height and make it
white.
Select all the layers, right click and choose Merge layers.
With the Polygonal Lasso tool select and than delete the bottom part of the rainbow.
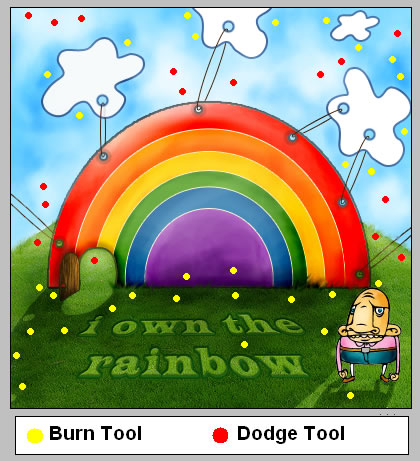
To give it some contrast choose Burn Tool and burn the lines of every color take the Dodge tool and give some light areas.
Right click on the layer and Choose Blending options and do the following settings.
Now play with opacity, i choose 85 % and this is the result so far:
Step 2 - Create the background
The grass and the sky will represent our background.
Set the Foreground color # 3dc7ff and the Background Color white.
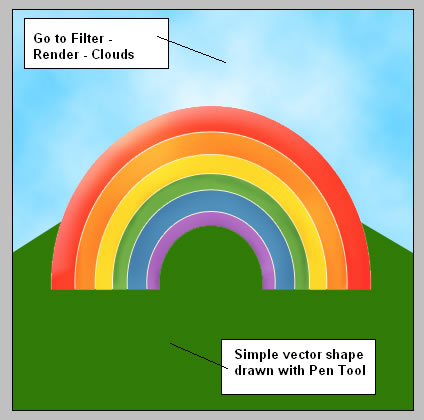
Create a new layer behind the Rainbow layer and than go to Filter - render -Clouds. Call this layer Sky Layer.
With the Pen Tool draw a grass area like in the photo below. This Grass Layer is placed between Rainbow Layer and Sky Layer.
The color for this shape is # 2f7b06.
Step 3 - Add Grass Texture
Copy this beautiful grass texture. Now i will change the Rainbow Layer to make it funnier. For that I will draw a open door and some other stuff. Let's proceed!
Draw with Pen Tool a simple door shape. Call this layer layer Door Shape. Duplicate Door Shape layer, go to Edit - Transform Path - Flip Horizontal, than move this layer like in the picture below. Call this layer Door Layer. Than go to Edit - Transform - Distort .

Step 5 - Upgrade the Rainbow - Details
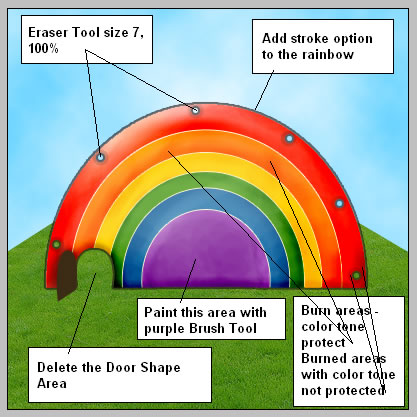
It is now time to work with Rainbow Layer. Press CTRL and click the thumbnail of the Door Shape Layer than return to Rainbow Layer and press delete. Now hide Door Shape Layer.
Set the Foreground Color # b065c2. With the Brush Tool, size 19, opacity 100% draw the purple area from the middle of the rainbow - see image.
Now go to Blending Options of the Rainbow Layer and add check Stroke option, the color is # 201212.
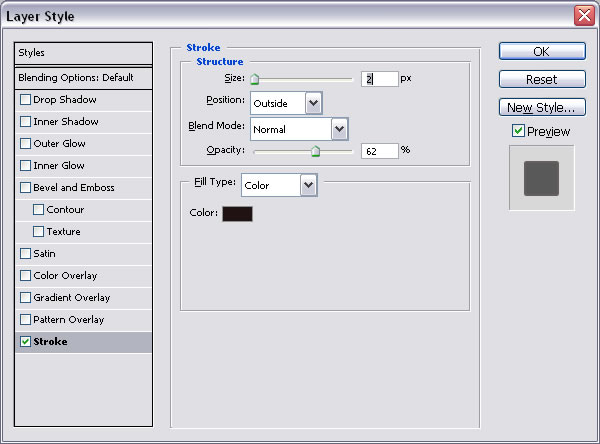
Another detail is added with the Eraser Tool, brush size 7, opacity 100%. Delete little points like in the picture below.
Now with Burn Tool make the colors of the rainbow more intense. The exposure is 8%. Choose Midtones, Shadow and Highlights. Remember that Midtones and Shadow make the color more intense, darker but with the same tone of red for example. Instead Highlights darkens the area, the color tone is not preserved.
Step 6 - Drop Shadow for the Rainbow
Press CTRL
and click the Thumbnail of the Rainbow layer. You can see that the entire area of
this layer was selected. Create a new layer, call it Rainbow Shadow Layer and than
with Paint Bucket Tool color this area with black. Go to Edit - Transform - Flip
Vertical. Move it down like in the image below and than go to Edit - Transform -
Skew.
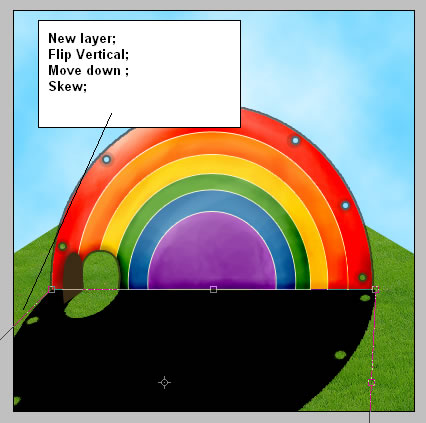
Change the Blending Mode of this layer from Normal to Soft Light, opacity 70% and you obtain a nice shadow.
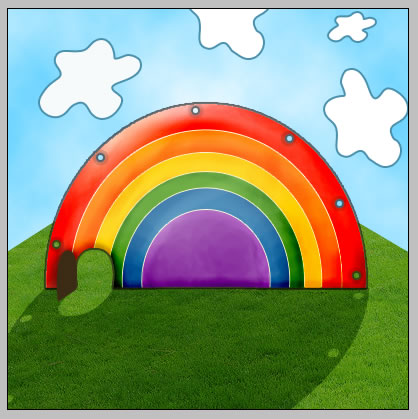
Step 7 - Add Funny Clouds
Select Custom Shape Tool and draw 4 funny clouds. Because we don't want this clouds to be identical we can change their shape with : Pen Tool (like any vector you can add, delete or move points ), rotate the cloud and/or scale.
Select all 4 layers and merge them.
The color of the clouds is white and for the merged layer I added a stroke , color # 4a77ae.
Step 8 - Link the Rainbow and the Clouds
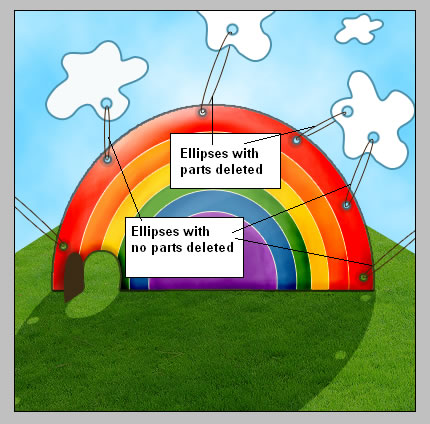
Select Ellipse
Tool and make six elllipses like in the picture below. After you draw them rotate
to different directions. A important thing is to choose the style for this shapes.
No background only edges.

Select all six layers and merged them.
Return to Cloud Layer and with Eraser Tool size 12, opacity 100% erase parts of the clouds to look like the rainbow is linked to the clouds.
We have to delete with the Eraser Tool parts from the ellipse layer like in the picture below.
Step 9 - Add Texture to the Door
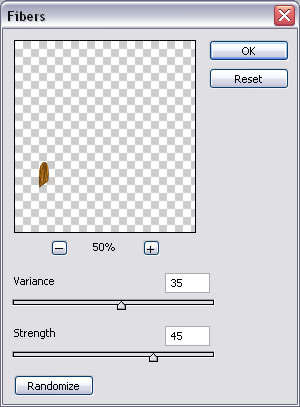
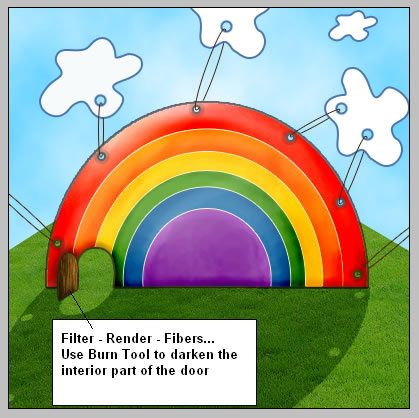
Return to Door Layer. Set the Foreground Color to # 663f0b. Go to Filter - Render - Fibers. Than with the Burn Tool, range highlights, exposure 8%, burn parts of the door. Go to Blending Options and check Stroke option, color # 23290d, size 1.
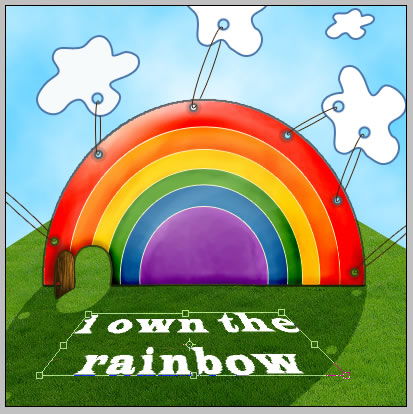
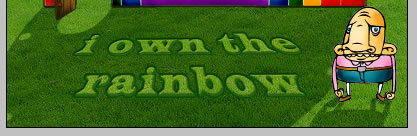
Step 10 - Add a Grass Text
I will now add a nice text on the grass. The settings are shown below.

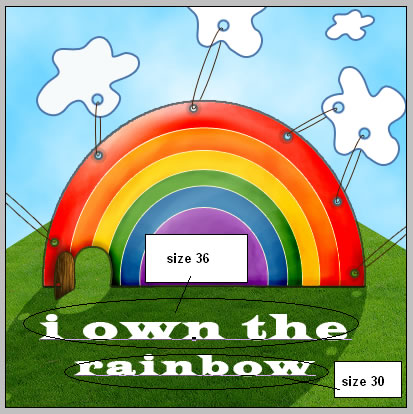
Right click on the layer name and choose Rasterize Type. Now go to Edit - Transform - Distort
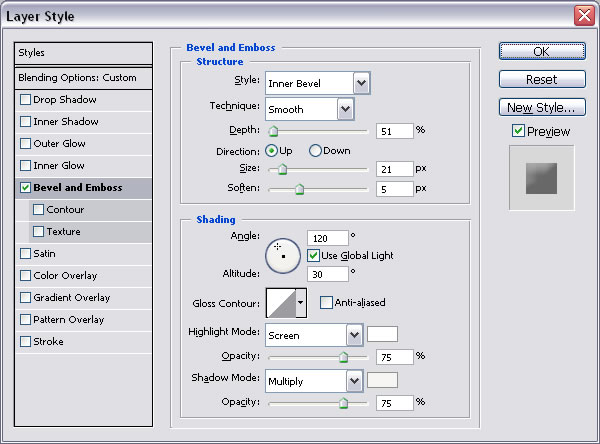
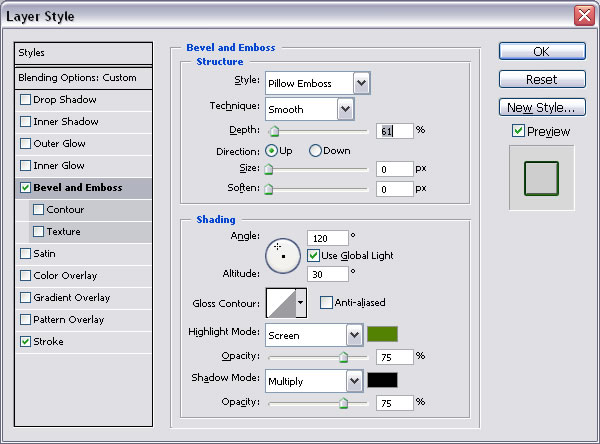
Now go to Blending Options and check Bevel and Emboss with the settings:
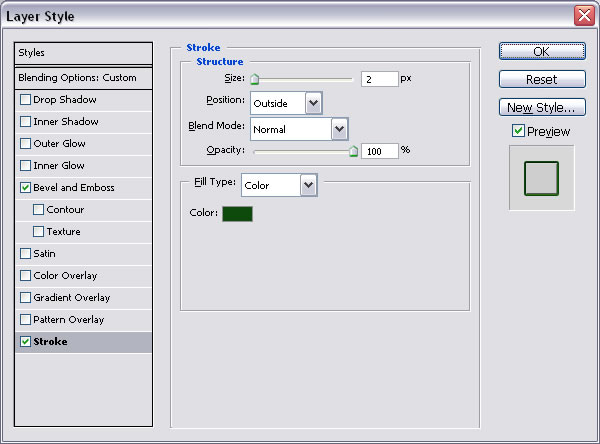
Check also Stroke option with the settings:
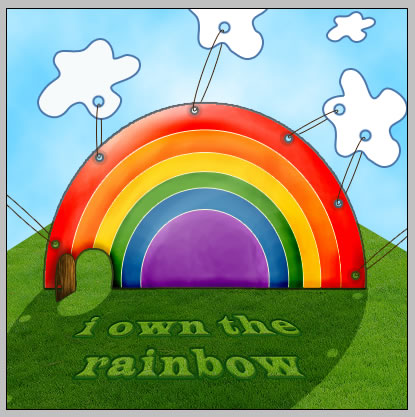
Now change the Blending Mode from Normal to Soft Light 100%. Your result should look like this so far :
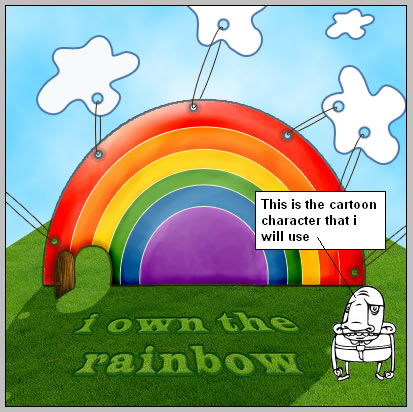
Step 11 - Add a Funny Cartoon Character
Browsing the internet I have found this really nice set with free vector. This is the character that I will use. As you can see it has no colors so it doesn't blend with my image. But with photoshop you can do anything.
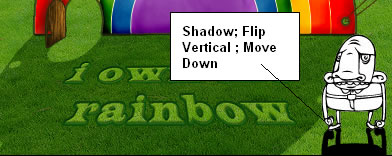
Duplicate the cartoon character and call it Cartoon Shadow. Create a new layer under this one, press CTRL and click the thumbnail of the Cartoon Layer. Return to the new created layer and with the Paint Bucket Tool color the selection with black.
Now go to Edit - Transform - Flip Vertical. Move it down and place this layer under the Cartoon Layer.
Now go to Edit - Transform - Distort
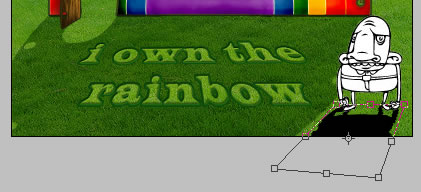
Change the Blending Mode of this layer from Normal to Soft Light 73%.
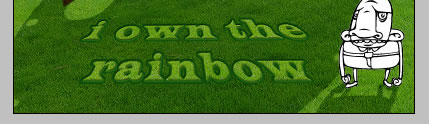
Step 12 - Color the Funny Cartoon Character
It is easy to give color to a character. Simply create a new layer above the Cartoon layer and with the Brush Tool, size 9, opacity 100% , paint over the character.
Skin color ffe5a5 ; Shirt #fcb9dd;Pants # Now change the Blending Mode of this layer from Normal to Multiply 100%.
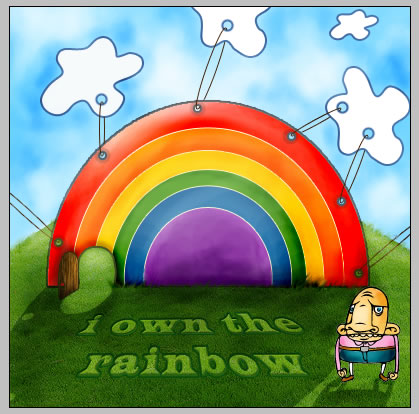
Step 13 - Final Details
For this stept create a new layer on top of all the others. Go to Image - Apply Image...you will see that a new layer was created that contains all the visible layers merged. This step is entirely up to you, your imagination and your taste. With the Burn Tool and the Dodge Tool give the image contrast. You can easily see the difference between the two images; the sky was modified, the grass
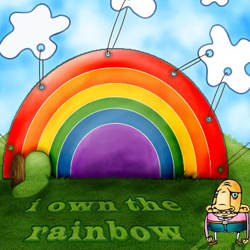
And my final image is:

4 comment(s) for "Funny Cartoon Rainbow"
thanks for sharing reply
I love cartoons ! reply