


NEW! If you want to make comic book pages, download our comic strip template pack and use it for your photos. We made this PSD file especially for all the comic book fans!
How to Make a Comic Book Effect in Photoshop
I've studied other tutorials before creating my own comic book effect so if you want to see how other people created comics effect, check out this list of Photoshop Comic Effect Tutorials
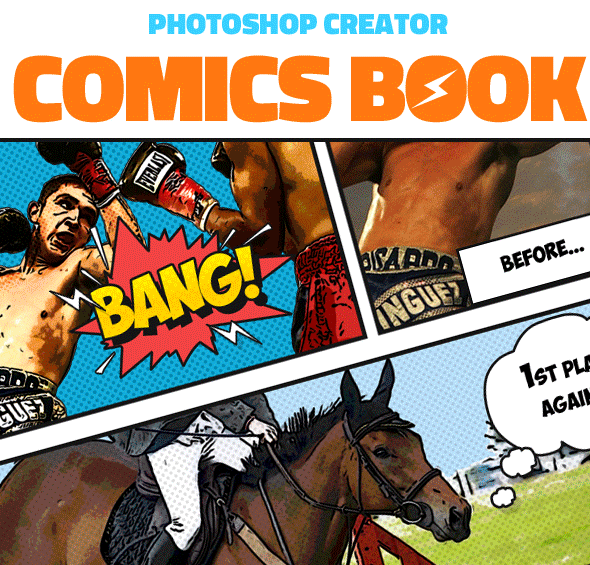
Take a look of the before and after preview image. So you will get a picture on what we'll be creating in this tutorial.
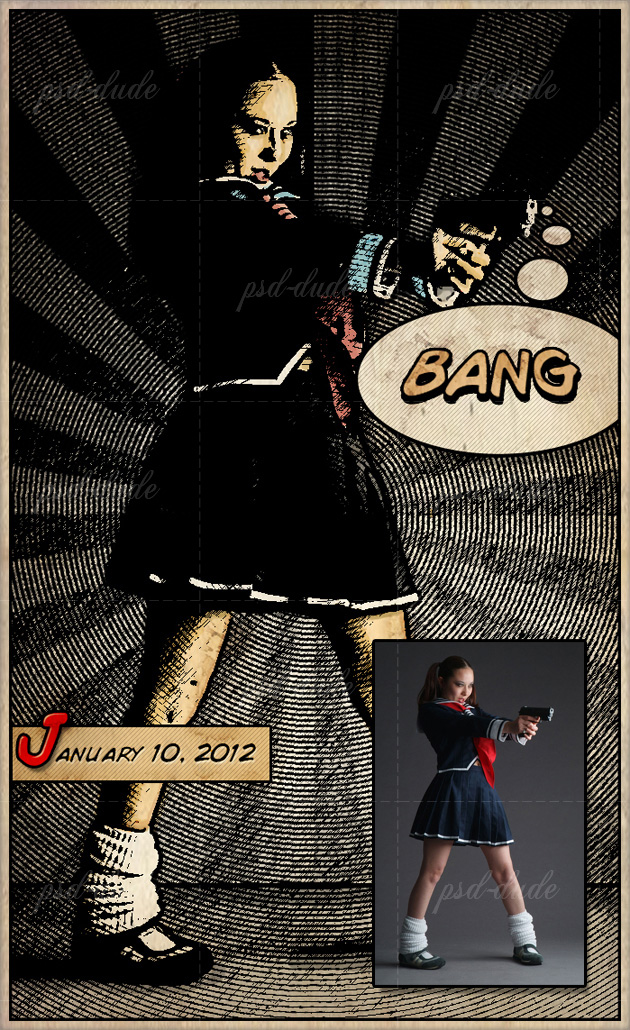
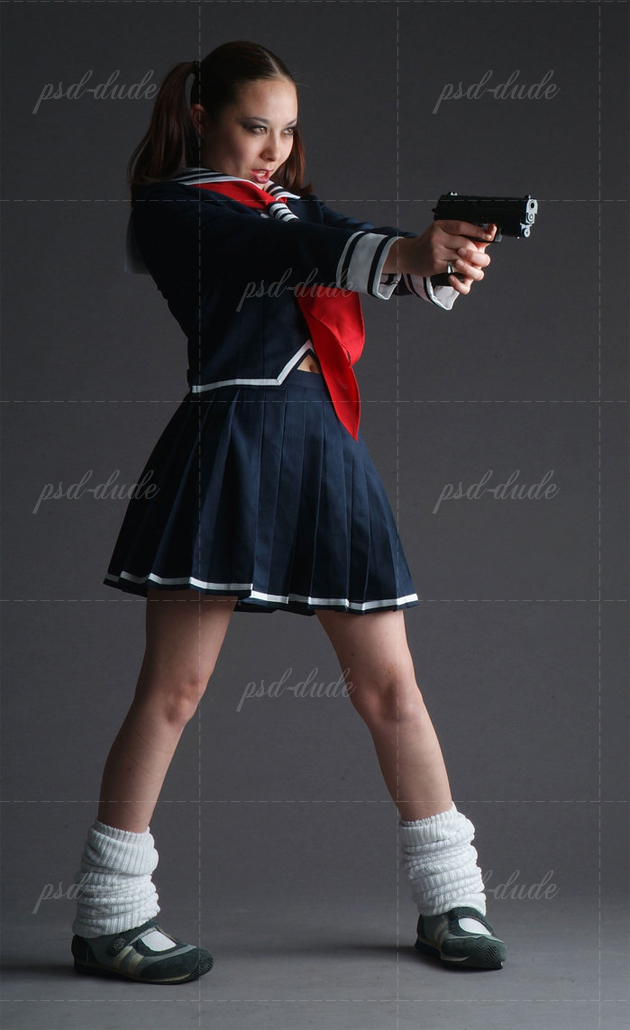
So let's star by opening the School Girl in Photoshop. Beside the fact that is a really good photo, this image has all the elements of a comic book image: a cool School Girl character, action/motion and a good balance between the focus element and the background.
The first conclusion is that not all the images can be transformed with good results in a comic effect image so you have to choose carefuly.
Duplicate the Girl Layer and change the Brightness/Contrast Balance. You will have to adjust the parameters two times as shown in the image:

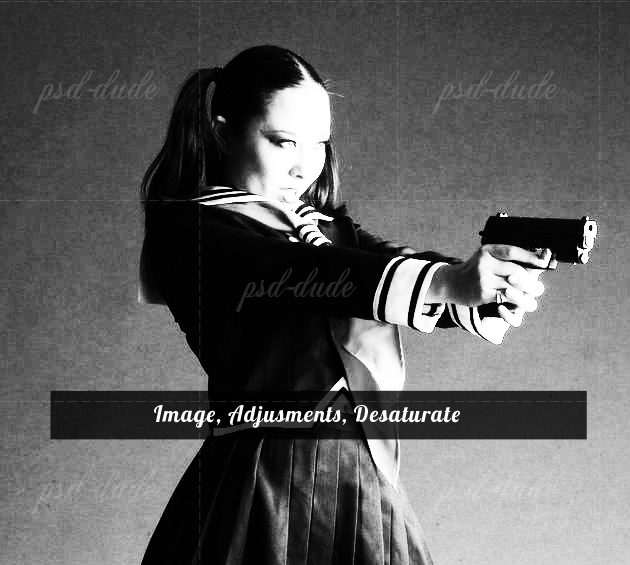
Duplicate the previous layer and desaturate the image. Go Image, Adjustments and choose Desaturate.
Photoshop Stamp Filter
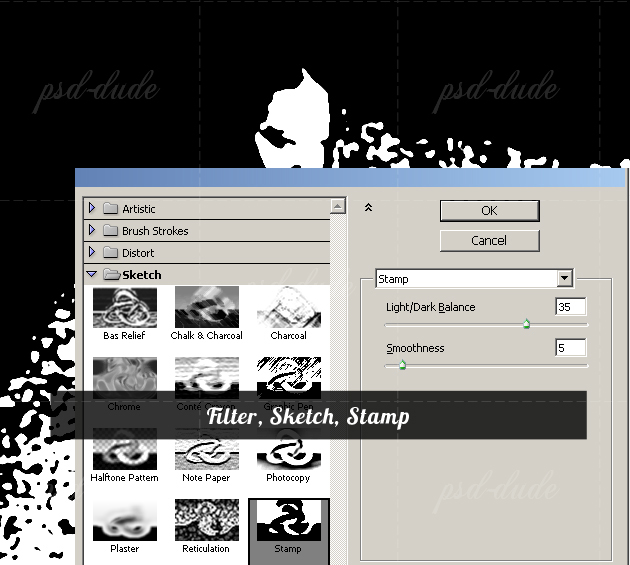
Duplicate the Desaturate layer and go to Filter, Sketch menu and choose Stamp Filter. It is very important to set the Foreground color Black and the Background color White. Set the Blending Mode of this layer to Color Burn 100%.
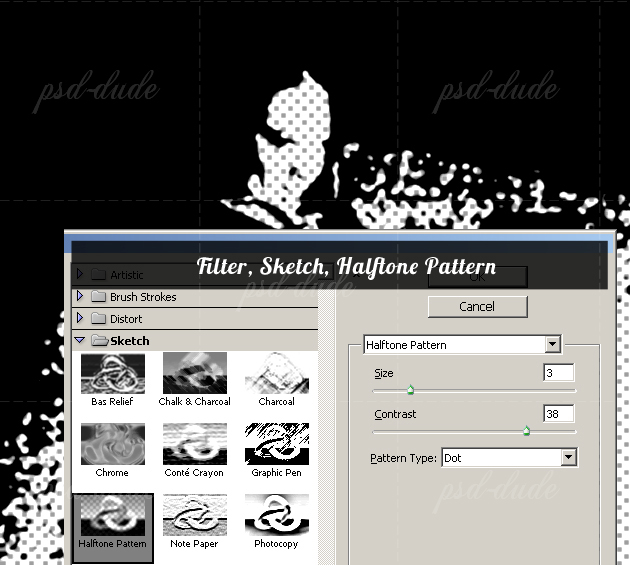
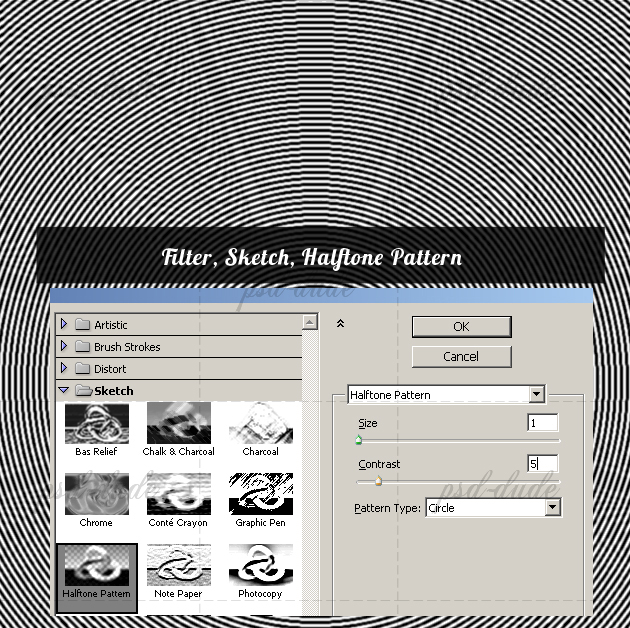
Photoshop Halftone Pattern Filter
Duplicate the Stamp Layer and go to Filter, Sketch and choose Halftone Pattern Filter with the following settings. Set the Blending Mode of this layer to Color Burn 100%.
Photoshop Graphic Pen Filter
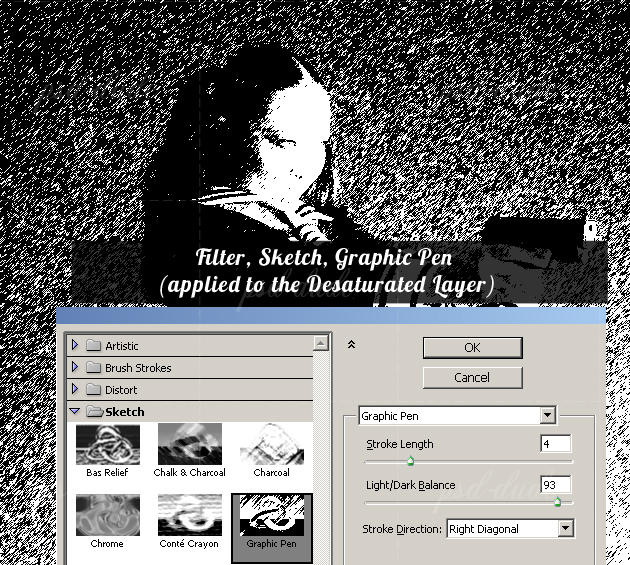
Copy the Desaturate Layer and add Graphic Pen Filter that you will find in the same Sketch Menu. This Photoshop Filter has three settings: the Stroke Lenght, the Light/Dark Balance and the Stroke Direction. I will apply this filter two times with different settings like shown in the image. Set the Blending Mode of this layer to Darken 100%.
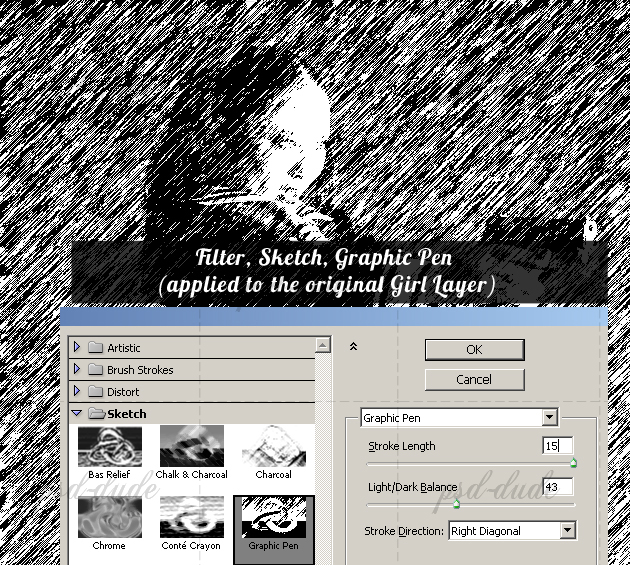
Now duplicate the original Girl Layer and add again Graphic Pen Filter this time with another settings. Change again the Blending Mode of this layer to Darken 100%.
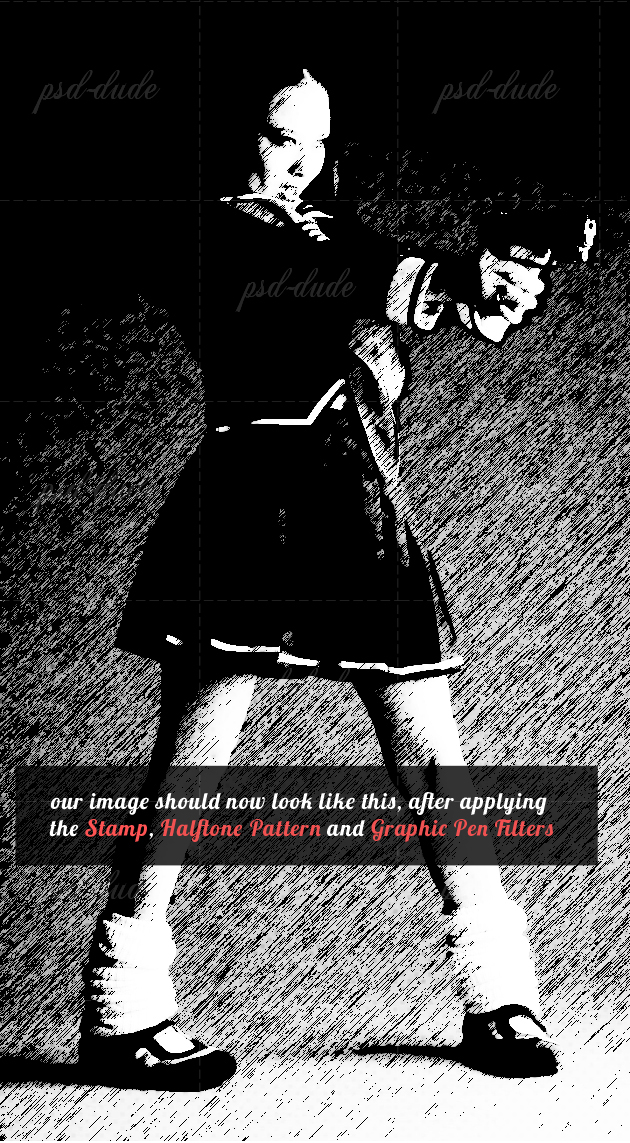
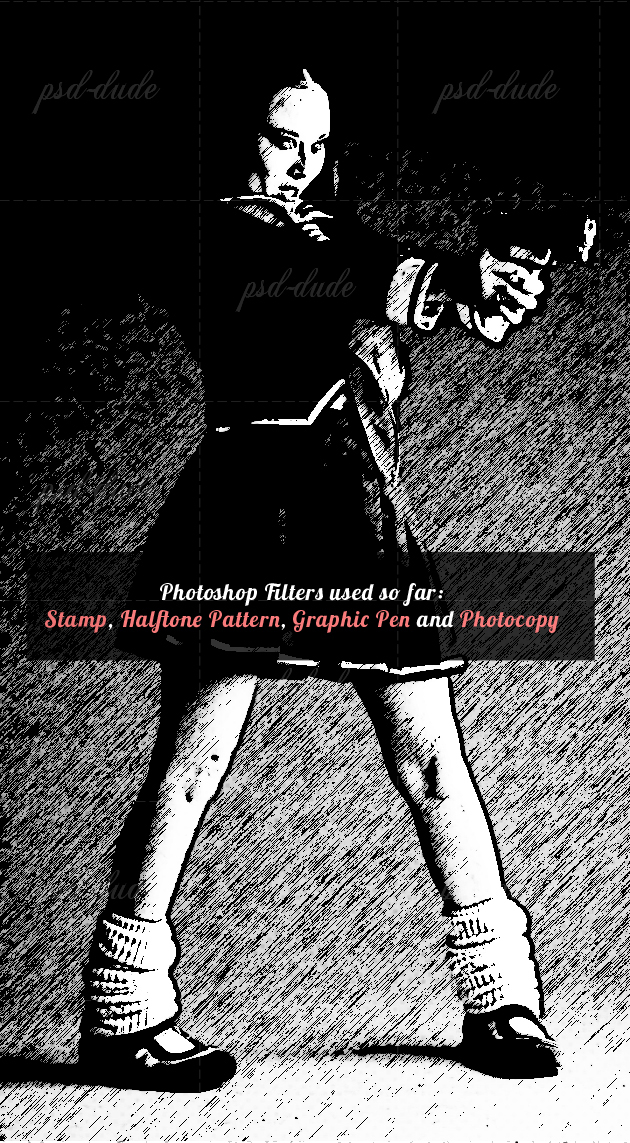
After applying all these filters our image should now look like this:
Photoshop Photocopy Filter
Duplicate the original Girl Layer again and apply the Photocopy Filter found in the same Sketch category of Photoshop Filters. Change the Blending Mode of this layer to Color Burn 100%.
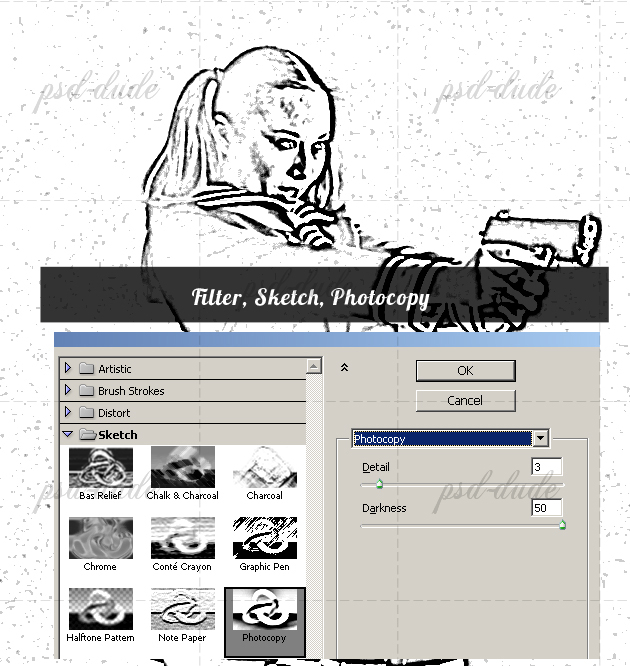
Maybe you wonder why so many Filters, well the last one for example, adds a nice black contour to the girl so that it looks even more like a hand drawn sketch. You can adjust the contour lines of the Photocopy Layer by using the Brush Tool and a black 5px round brush.
So we have use almost all the Sketch Filters so you might wonder who is next? The answer is Halftone Pattern again but in a different way. So create a new layer above all the other layers and fill it with white color. Apply Halftone Pattern filter, Pattern Type Circle, like in the image:
Change the Blending Mode of this layer to Color Burn 100%.
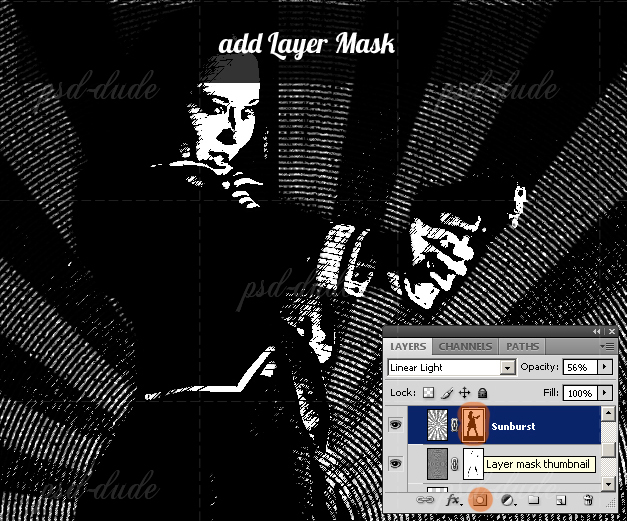
Sunburst Photoshop Brush
If you want to add another cool effect you can even add a Sunburst Brush in another layer. Use white for the sunburst color and apply Halftone Pattern Filter with the same settings used in the previous step. Make sure the sunburst has the center in the center of the image.
Change the Bending Mode of the Sunburst Layer to Linear Light 55%.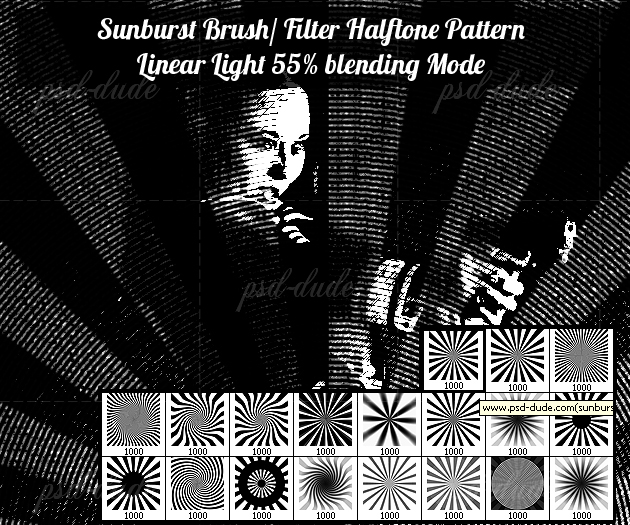
Go to the Sunburst Layer and Create a Layer Mask by pressing the Add Layer Mask button from the Layers Tab. Make sure you are in the Layer Mask by pressing the Layer Mask Thumbnail. Use a soft round brush to draw the Girl shape with color black.
Add a similar Mask Layer to the previous Halftone Pattern Layer(circle pattern).
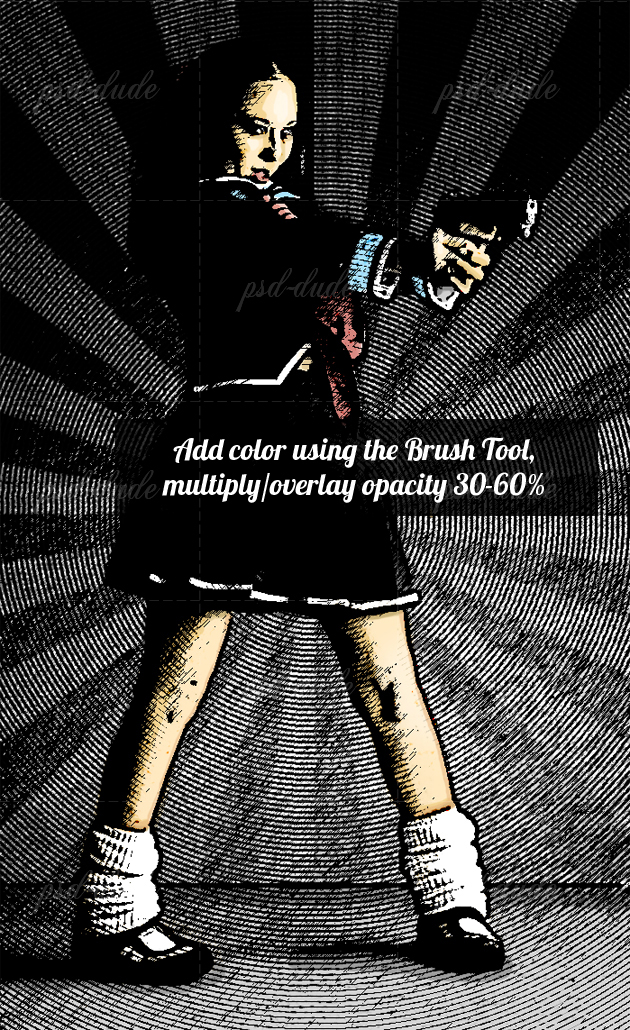
Color Effects
Create a new layer above all the other and call it Color Layer. With the help of Brush Tool, paint over the image where you want to add color, it's entirely up to you. Use more than one layer and set the Blending Mode to Multiply and/or Overlay with different opacities.
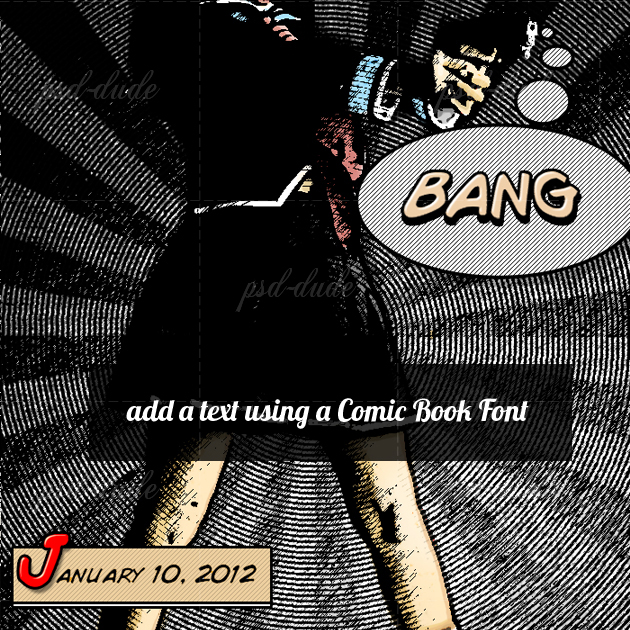
Comic Book Font
For the final touches add some comic book sound effect "Bang" using this Comic Book Font. Add also the date in the bottom left of the image using the same Comic Font.
It is really a matter of taste, you can search the internet for inspiration or you can use one of these free Comic Brushes.
If you want to add some comic elements like speech bubbles or comic sound effects you can download these free cartoon sound effects in PNG format.
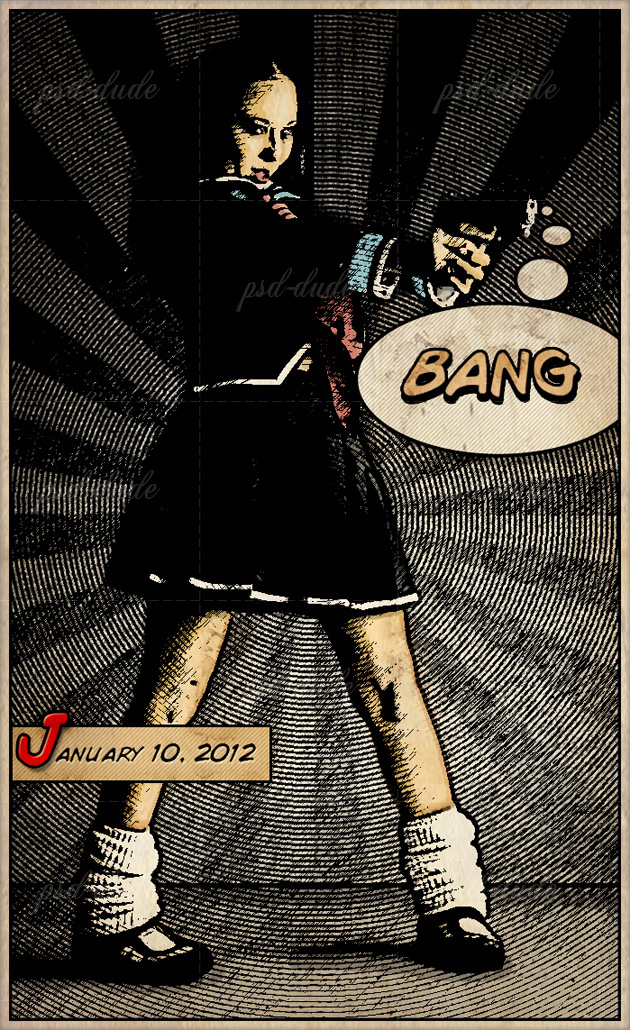
Vintage Effect
Add a new layer and call it Border Layer. Fill it with white color. Set the Fill to 0%. Add a Stroke, inside 10px white. Add an Inner Glow, normal 100%, black, size 15 px, range 1%.
To give a vintage look copy an Old Paper Texture in a new layer and set the Blending Mode to Multiply 60%. You can obtain a more realistic look by adding some Stain Brushes. And you're done, hope you like it!
Comics Book Photoshop Generator
You can also try this useful comic book Photoshop generator that will transform your photos into comics in just a few seconds. Save time and money with this powerful tool. The pack includes also comics speech bubbles and comics sound effects that you can use to obtain unlimited results.

28 comment(s) for "Comic Book Effect in Photoshop"
Absolutey love this effect. A lot better than many of the other comic effects out there on the net.
However, I am really struggling to complete it. All goes well until the graphic pen filter. By changing the blending option to darken with 100% opacity, the image just goes completely black. Is there something I am doing obviously wrong?
reply
I am glad you like this comic book effect. I really don't know why you are getting a black image but what I suggest you to do is to convert each image into a smart object; and than apply the filters (as Smart Filters). That way you can adjust the settings to obtain a good result. For example you might have to change the setting of the Graphic Pen, lower the opacity etc.
I assume you are using the same image, because if not, it is a must to adjust ALL the settings for the filters because each image is unique.
-------
Here are some other sketch tutorials and resources that you might like reply
Any ideas...? reply
Try to copy the layer in another PSD file and see if the menu is grayed out.
Why Are Photoshop Menus Grayed Out
http://www.digitalfelix.net/blog/35-blog-posts/73-why-are-photoshop-menus-greyed-out reply
How do I set the Foreground and Back ground color in Step 15?
I'm not seeing the option to control the Foreground/Background
As soon as I apply the Stamp Filter the entire image goes solid Black. :(
Step 15: "Duplicate the Desaturate layer and go to Filter, Sketch menu and choose Stamp Filter. It is very important to set the Foreground color Black and the Background color White. "
Thanks,
Jon
reply