


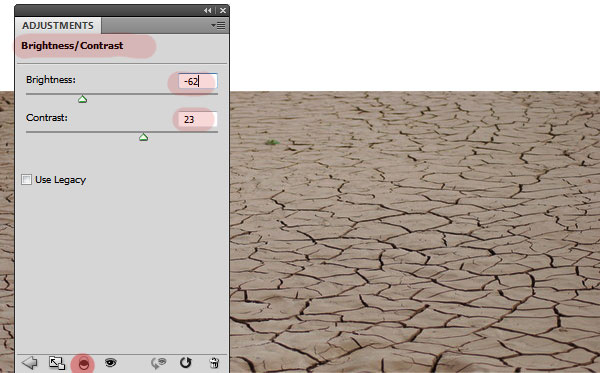
Open this crack ground in a new PSD file and add a Brightness/Contrast adjustment layer with the following settings.
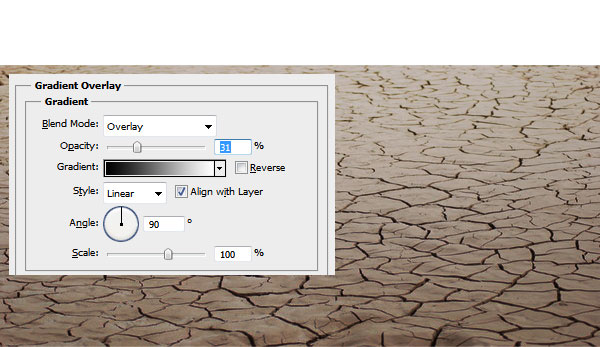
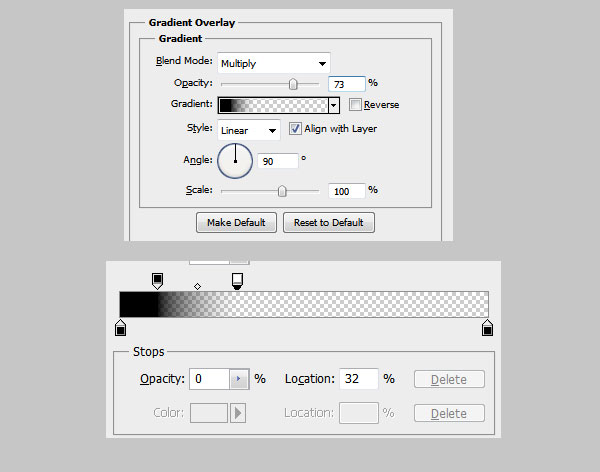
Add a Gradient Overlay to this Cracked Ground Layer.
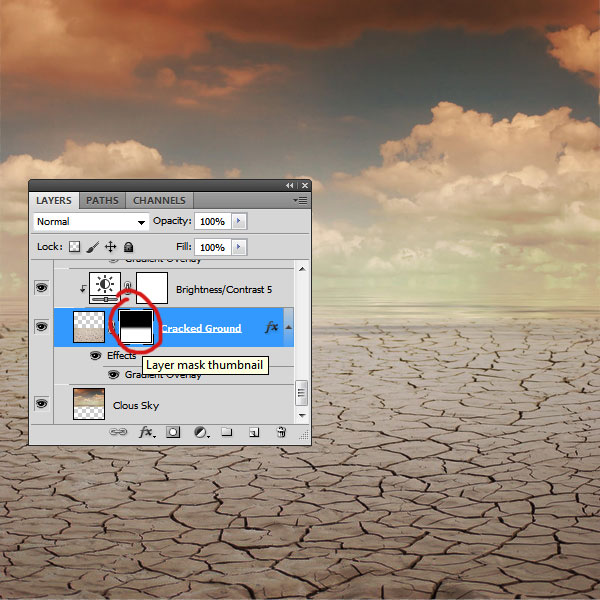
In a new layer behind the open this Cracked Ground Layer Clouds Sky stock image. To blend the sky with the ground add a layer mask to the Cracked Ground Layer to make the transition smooth between the two images. Use the Gradient Tool inside the layer mask (use a black to white gradient).
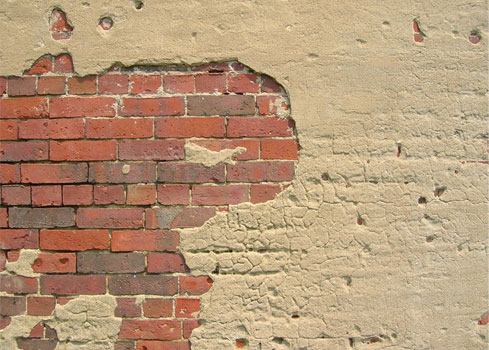
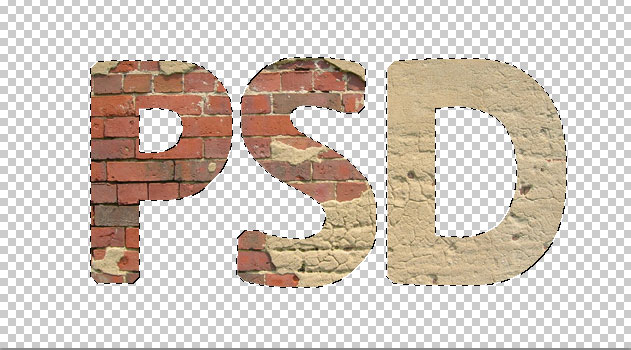
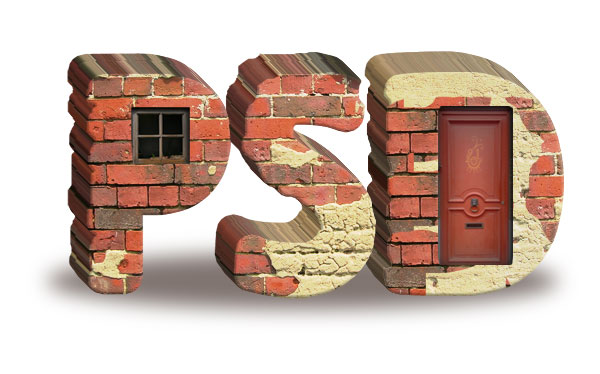
Open a new PSD file copy this brick wall texture.
Here are some other brick alternatives in case this image is no longer available or you want to choose something else:
You can always pick another brick texture from this extended collection of free textures.
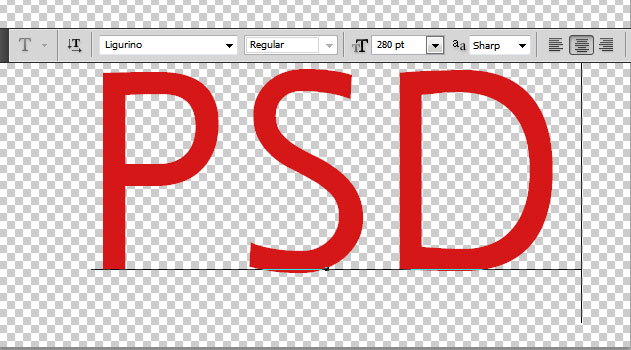
In this new PSD file use the Type Tool to write a text using Ligurino font. You can download it from the internet and install the font in Photoshop.
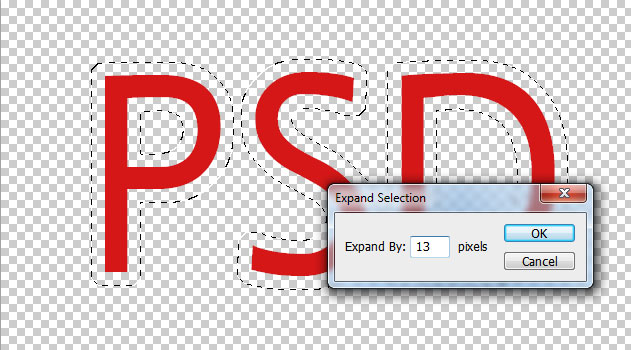
Press CTRL and click on the Text Layer thumbnail to make a selection. Go to Select>Modify>Expand and set 13 pixels.
Go to the Brick Texture Layer and press CTRL+J to make a Layer via Copy. Call this layer Brick Text and remove all the other layers from this new PSD file.
Use the Lasso Tool to make selections around the edges to add a distressed look to the brick text.
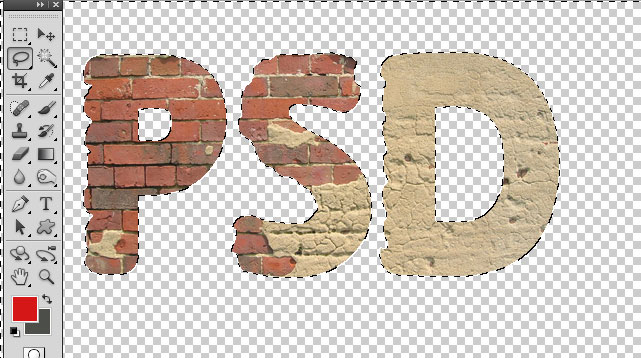
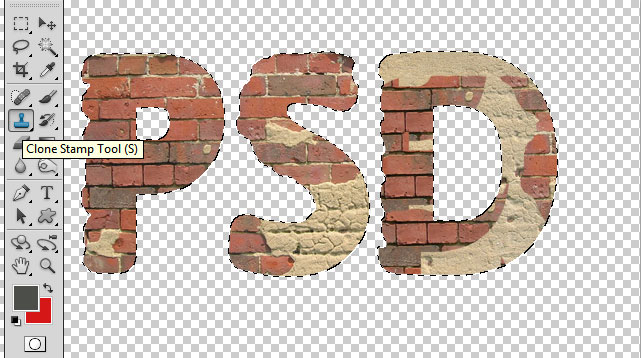
Make a selection out of the Brick Text Layer and use the Clone Stamp Tool to add brick texture to the "D letter".
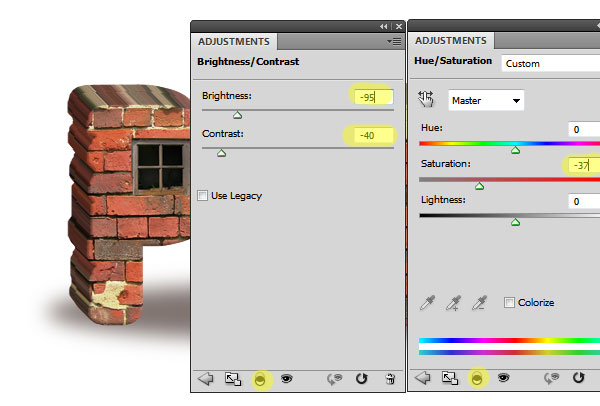
Add a Brightness/Contrast adjustment layer to the Brick Text.

Merge the Brick Text Layer and the Brightness/Contrast adjustment layer. Download this 3D action generator and install it in Photoshop. Play the action for the Brick Text Layer; you should obtain a similar result.
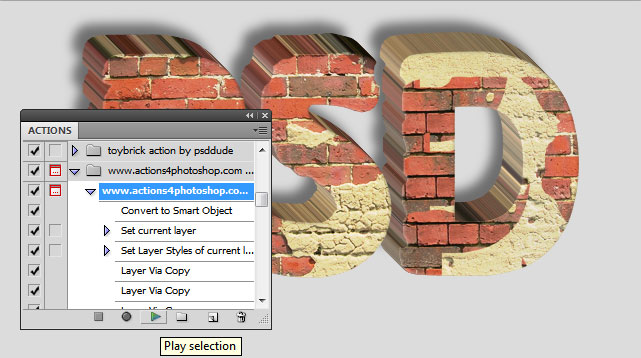
As you can see you have three groups and a background layer. Delete the shadow (actions4photoshop.com) Group and also the Background Layer.
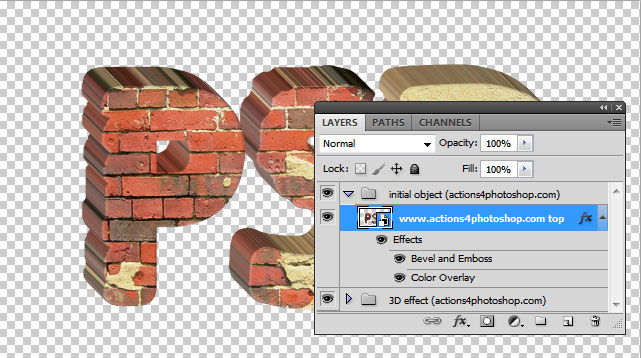
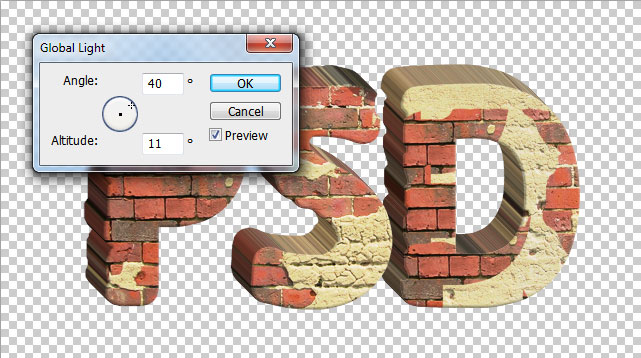
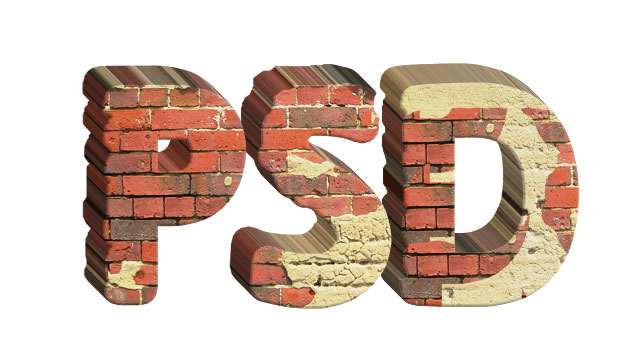
Go to Layer>layer Style>Global Light and make these settings; you will see thtat the shading and lighting of the text changes. Group all the brick text layers and groups in one single group called Brick Text Group and move it to the initial PSD file.
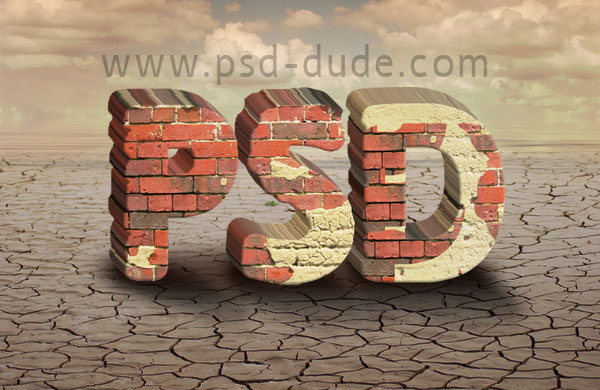
Add a shadow effect below the Brick Text using the Brush Tool, a soft round brush and color black. Lower the opacity to make it look natural. Also you have to cast a shadow for the brick text to make it look like it is standing on the cracked ground
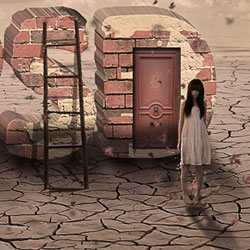
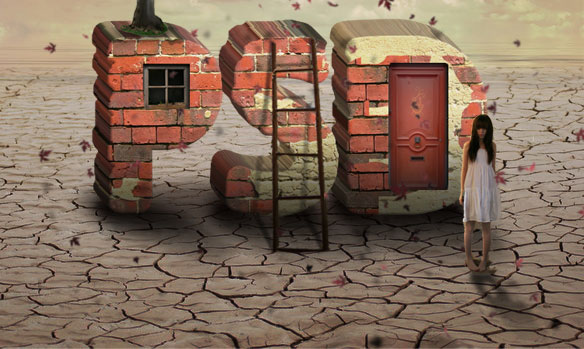
Now I will add a window to the brick text to look like a house. Simply select and place the window, resize to fit and adjust the color/saturation/brightness.
Add a Inner Shadow and a Inner Glow for the window to look more realistic.

In a similar way add a door; crop, resize, adjust, add layer styles.
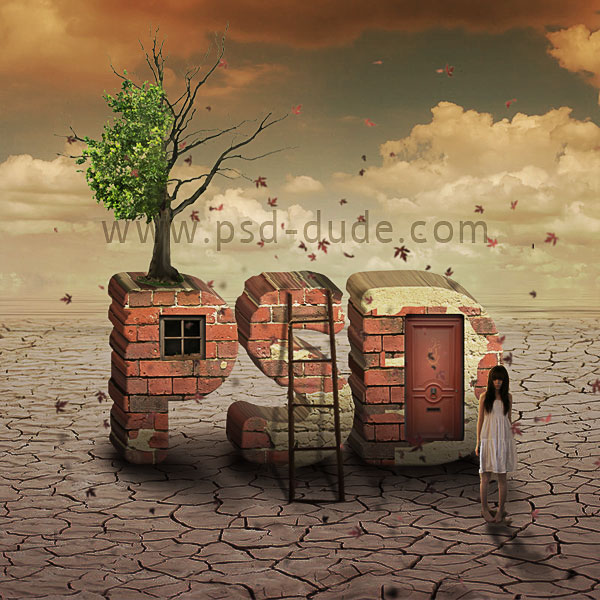
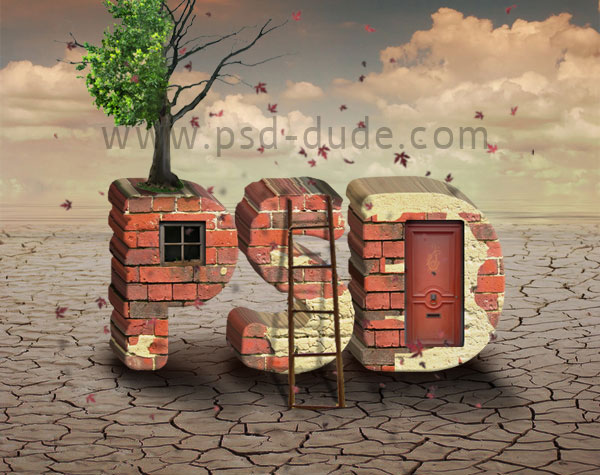
To create a surreal photo manipulation I will add an unusual dead tree on top of the "P letter".
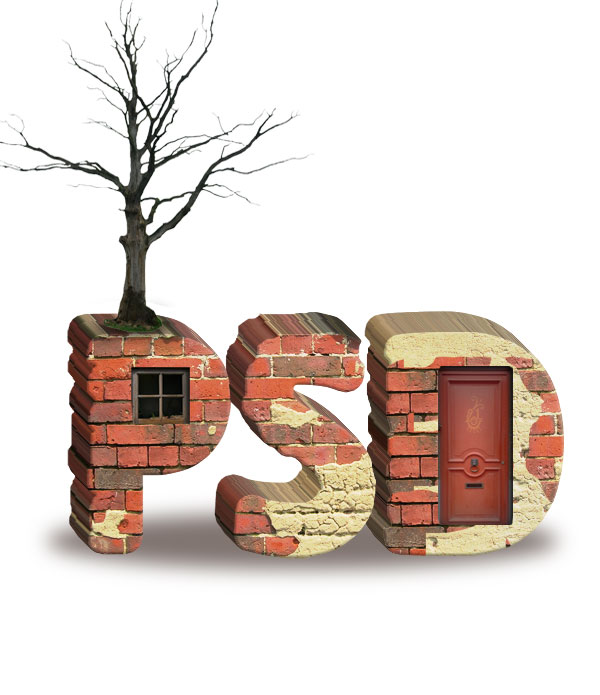
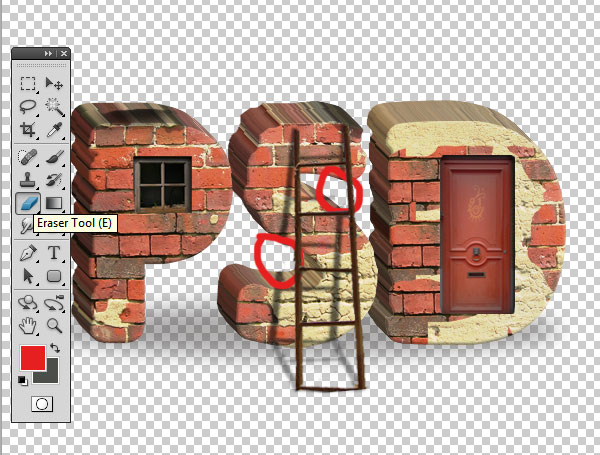
Combine the dead tree with this green tree PNG stock image. Leave only half of the tree with leafs. Use the Eraser Tool with a distressed brush to delete some aresa like shown in the image.

Add this stair ladder and place it near the "S letter"' you have to crop the ladder using a Selection Tool. Use the Edit>Transform>Distort to give the right perspective.

The ladder casts a shadow on the "S letter" so you have to create the shadow. Duplicate the Ladder Layer, make it black and distort it like in the image. LOwer the opacity to 50%.
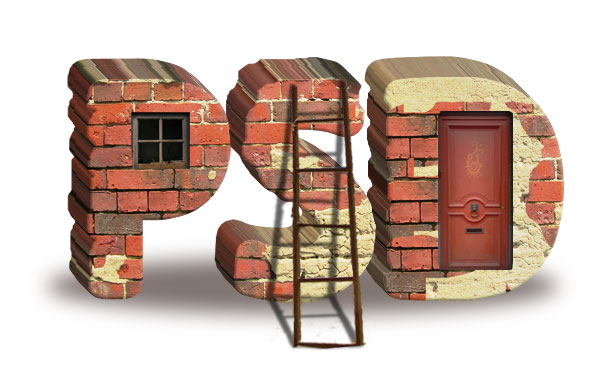
Use the Eraser Tool to delete the shadow areas that exceeds the Brick Text Group like shown in the image.
For creating a cool effect I have added this beautiful falling leaves PNG stock image. Don't forget to also add shadow effect for the leaves on all the solid objects(brick text, ground, etc)
I gathered all the existing layers(except the Cracked Ground and the Sky Clouds layers) and put them inside a smart object. Add a Gradient Overlay to the smart object.
I have decide to also add a sad looking girl outside the brick text house. Remove the background of the girl photo and add some layer styles to add light and shading
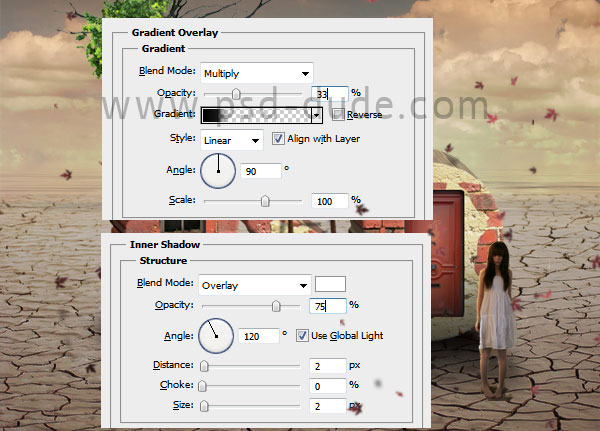
Add a cast shadow effect for the girl.
For the final touches you can add more leafs around the girl, you can add a Gradient Map adjustment layer to colorize the photo, you can reduce/increase the Hue/Saturation, you can use the High Pass filter to increase the sharpness. If you want to add a grunge effect use one of these old paper textures and set the blend mode to Overlay opacity to around 50%.

46 comment(s) for "Brick Text Typography Surreal Photoshop Tutorial"
Step 1 - Download the ZIP file and extract the files.
Step 2 - In Photoshop go to Window menu and choose Actions
Step 3 - Click on the top right button from the Actions Panel
Step 4 - Choose Load Actions and simply choose the ATN file
Step 5 - Press the Play Selection button to run the action
But the 3D action generator is not working for me.
I have Photoshop CS6
I tried everything, without any result: (
Thanks anyway. reply
Thank you for your response, John :) reply
I am glad you uploaded your 3D brick text photo manipulation. It looks really nice except the lighting part - the text and the girl look that they are floating. You should darken the area beneath the two items to obtain a realistic shadow! reply
I have done: Press CTRL and click on the Text Layer thumbnail to make a selection. Go to Select>Modify>Expand and set 13 pixels.
and: Go to the Brick Texture Layer and press CTRL+J to make a Layer via Copy. Call this layer Brick Text and remove all the other layers from this new PSD file.
But having trouble getting the brick actually behind the text?
reply
Use the Brick Texture Layer and the Text Layer. Right click on the Brick Texture Layer and choose Create Clipping Mask reply
Debs
reply
Thanks for a great tutorial.
Johnny
reply
it was my first try
thanks alot
i am on part 8
can you tell me how to add a distressed using lasso tool ?
thank you , reply
Simply draw the edges of the shapes that you want to select(using the Lasso Tool) and press delete to erase them. reply
http://www.actions4photoshop.com/atn/3d-effects/3d-photoshop-action-generator-for-text-and-shape.aspx
You have a Download button at the end of the page, before the Facebook comments. reply
If not you will have to create the 3D effect like in this 3D text tutorial or you can use the 3D Tool feature that CS6 has.