


In this you will learn how to create an angel of fire in Photoshop.

Related Tutorials and Resources
Here are some useful Photoshop tutorials and resources that are related to this tutorial. You might want to take a look at to improve your skills.
Open a new PSD file and open this Sky texture package and select image "sky7_2259". Go to Filter > Blur > Gaussian Blur and set radius to 2px.

Now open the Vintage texture and set blend mode to Soft Light with opacity 48%.

Open the Space texture and blend mode set to Overlay with opacity 80%. Now create a layer mask and delete a center of image with brush tool. Also add a Hue/Saturation adjustment layer and set the Hue to 15 and the Saturation to -15 .

Now open the Dark Snow texture and create layer mask. Now use the brush tool and delete the top part of the picture. Blend mode set to Exclusion with opacity 30%.

Open the Sky image and set opacity to 30%.

Then now open the Fire sparkle texture and crop sparks as shown in the picture below. Blend mode set to Screen and use erase tool to delete edges.

Open the Girl image and place it like shown.The best way to precisely cut image is to use pen tool. Now use the brush tool with red color and brush lips, blend mode set to Soft Light and opacity 80%. Now right click on layer and click to Create Clipping Mask.

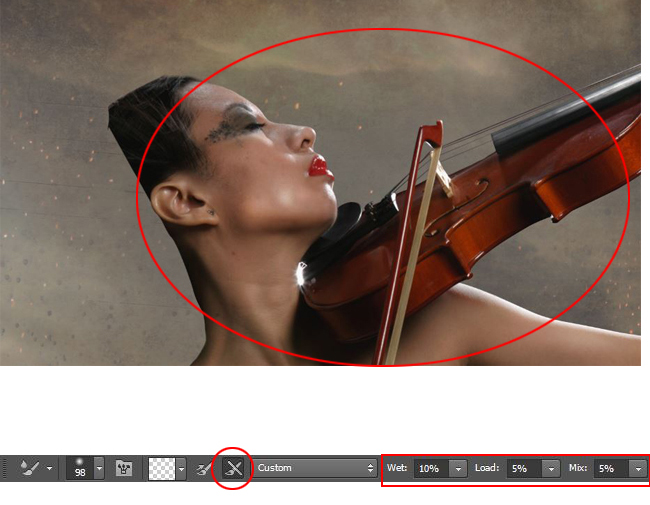
Create a new layer, right click and choose Create Clipping Mask. Now use the Mixer brush tool and set Settings as shown in the picture below. With the mixer brush tool be careful and do not make long movements; this tool is used for cleaning the face. Use the Mixer Brush Tool to retouch the skin to remove wrinkles or any other details.
Repeat the same procedure as in the previous step and create a clipping mask layer. Then go to Edit > Fill and use 50% Gray. Blend mode set to Overlay with opacity 17%. Now use the Burn tool for dark surfaces and Dodge tool for light surfaces.

Create a nw layer with clipping mask and use the Brush tool with foreground color #d89a06 and brush over the body.

Now open the Hair Stock and use Brown Hair and also open this hair image. With these images make add hair like shown in the image. You will have to make a lot of duplicates to make it look as realistic as possible. Also put hair in front and behind the Girl Layer.
Go to Image > Adjustments > Match Color and proceed as shown in the preview for the hair image. Learn more about match color in Photoshop from these quick tutorials for beginners.

Now open the Wings stock and repeat the same procedure as in the previous step, by going to Color Match.

Now add fire to the wings; blend mode must be set to Screen.

Now add Smoke in front of and behind the girl layers. Blend mode set to Screen.

Open burned paper and cut it with Pen tool. Now add the fire in the same way you added on the wings with Blend mode Screen. Make several copies as shown the picture.
If you want to create burned paper effects in Photoshop you can try our new added Burnt Paper Creator, that contains fully customizable Photoshop actions.

Now open a Fire Sparklers Sphere and crop line. Blend mode set to Screen. Make several copies and merge them into one layer. delete some areas around the fingers using the erase tool. See picture below.
You can also try our Sparklers Creator and use it to create fireworks sparklers effects.

Now copy fire sparks throughout the image and set blend mode to Screen.

Open Particles002 and Particles023 from the particles pack; for 002 set blend mode to Screen and for 023 keep normal.

Open Glitter texture and set blend mode to Screen with opacity 15%.

Now open Rain Texture and go to Image > Adjustments > Hue/Saturation. Set the Hue to -180 and the Saturation to +16.Blend mode set to Soft Light with opacity 30% .

Go to Image>Adjustments and make the following settings:
- Photo Filter: choose Warming Filter (LBA) with Density 46%
- Curves: set opacity to 80%
- Color Lookup: set to DropBlues with opacity 60%
- Brightness/Contrast: settings -1/21 and opacity 40%
- Curves and set litle dark

Press CTRL+SHIFT+ALT+E to make a new layer with all visible layers merged and go to Filter > Other > High Pass radius set to 2px. Set blend mode to Overlay with opacity 30%.

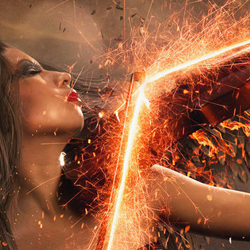
Angel with Fire Wings - Final Result
This is the end of the "Angel with Fire Wings Tutorial" and here is the final result, hope you like it! Don't forget to upload your results on our comments section.

5 comment(s) for "Angel with Fire Wings Photoshop Manipulation Tutorial"