


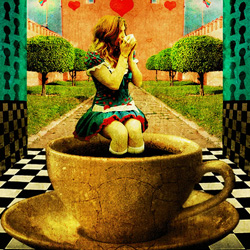

Symmetry is the keyword for this photo manipulation.... we have symmetric walls , symmetric exterior landscape and the girl is place strategically in the center of the photo. We also have items that are repeating like the tea cup, the key from the walls, the floor pattern , the trees....
In the center, the girl sits in a cup of tea and she is drinking tea from another cup. All in all we have a strange looking photo manipulation just the style for Alice in Wonderland.
Alice in Wonderland – Drinking Tea
Step 1
I am starting my photoshop images by drawing a simple sketch of the background and
than add all the other items. Sometimes I draw an idea on a piece of paper and than
scan it and import it into my photoshop file.
Of course that
in the most cases the final result doesn't look at all with the first idea!
So I will start
with the background, in fact with the opened room in which Alice stands. For that
I need to types of textures;the blue one from the walls and the black and white
texture from the walls and floor.
I will show
you how simple it is to create your own pattern if you don't find the perfect one
on the free internet resources. Also, check out my detailed tutorial on how to create a seamless pattern in Photoshop.
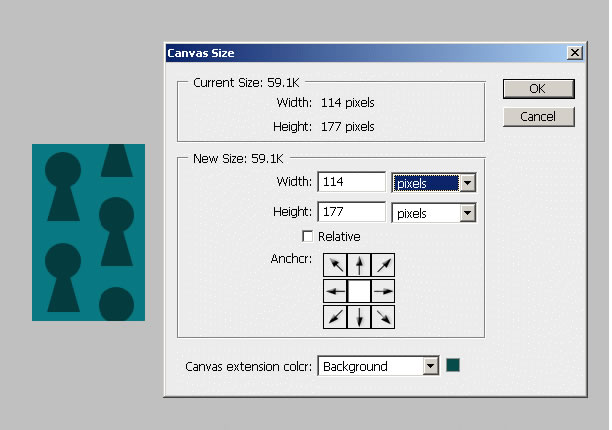
Open a new
psd file size 114/177 pixels as shown in the picture below.
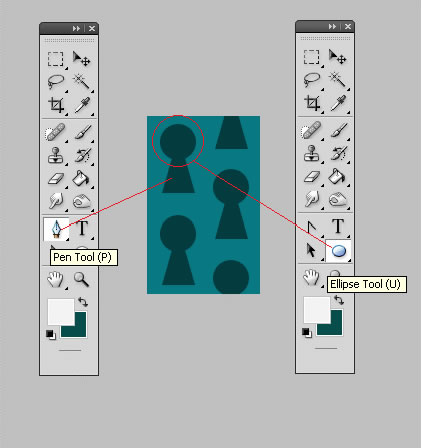
I will simple
draw a simple small rectangle, color #087883.
As you can see I have also drawn some key shapes. For that use the Ellipse Tool for the round shape and the Pen Tool for the rest of the shape . Put the two shapes into a group or merge the two layers , as you wish. Than copy the key shape four times and place it like in the image. With a little bit of luck we've achieved our own pattern.
You can of course change the key shapes to give it a fancier look but I am fine with that one. Now the only thing that we need to do is to go to Edit – Define Pattern
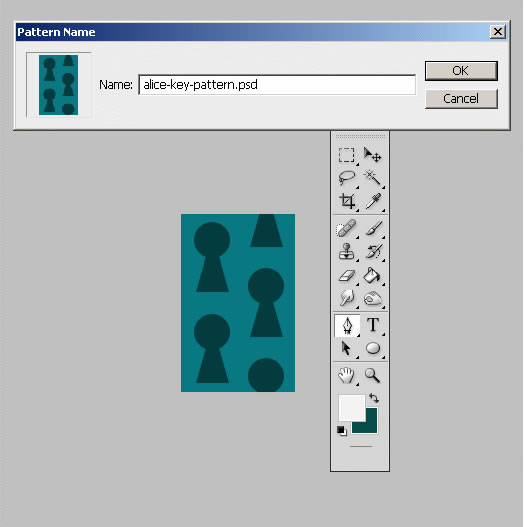
Also save this PSD file.
Step 2
Open a new photoshop file 690/580 pixels. Draw an white rectangle. Go to the Blending Mode of this layer and check Pattern Overlay with the settings shown in the image below. Choose for the pattern the one that we have just created :
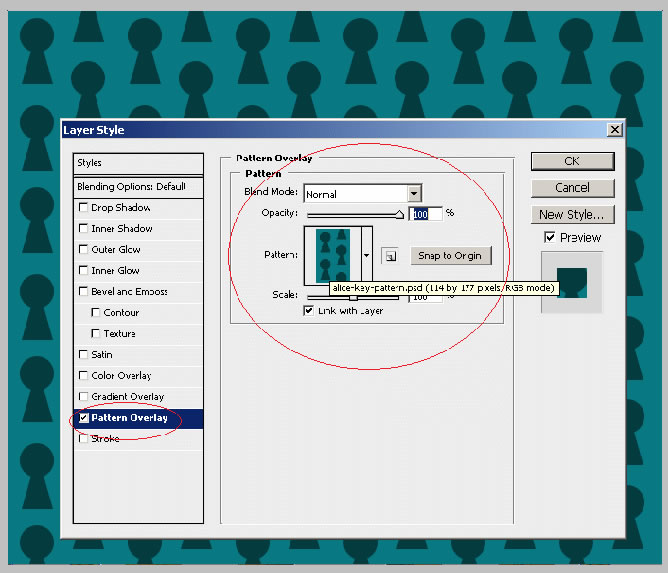
The pattern is ok but the perspective is not right. So create a new layer and call it Wall Layer . Go to Image – Apply Image. Now you have a flat image without Pattern Overlay attached.
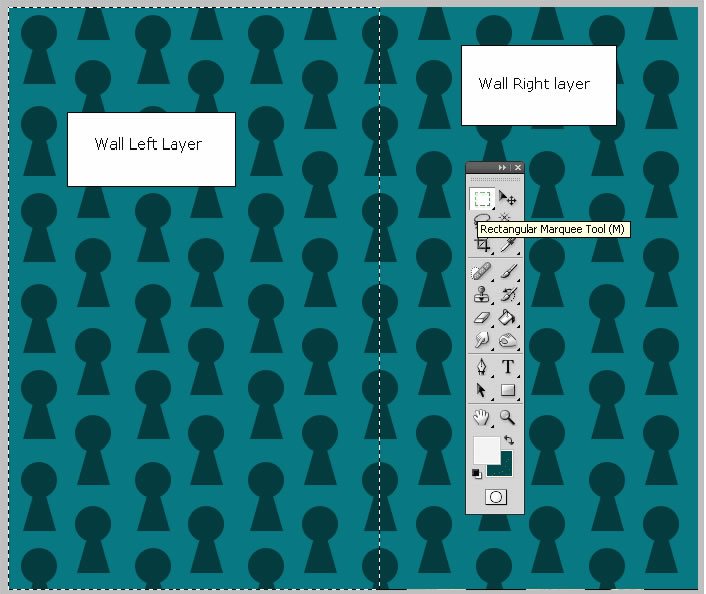
Now we have to select with the Rectangular Marquee Tool half of this image. Press CTRL+X and CTRL+V and now you have two layers Wall Left and Wall Right.
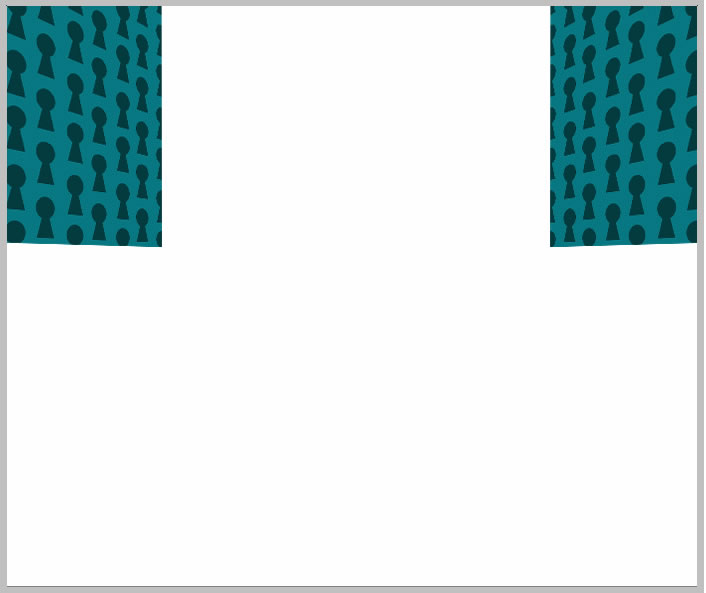
Use the Edit – Transform – Skew option to give to the wall the right perspective like in the image attached:
Step 3
Create a new layer and copy this
chessboard photo from Flickr
into your psd file.
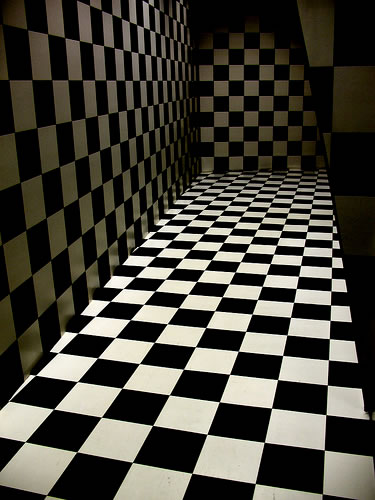
Delete the
area from the back of the room. Now with the Pen Tool select part of the wall. Make
sure that the path option is selected. Than right click and choose Make a Selection.
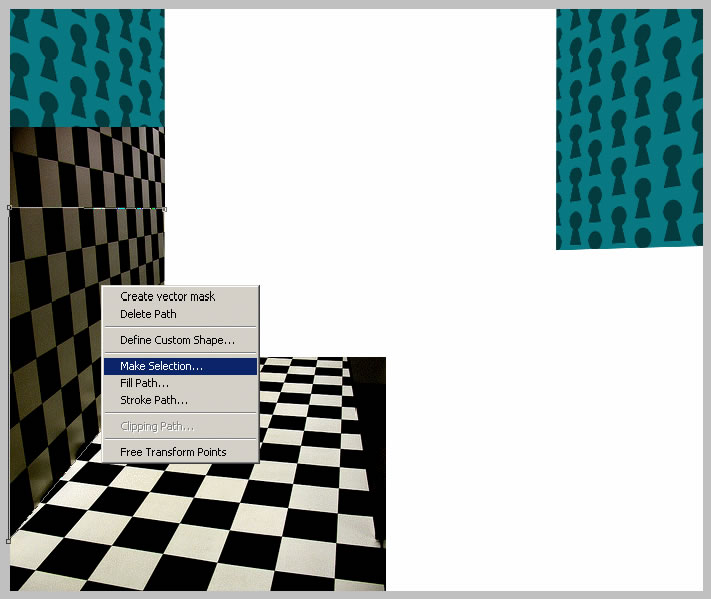
Copy/Paste this part, duplicate it and than flip it horizontally. Move it to the
right side. You should now have something like this.
I have also
altered the perspective a little bit with the Skew Option.
Step 4
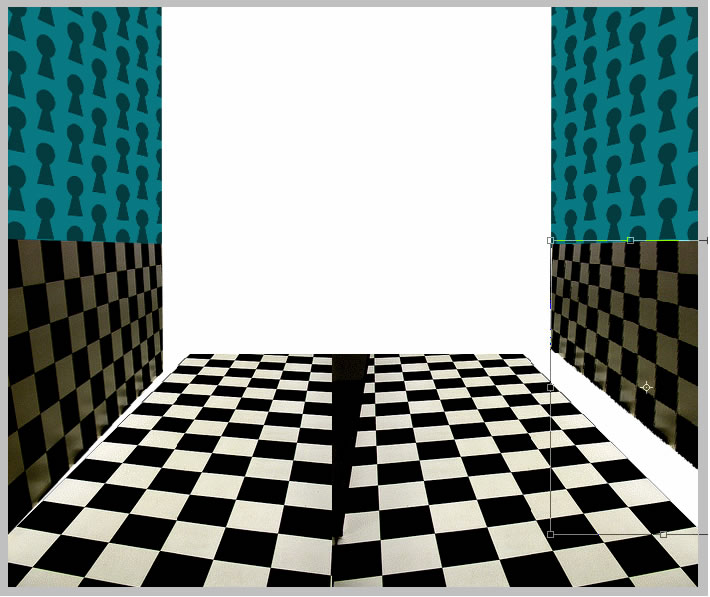
The floor is also obtained from the previous photo. Select the floor area like you
did in the previous step and than duplicate it and flip it horizontally.
Now looking
at the image a see a little anomaly , the lines from the chess wall patern are not
vertical so I will skew it a little:
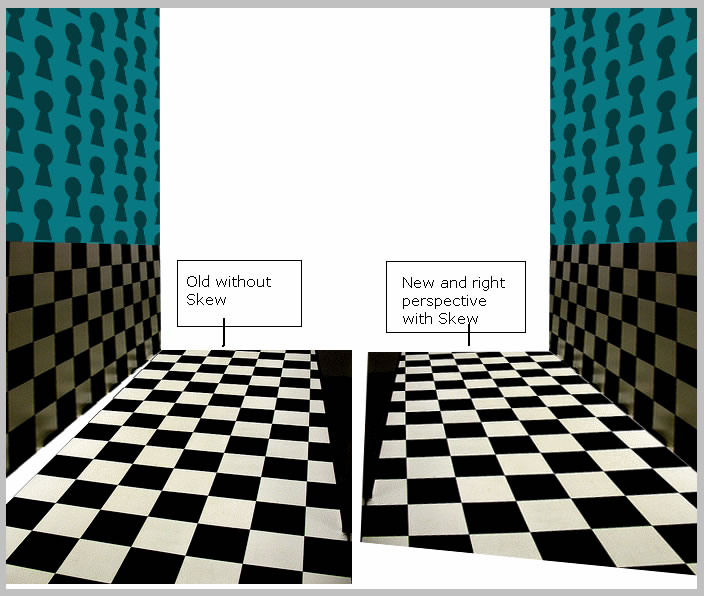
As you can see the floor has a wrong perspective due to duplication. So use the Skew to fix that.
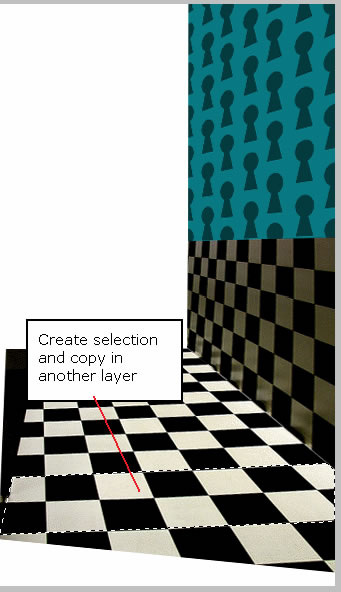
As you can see we have now the right side of the floor that is right but does not cover the hole image. Until I duplicate this right side I must complete the pattern. With the Pen Tool select a part of the floor and copy it in another layer.
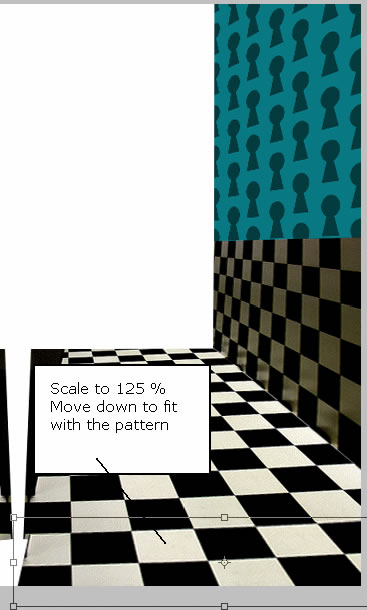
Move this selection downwards and scale it to 125 %. You see that there is no difference. Once there is in place merge the two layers.
Duplicate it , flip horizontally, move to the left. Now merge the two sides. As you can see there is an empty space...try to fill it yourself using the techniques practiced before... you can use Warp from Edit – Transform menu.
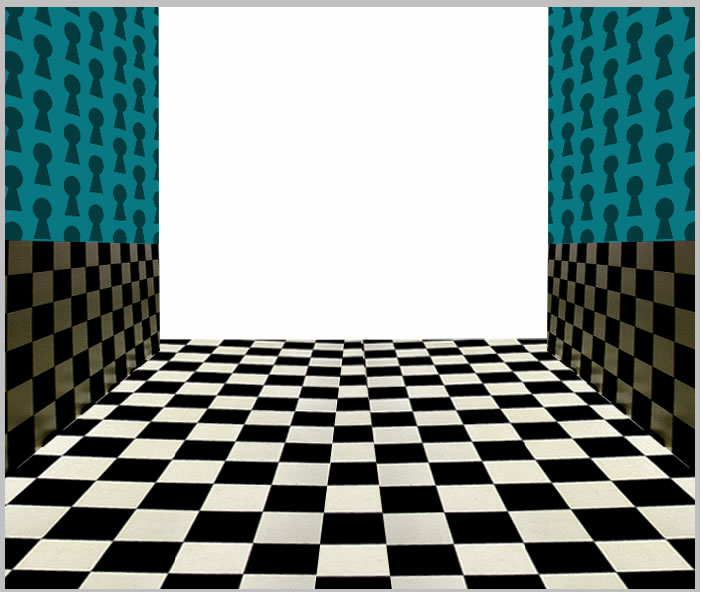
Alice in Wonderland Room
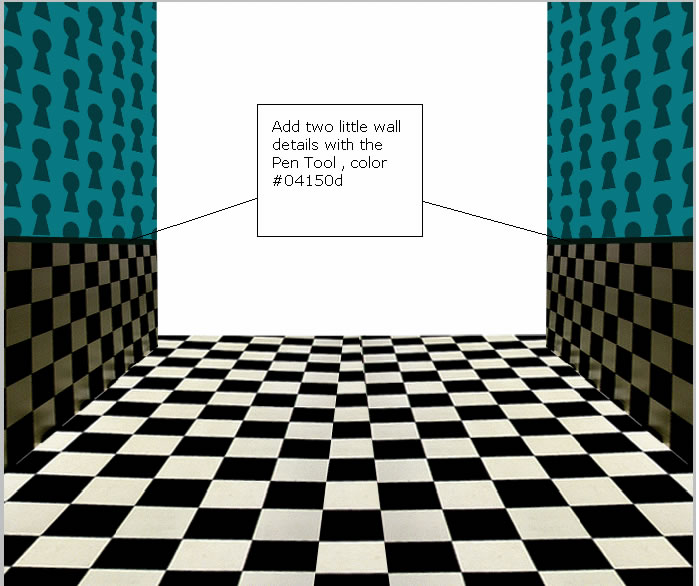
The last thing that we have to do for now for this room is to add 2 little lines (color #04150d) to differentiate the chess patter from the key pattern of the wall. Use the Pen Tool for that.
Select all the layers so far and put it in a group called Room.
Step 5
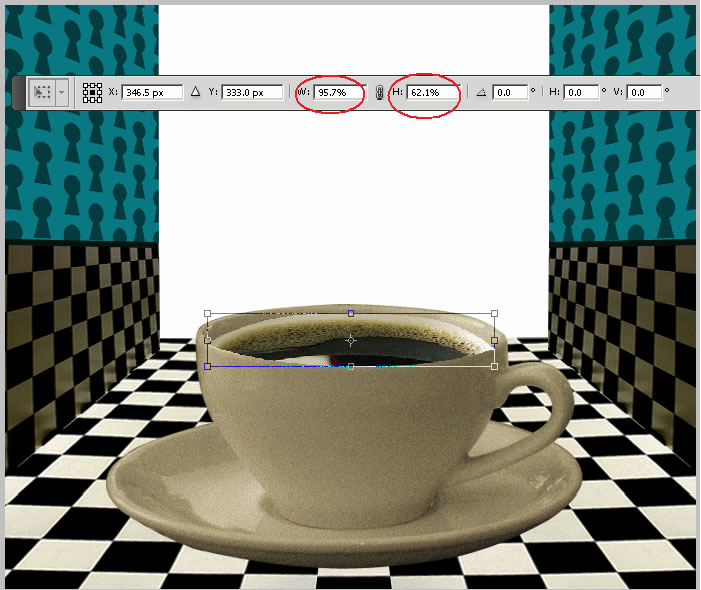
Now it is time to add the Tea Cup by YaZzZz... into the scene. Copy the large size of this photo into your file. Now simply crop only the image of the tea cup. I use for that the Pen Tool (paths option, make selection, copy paste) as you can probably know if you read other tutorials written by me .

We have two
problems with this image : the first is the size we need to scale it to 88 % and
the other is color and tone.
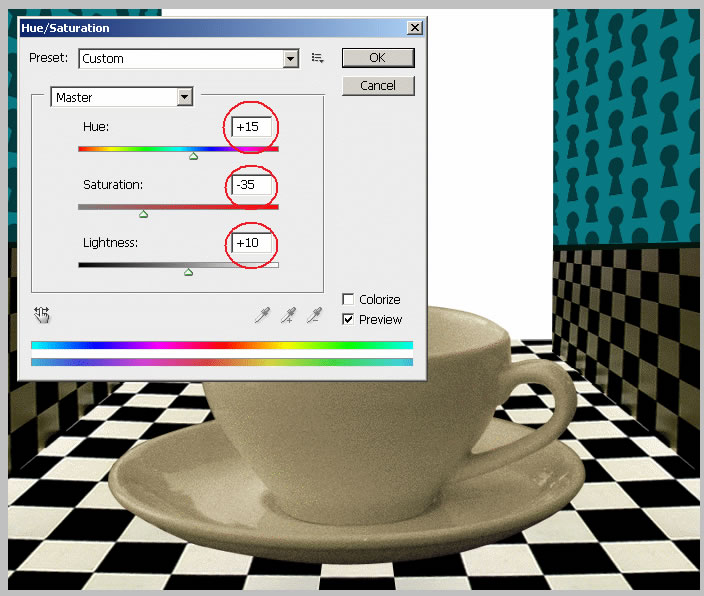
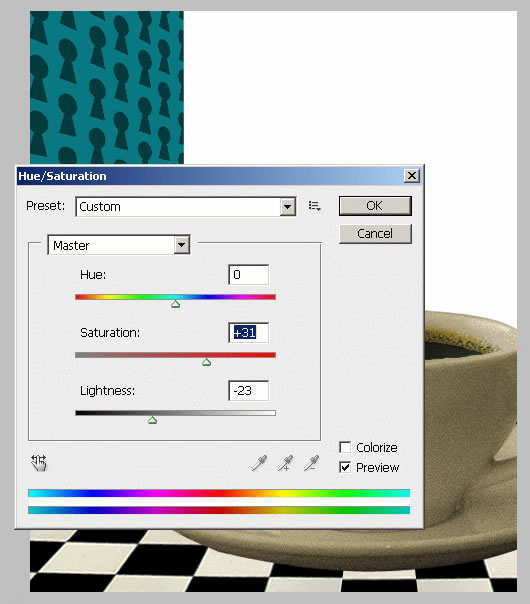
As you can
see there is a big discrepancy between the tea cup and the rest of the image; the
tea cup image has a different light , a yellow tone one. For a realistic blending
of the two images we need to lighten the tea cup image and lower the saturation
level.
I will adjust
this parameters from the menu Image – Adjustments – Hue/Saturation. Set the values
like in the image:
Step 6
Now copy his
Photo of Alice
by
Rebecca Lader
into your psd file. Crop Alice from the photo.
After loooong
10 mintues I have selected and cropped Alice . So it is better to Zoom In the photo
to see all the details.
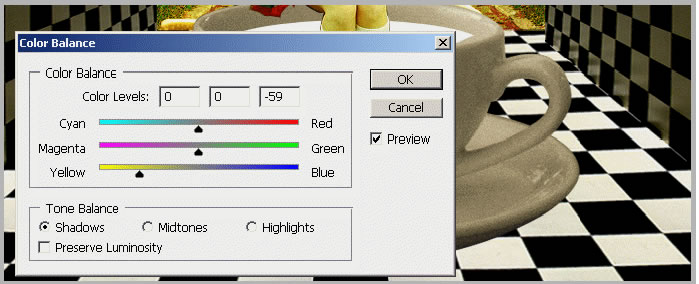
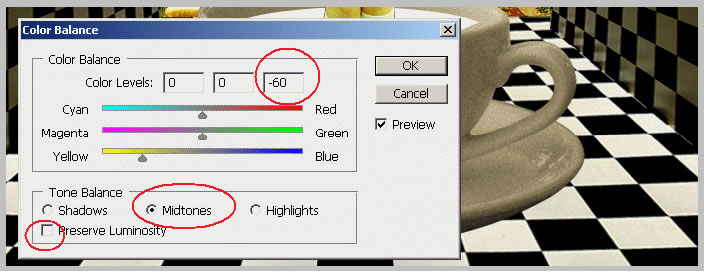
So the Alice
photo is in place, giving the impression that she sits on the tea cup edge. The
only thing that I don't like is the color of the dress ... I want a color similar
to the turquoise of the walls.
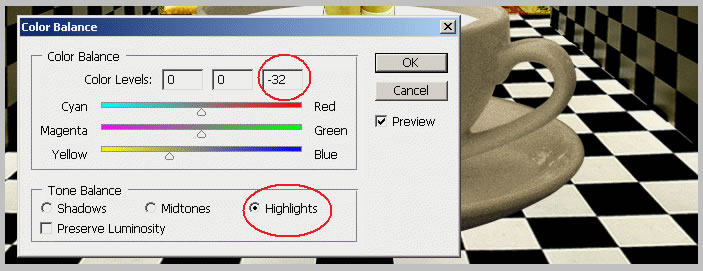
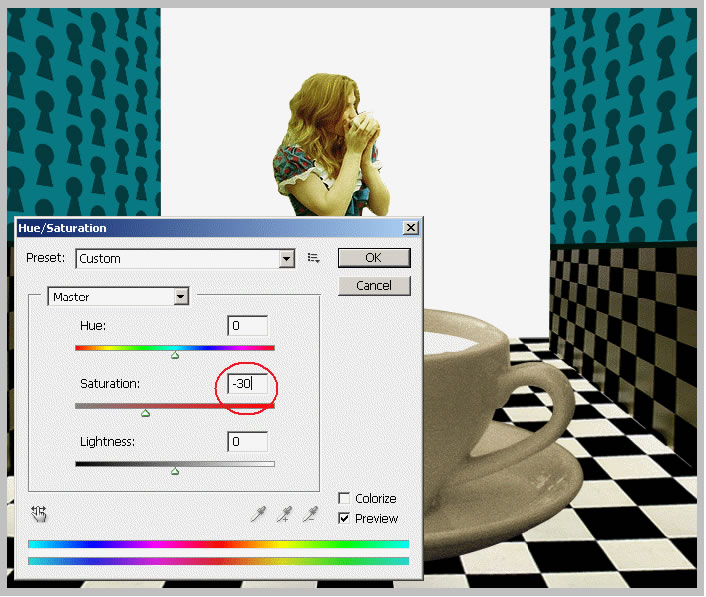
There are a
lot of methods to play with colors : Color Balance , Hue/Saturation , Color Replacement
and so on. I choose to work with Color Balance. Set the colors as shown in the image
below. Make sure the Preserve Luminosity option is unchecked.
Now the only thing that I will do to this photo is to lower the saturation a little bit:
Step 7
Add the tea in the Tea Cup. It is now time to fill in the tea cup.
For the tea texture I have found a really nice photo,
The Perfect Cup
by
Campin' Guy .
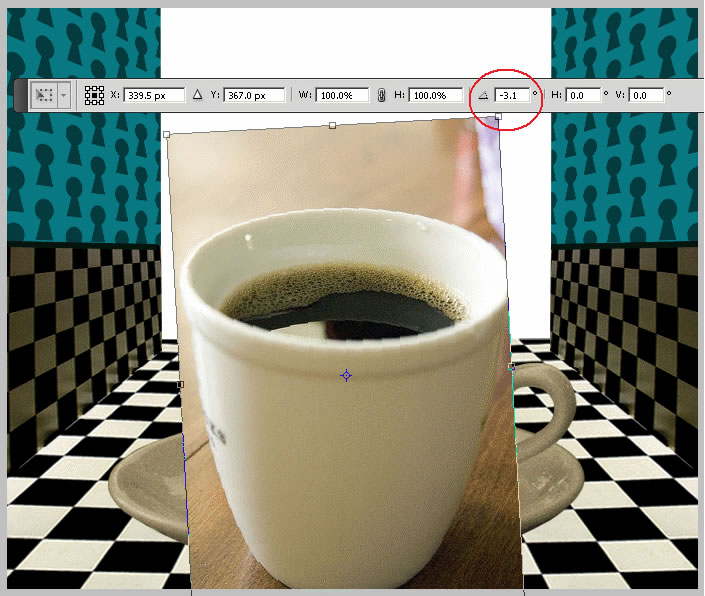
So copy this
photo into your file and rotate it like in the image.
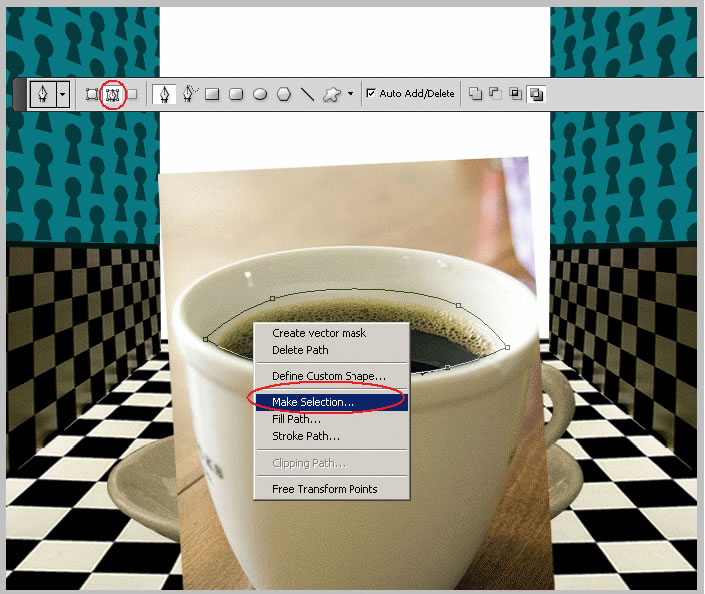
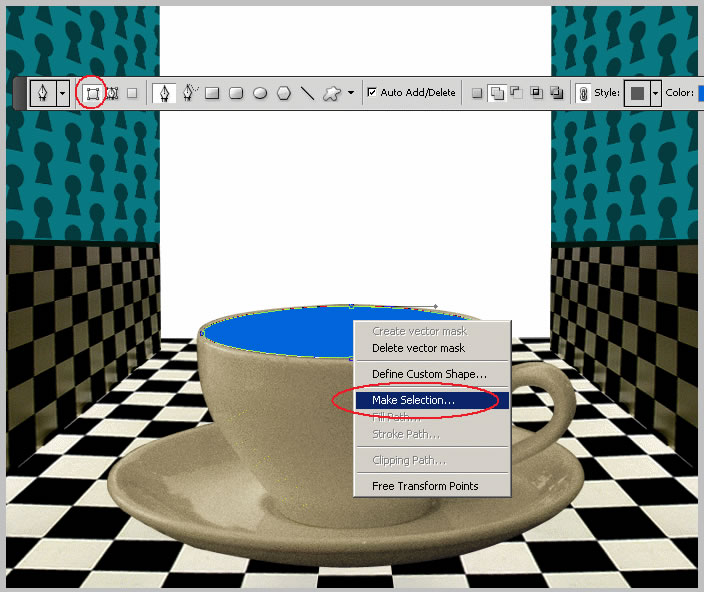
Take the Pen
Tool and start drawing a shape above the Tea Texture Layer to include the tea and
part of the cup. The reason we do that is to maintain the tea texture intact , to
look realistic.
Now right click
and choose Make Selection and press CTRL+C and CTRL+V. Delete the photo and keep
only the crop part with the tea texture.
Now we have to resize it a little to fit our tea cup. Edit – Transform – Scale:
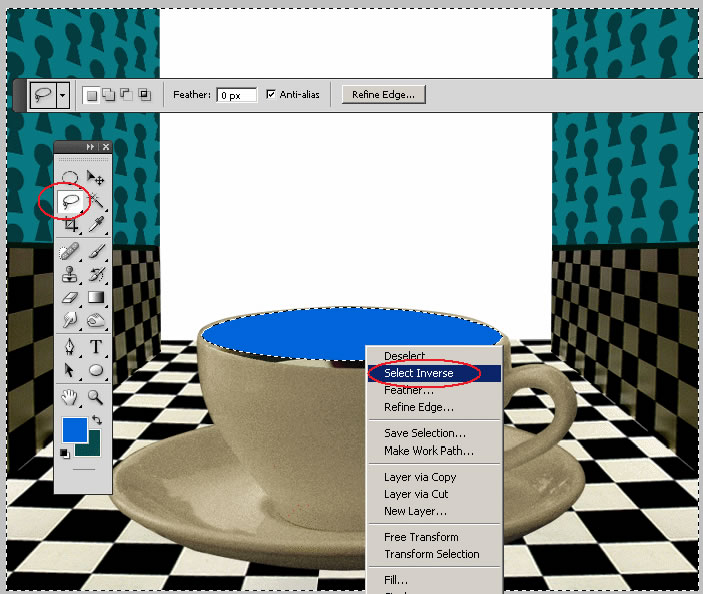
Still not exactly what we need especially in the bottom part. So hide the texture layer and with the same Pen Tool , paths , draw the shape of the interior of the tea cup.
Now select the Lasso Tool , right click on the selection and choose Select Inverse. Return to the Tea Texture Layer and press delete.
One more step is to match the color of the tea cup with the color of the cropped tea cup. Use first the Eraser Tool , choose a soft round brush and erase as much as you can from the tea cup.
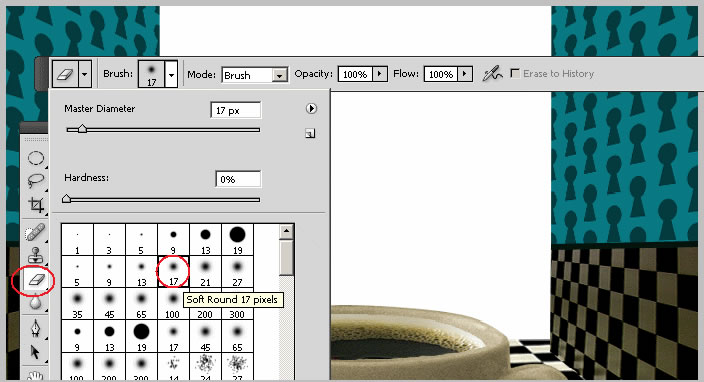
Use Hue/Saturation for matching fully the color:
Step 8
I want Alice to sit inside the tea cup so I have to delete part of her legs ...sorry! So create shape with the Pen Tool, Make Selection , and press delete:
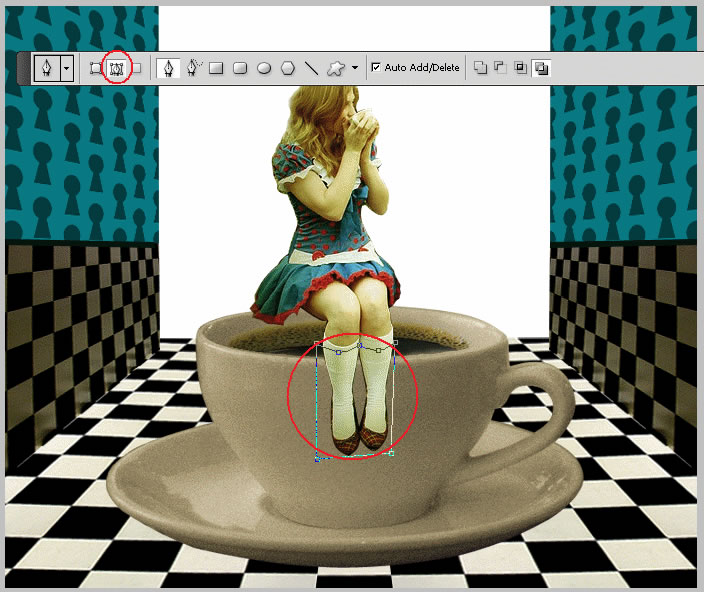
Use the Eraser Tool with a softer round brush , small size, opacity 60 % and also Blur Tool same settings to adjust the area where the feet meet the tea.
Step 9
Add the exterior background. I have found this really beautiful photo
Alice in Wonderland
by
twenty_questions.
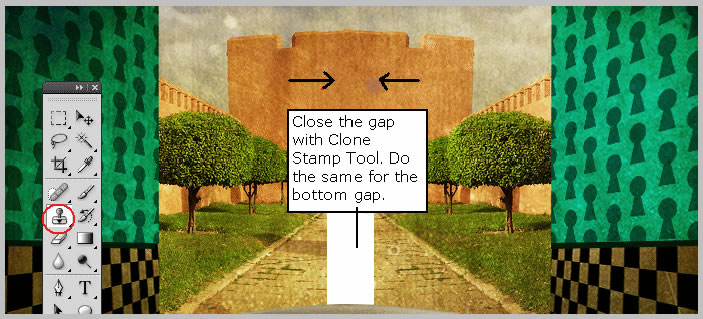
Place this
photo behind all the layers in the right side. Duplicate this layer , Flip it horizontally
and move it to the left side. Left a gap between the two photos. As you can see
we now have two shadows coming from different sides as if outside are two sun. To
fix that take the Clone Stamp Tool
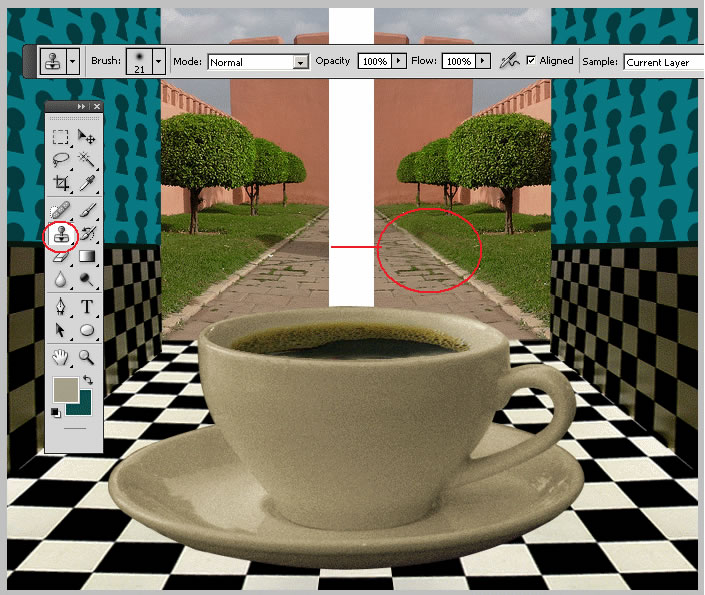
Use the same tool to close the gap. Use it for both layers to meet somewhere in the middle.
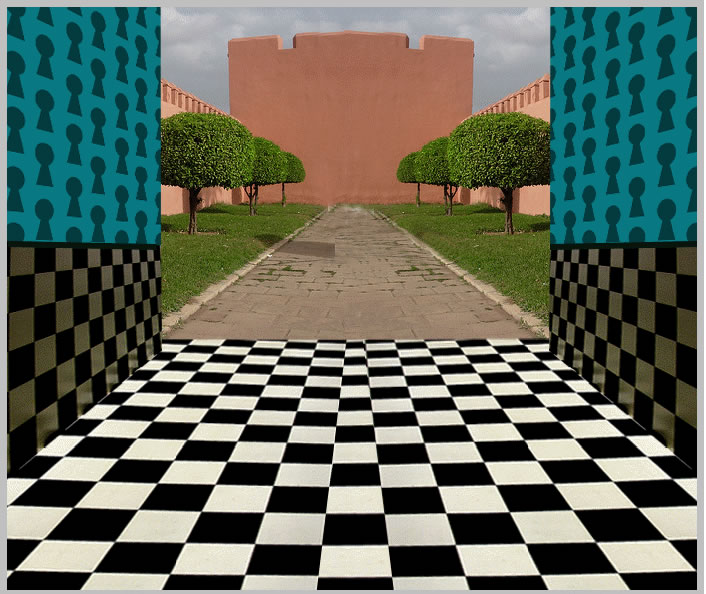
So this is our background image so far with no textures.
Step 10
Because what you see in the back I want to be the walls of the Red Queen Castle I will put three red hearts on the walls:

Create 3 Custom
Shape Hearts; color #c22f17, Stroke 1px color # 761611.
Merge the 3
shapes and change the layer blending to Overlay 60%.
Step 11
The texturing part is the last part. So take this beautiful
Crack wall texture
by
K. OS and place it above all the other layers. Change
the blending mode of this layer to Color Burn 100%.
Above this layer add anther texture
Sand and stone texture
by
dog ma.
For this layer
change the blending mode to Overlay 75%.
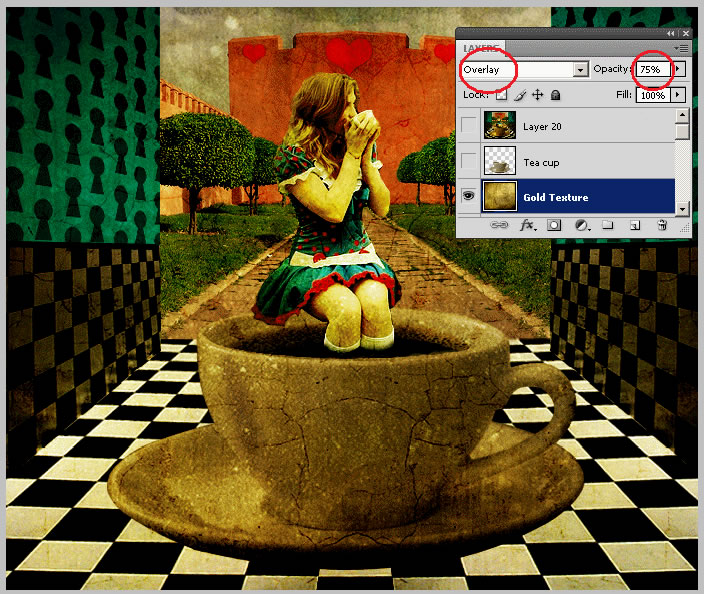
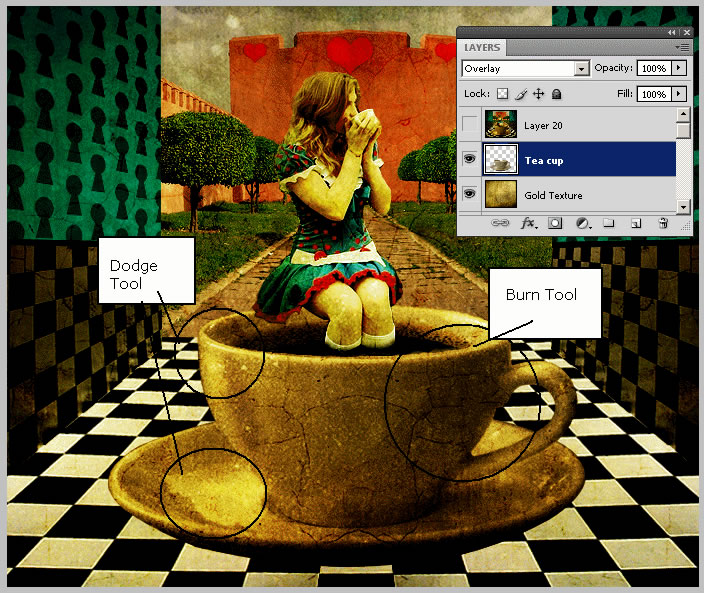
I don't like that the tea cup is not looking very good. So duplicate the Tea Cup Layer and place it above the two texture layers. Change the layer blending mode to Overlay 100%. For an extra contrast take the Burn Tool , midtones and Dodge Tool and burn/dodge parts of the tea cup.
What is a castle
without flags? I have decided that I want to change a little the sky color and add
2 little flags to the castle. So I have found this photo on flickr
Gediminas Casle
by
jaudrius.
Copy this image
into your file and copy the image and flip it horizontally so that we have the same
image in both sides. Merge the two images and change the blending mode of this layer
to Color Burn 100%. Change carefully the castle area so that the image covers only
the sky.
Another thing
that I did was to Duplicate the Exterior Group and change the blending mode of the
entire group to Screen 65 %.

If you want
to add more contrast to other parts of the image, simply create a new layer above
all the others. Go to Image – Apply Image and than you can burn / dodge the parts
that you like; burn the interior of the room and dodge the exterior background.
I have also
used Sponge Tool to Saturate Parts of the sky and trees and grass to add a surreal
turquoise tone to the image!
Alice in Wonderland – Drinking Tea - Final Result
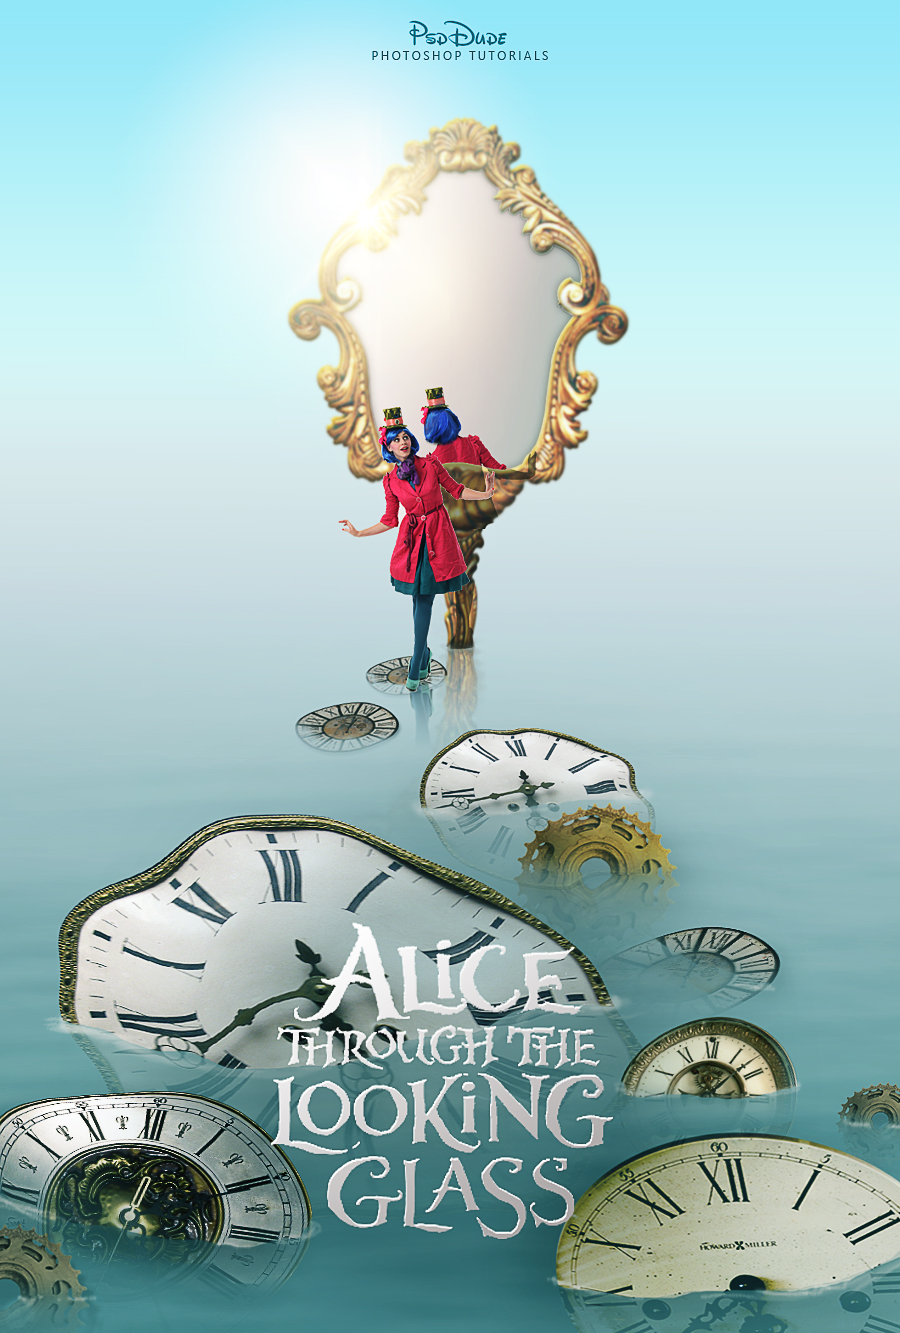
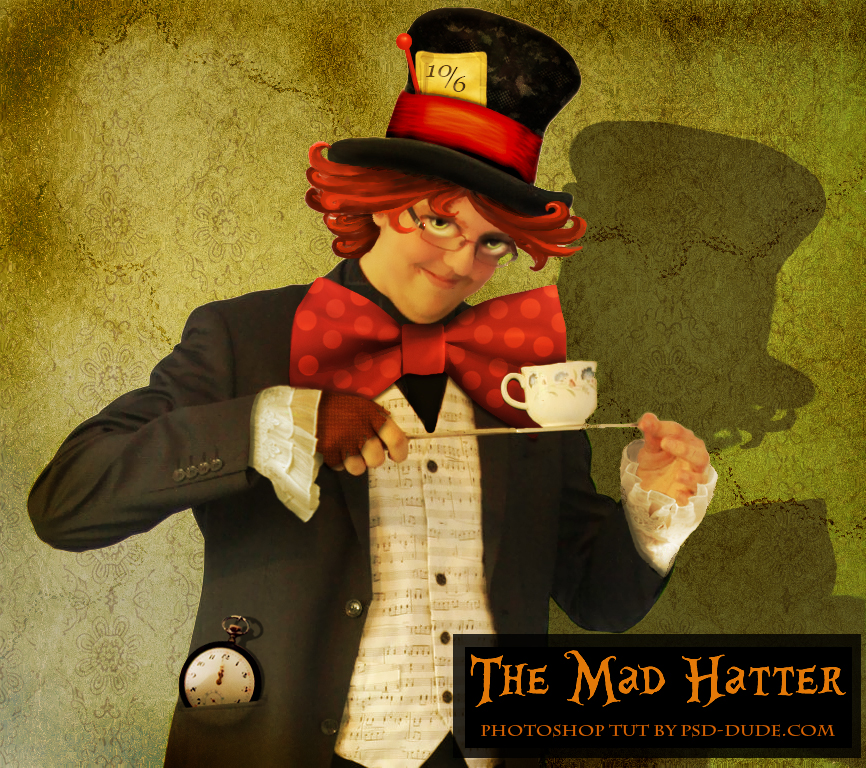
Other Alice in Wonderland Photoshop Tutorials


19 comment(s) for "Alice in Wonderland drinking tea in the royal courtyard"
The idea and the final result look beautiful ! reply
http://a.imageshack.us/img690/280/screenshotnx.jpg It's not finished yet but you can see what it looks like. I reply