


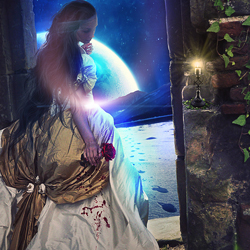

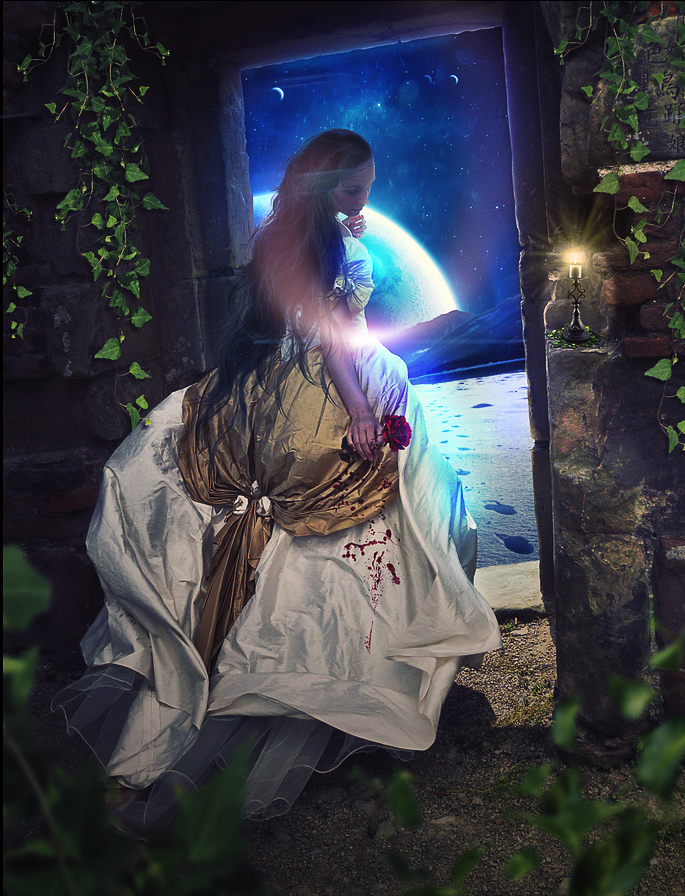
Abandoned Love - Emotional Photoshop Manipulation
Download the stock images that we are going to use in this photo manipulation tutorial:
- Woman - http://auroradreams.deviantart.com/art/Fairytale-Pack-3-134471460
- Ivy - http://auroradreams.deviantart.com/art/Fairytale-Pack-3-134471460 link2
- Blood Brushes - link1 link2
- Candle - link
- Rose - link
- Winter Beach Background - link
- Hair Stock - link
- Rain Texture - link
- Japanese Characters - link
- Cosmos - link
- Lens Flare Textures - link
Some of the links above might not be available anymore. Check out Textures for Photoshop for free stock art. Alternatively, sometimes I like to use AI generated images using MockoFun.
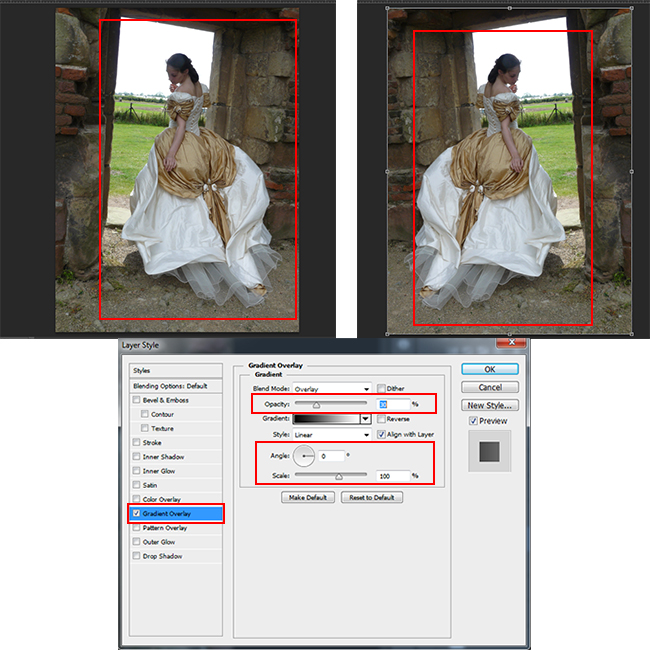
Open the woman stock image in your PSD file. Press CTRL+T to transform and right click to Flip Horizontaly. Right click on layer and choose Blending Options; check Gradient Overlay and set the Blend mode to Overlay, opacity 30% and angle to 0.
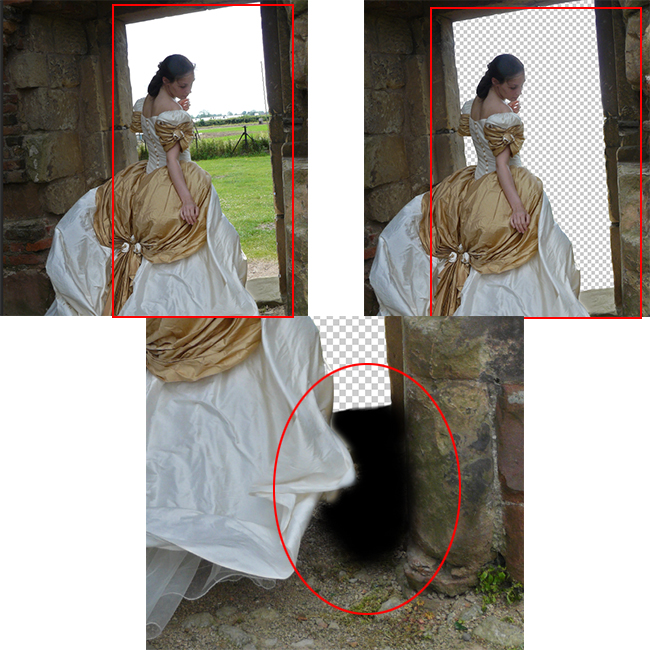
Now use Pen Tool to cut the door area. Create new layer and use the Brush Tool with foreground color black and paint as shown in the preview. Set the opacity to 35% and right click on layer to Create Clipping Mask.
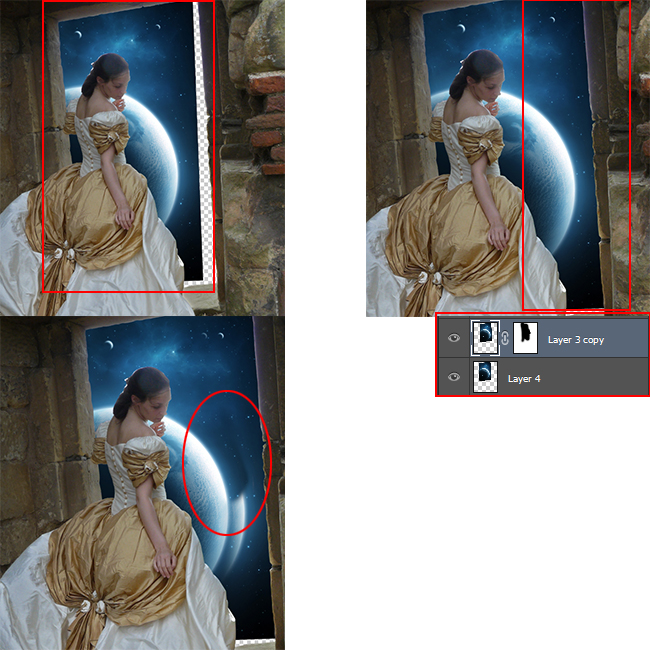
Open Cosmos stock image and put it below Model layer as shown in the picture. Transform it by pressing CTRL+T. Duplicate layer (CTRL+J) and fill the blank area using the Clone Stamp Tool for example. Then create a layer mask and use the brush tool with black foreground color to delete some area as shown in the screenshot.
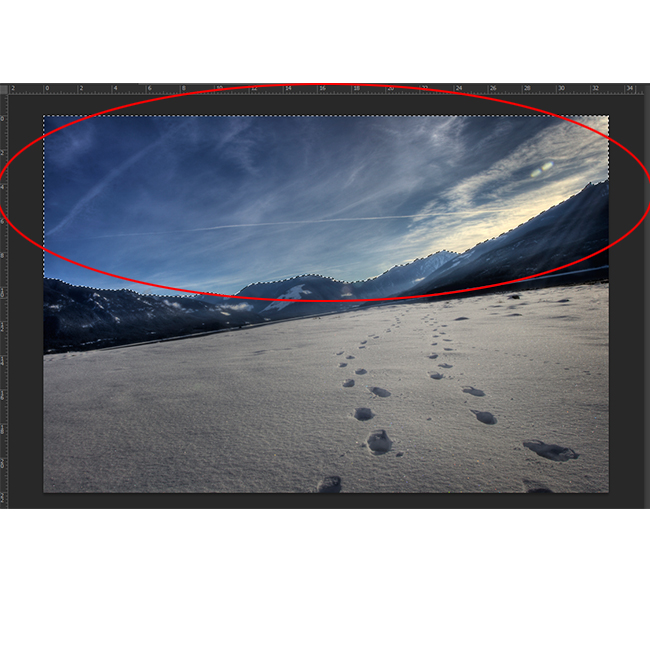
Open Winter Beach then click on Quick Selection Tool to remove sky and press delete.
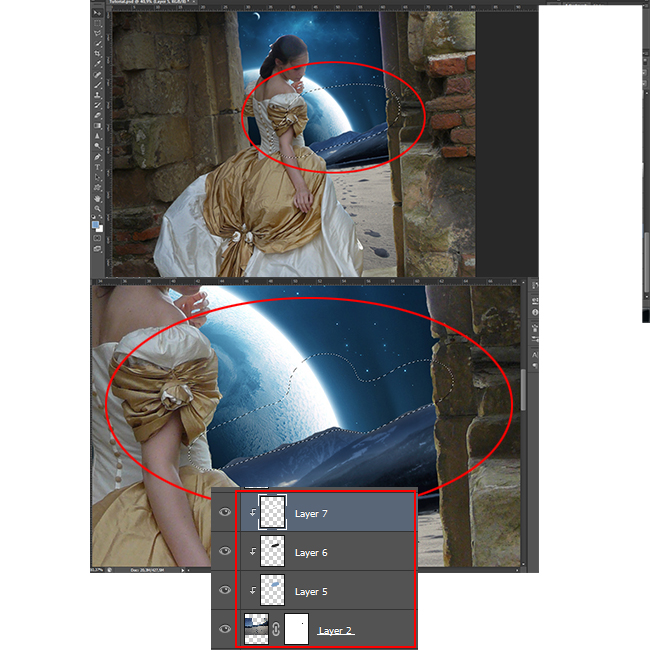
Create a new layer with clipping mask and set the foreground color to #7b9fc5 and use the Brush Tool to to paint mountains as shown below. Blend mode is set to Multiply. Create a new layer with clipping mask and repeat the same procedure but with gray color, blend mode Normal and Opacity 35%. Create again a new layer with clipping mask and set foreground color to white and do as shown in the screenshot below. Set the opacity to 10%.
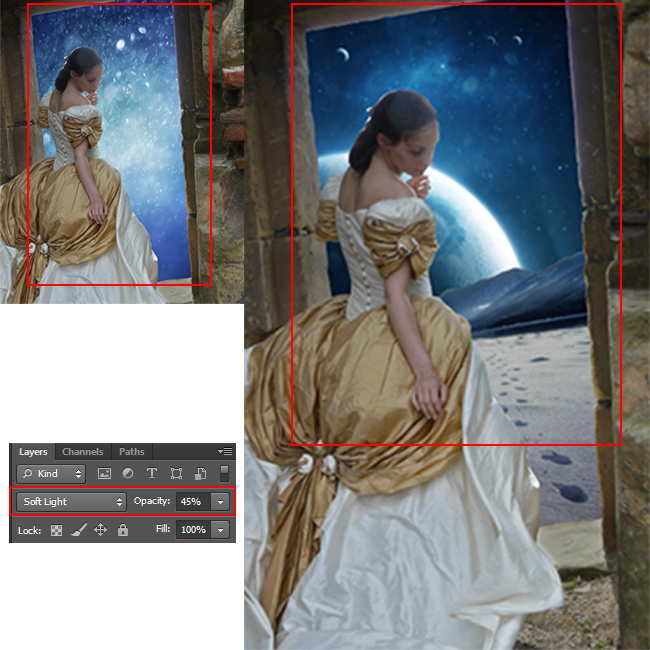
Open Rain Texture and add it as shown in the picture below Set the Blend Mode to Soft Light with Opacity 45%.
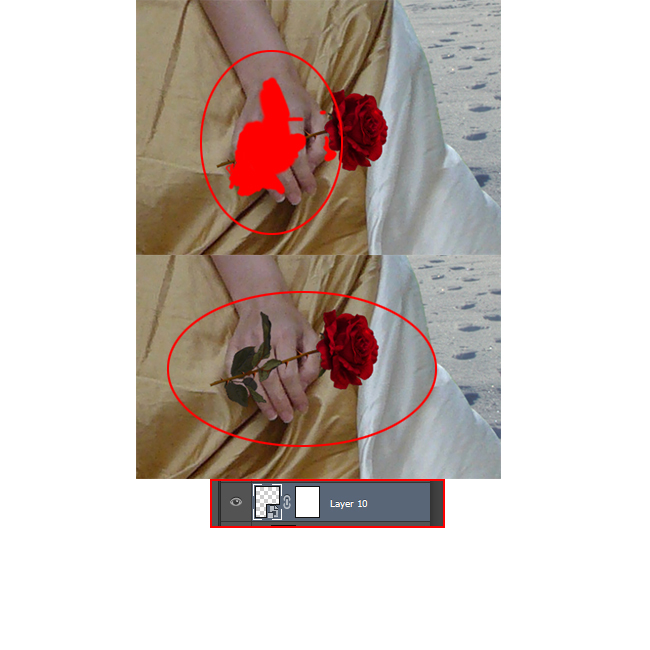
Now open the Rose stock image and put it in to the hand of the woman. Press CTRL+T to transform and click on the corners to rotate. Create a layer mask and use the brush tool with foreground color black to delete unnecessary parts.
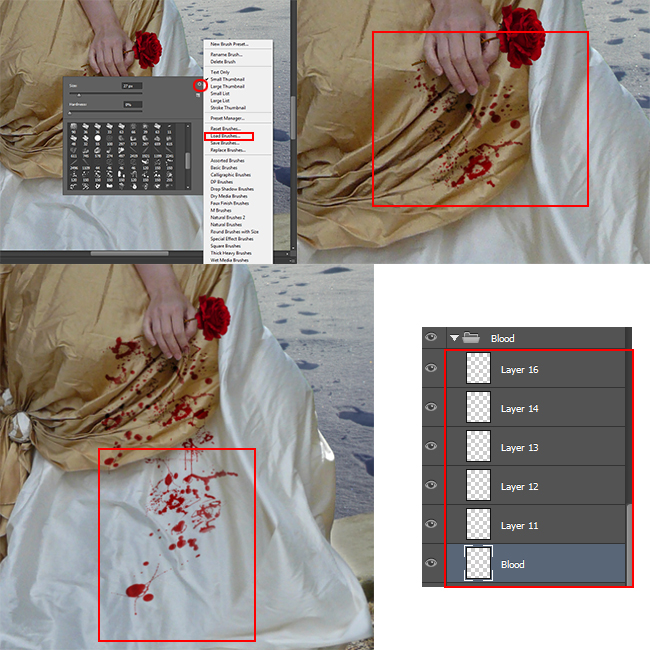
Now we will create blood. Make a new layer and use the Brush Tool. You have to Load Brushes to be able to use the blood brushes. Now use the blood brushes to add some blood splashes using a red color like shown in the image. Blend mode is set to Color Burn.
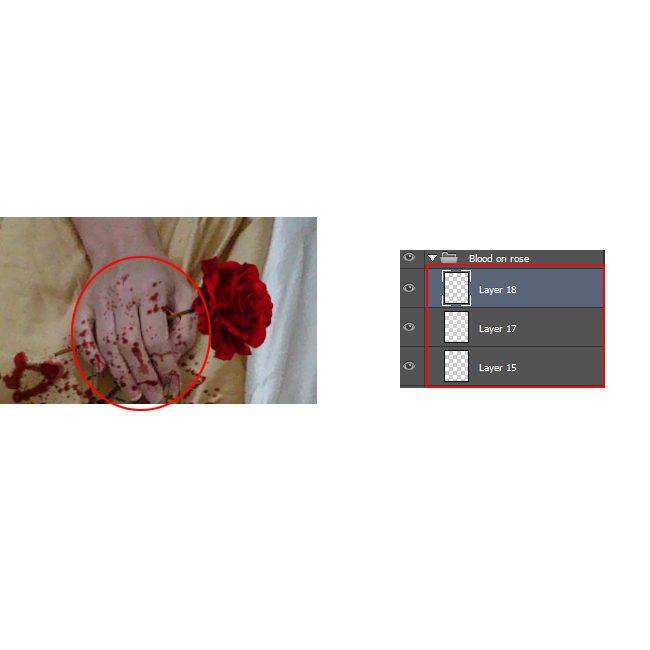
Now we will add blood on the hand. The procedure is the same as in the previous step; make several copies and reduce the size using the transform tool. Also blend mode is set to Color Burn.
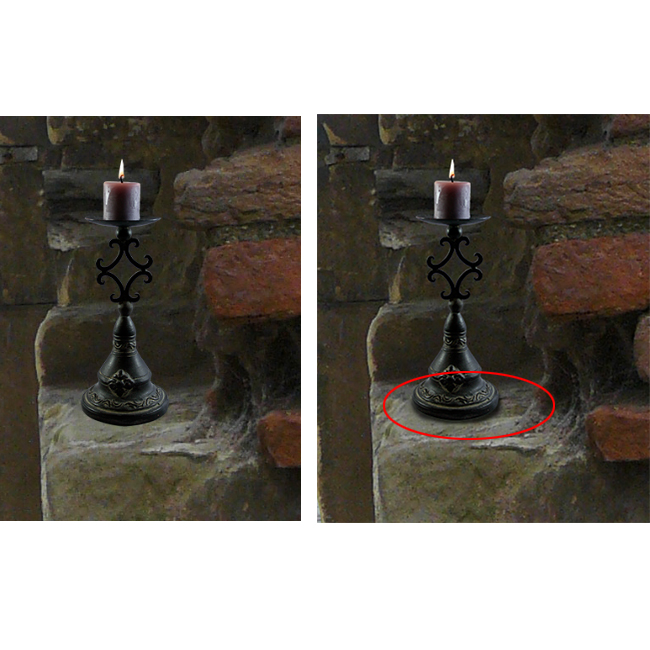
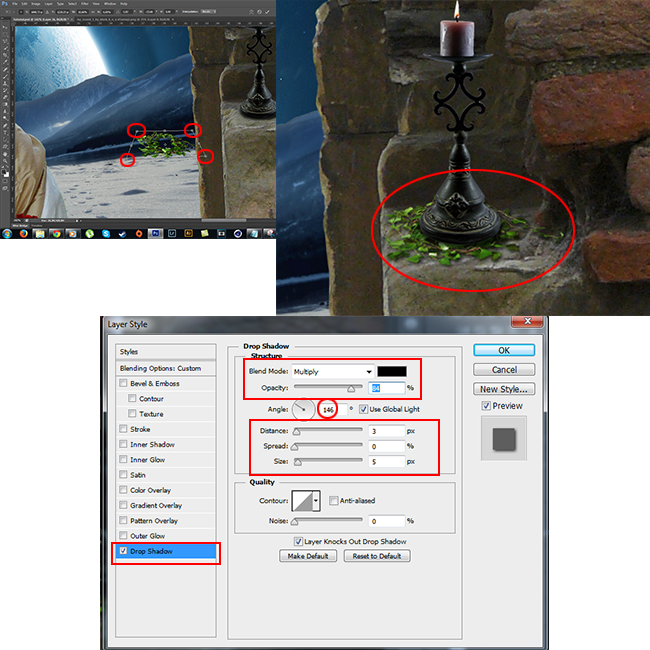
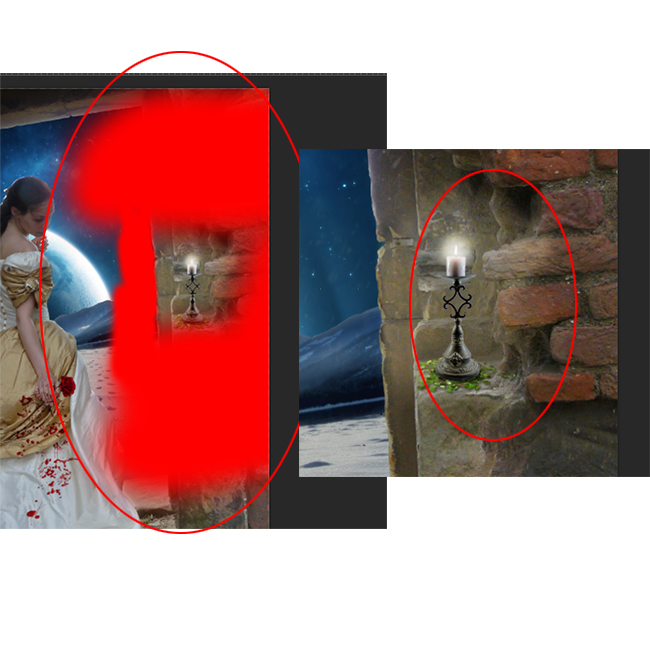
Open the Candle and convert to Smart object, resize it by CTRL+T. Create new layer for the cast shadow effect. Paint the shadow with black color and a soft round brush; opacity is set to 70-75%
Open Ivy Round stock image and transform (CTRL+T). Hold CTRL and drag the corners to distor and to add perspective; move with the mouse to look like in the picture. Right click on layer and open the Blending options. Check Drop Shadow and blend mode set to Multiply, Opacity 84%, Angle to 146, Distance 3, Spread 0 And Size 5
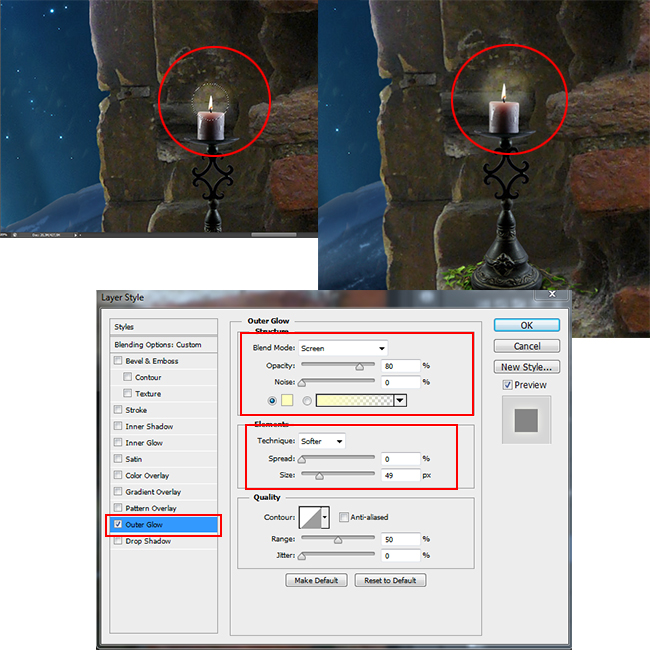
Now create a new layer and use a soft brush with size 90px and color #ffffe9 to create light around the candle. Blend mode is set to Soft Light. Duplicate the layer and slightly reduce the size of layer with transfomation (CTRL+T). Go to Blending options and check Outer Glow, opacity set to 80%, color #ffffbe and size to 50%.
Make a new layer and use soft brush tool to make the reflection of the light. Use the Brush Tool and paint the light on the wall. Create a layer mask to remove unnecessarily parts using brush tool (black color) inside the mask. Blend mode is set to Soft Light.
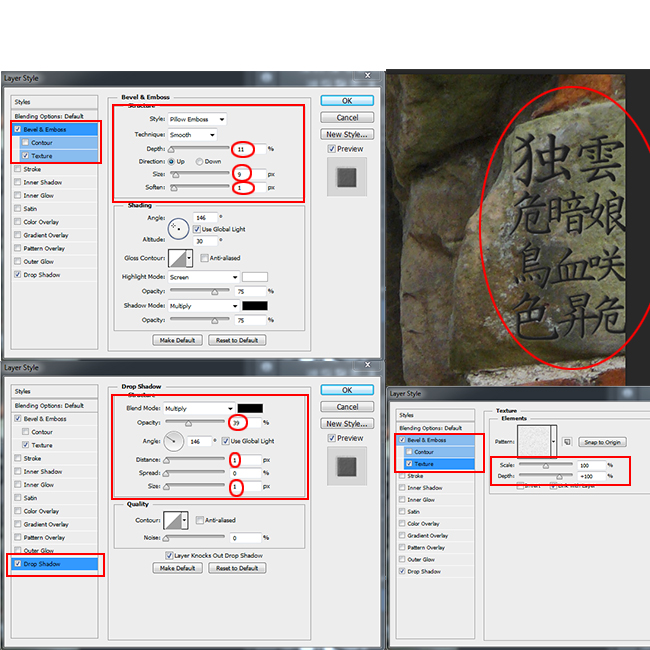
Now create another layer. Choose the Brush Tool, click on Load Brushes and choose Japanese Characters. We want to created an stone engrave effect; for that you can use these engrave and emboss styles or you can make the following settings.
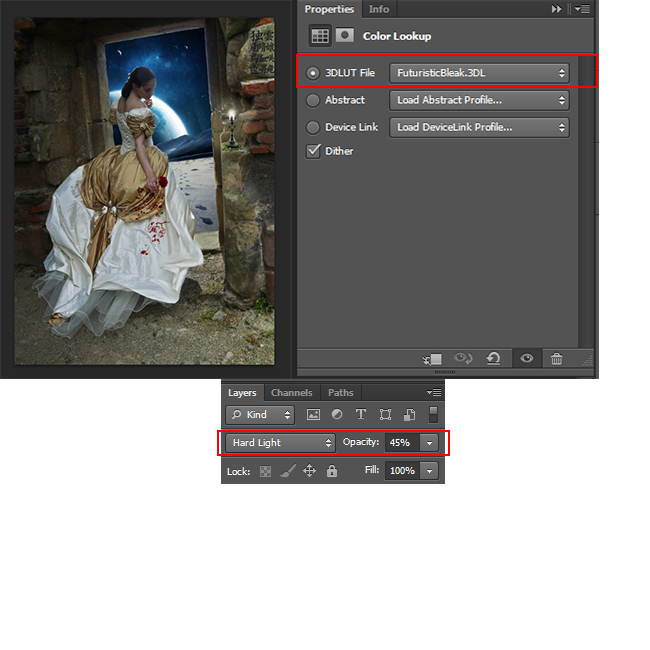
Go to New Adjustments>Color Lookup and choose Futuristic Bleak. Blend mode is set to Hard Light with opacity 45%
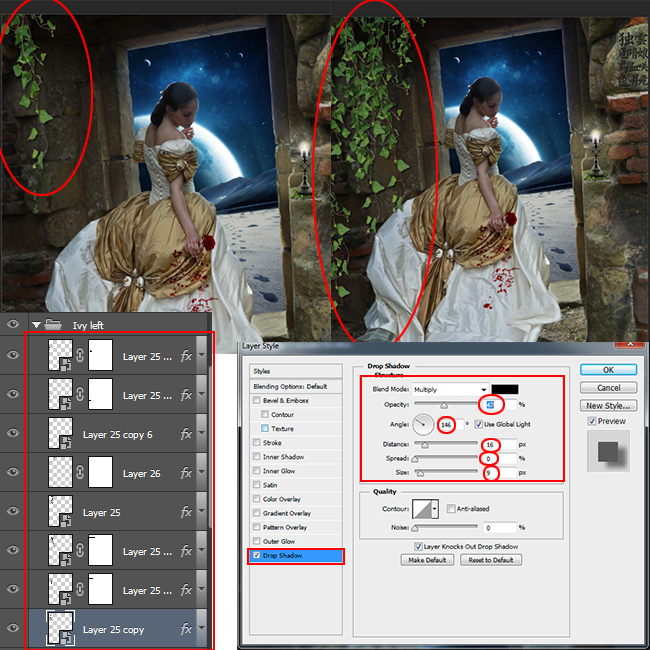
Open Ivy and add the foliage on the left corner as shown in the picture. Go to Layer styles and check Drop Shadow and set Blend mode to Multiply with opacity 47%. Angle is set to 146, Distance 16px, Spread 0 and size 9px. Make a multiple copies(CTRL+J) of the Ivy Layer and add them to create a leafy frame like shown in the preview.
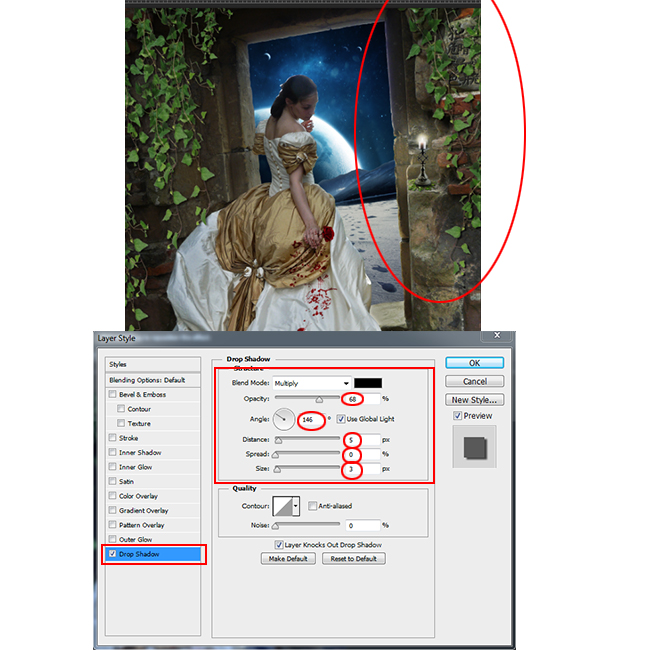
Open again Ivy stock image and transform it (CTRL+T); right click and Flip Horizontal. Put it in the right corner and make several copies like in the previous step. Change the layer style settings, set blend mode to multiply with opacity 68%. Angle set to 146, distance 12%, spread 0 and size 8px.
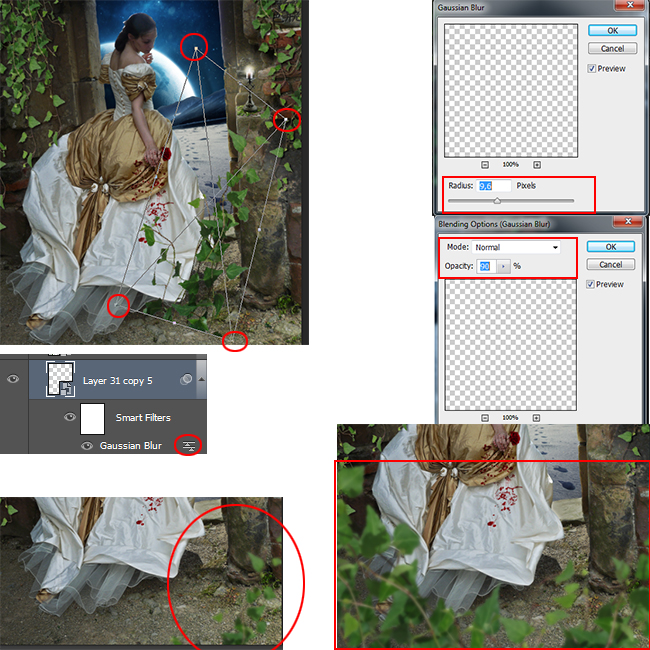
Open the same Ivy stock and right click on layer to Convert to Smart Object. Then transform the smart object; hold CTRL on corners to resize, distort and move with the mouse to look like in the picture. Go to Filter>Blur>Gaussian Blur and set radius to 9.6px. Set the blend opacity to 90%. Now make a several copies like we did in the previous steps. Adding these blurry out of focus elements helps us create depth and a realistic tridimesional look and feel for our photo manipulation.
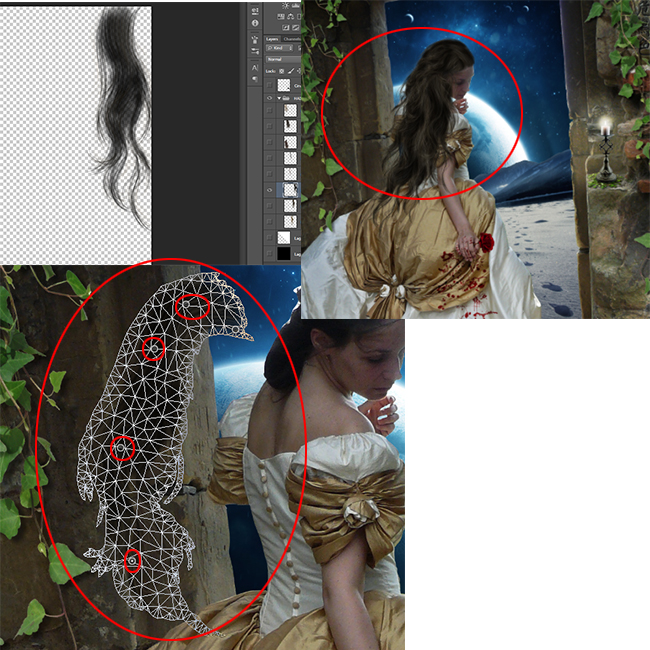
Now open Hair Stock. You can use more stock photos of hair or only one. Go to Edit >Puppet Warp(CS5's new Puppet Warp feature) and try to wrap it around the head. Create many copies to make it look the hair as realistic as possible. Delete the unnecessary areas using the brush tool via layer mask. Try to make it look like as shown below.
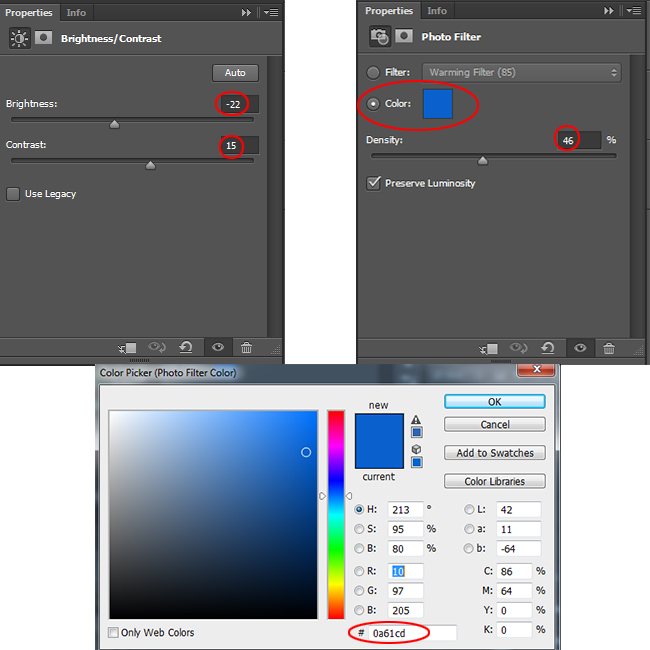
Go to Adjustment Layer>Brightness/Contrast and set Brightness to -22 and Contrast to 15. Go to Adjustment Layer>Photo Filter, Color set to #0a61cd and Density 46%. Blend mode is set to Lighten with Opacity 70%
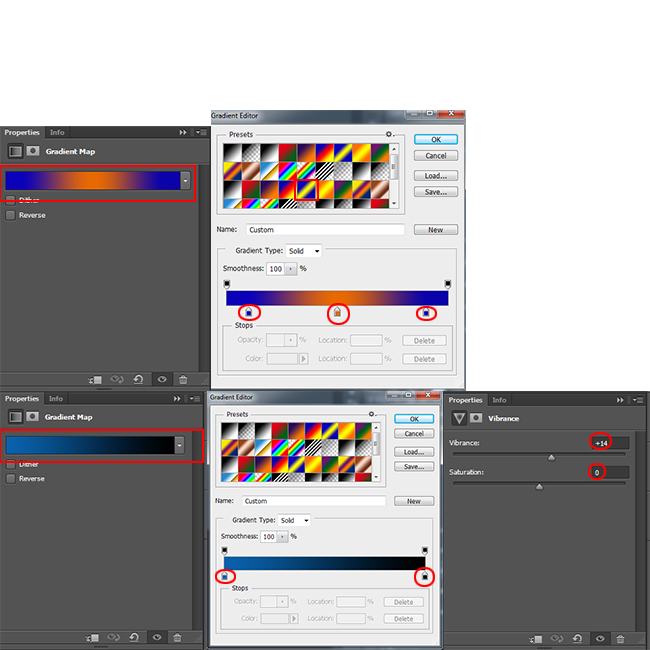
Go to Adjustment Layer>Gradient Map and use colors Blue to Black (#0962ad > #000000) for the gradient. Blend mode is set to Soft Light 26% Go to Adjustment Layer>Gradient Map and use colors as shown (#0b01b8 > #e86903 > #0b02aa). Blend mode is set to Soft Light 15% . Go to Adjustment Layer>Vibrance and set Vibrance to +14, Saturation 0
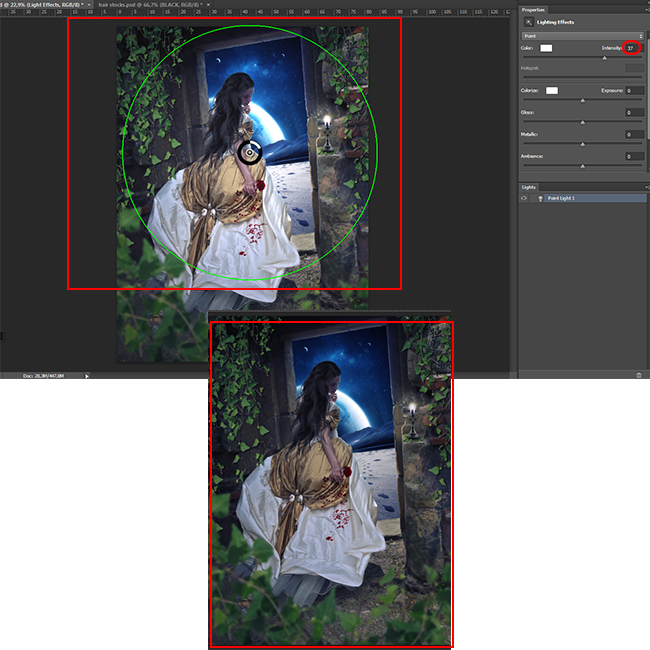
Press CTRL+SHIFT+ALT+E to merge all layers and go to Filter>Render>Lighting Effects. Intensity set to 37, Opacity set to 35%.
Now paint with black color on the left corner using the Brush Tool and a soft round brush as shown in picture. Blend mode is set to Soft Light 60%.
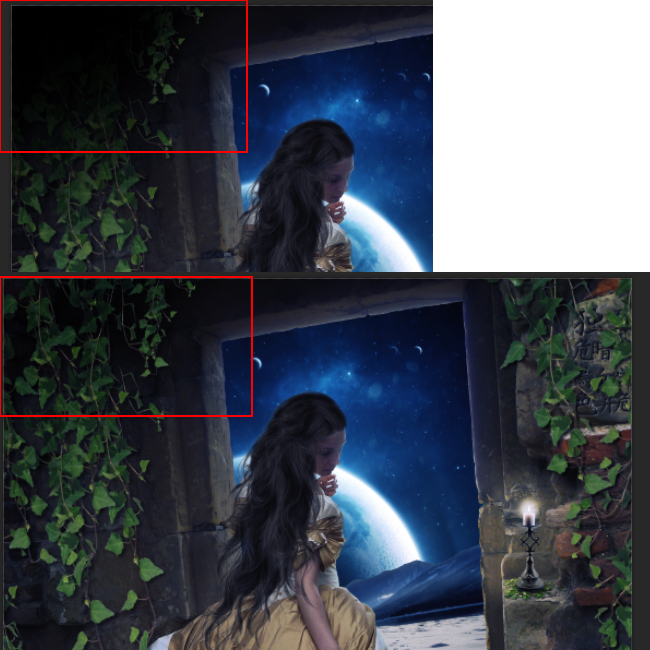
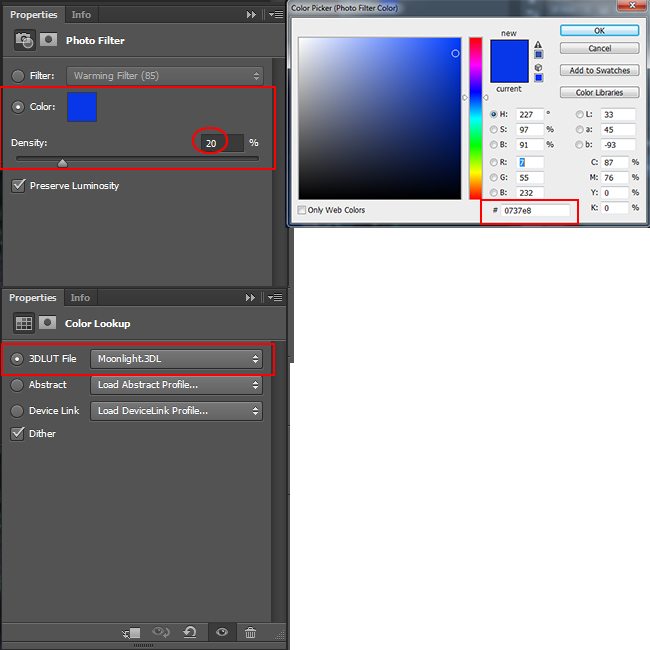
Go to Adjustment Layer>Photo Filter and set the color to blue (#0737e8) and Density 20%. Set the Opacity to 50% Go to Adjustment Layer>Color Lookup and use Moonlight.3DL. Blend mode is set to Soft Light with Opacity 30%
If you want you can add some lens flare effects using these flare textures. Use the Filter>Distort>Twirl to create light leak effects. Set the blend mode to Screen or Lighten.
So here is the final result for the Abandoned Love Emotional Photoshop lesson that I hope you will al enjoy reading and practising.

6 comment(s) for "Abandoned Love Emotional Photoshop Manipulation Tutorial"
On DeviantArt you can search for more images. reply
http://cartes-mireilled.eklablog.com/photomontage-emotion-d-un-amour-perdu-a115289102